
These homemade Mint Patties combine a creamy, refreshing mint filling with a rich chocolate coating for a candy that’s both simple and irresistible. They come together with just a few ingredients and are perfect for holiday trays, gifting, or satisfying a chocolate-mint craving. Keep a batch in the freezer for an easy sweet treat anytime.
Can’t get enough of this cool and sweet combo? Here are some more chocolate-mint treats to try: Mint Brownies, Mint Chocolate Chip Snowball Cookies and these Chocolate Mint Buttons.
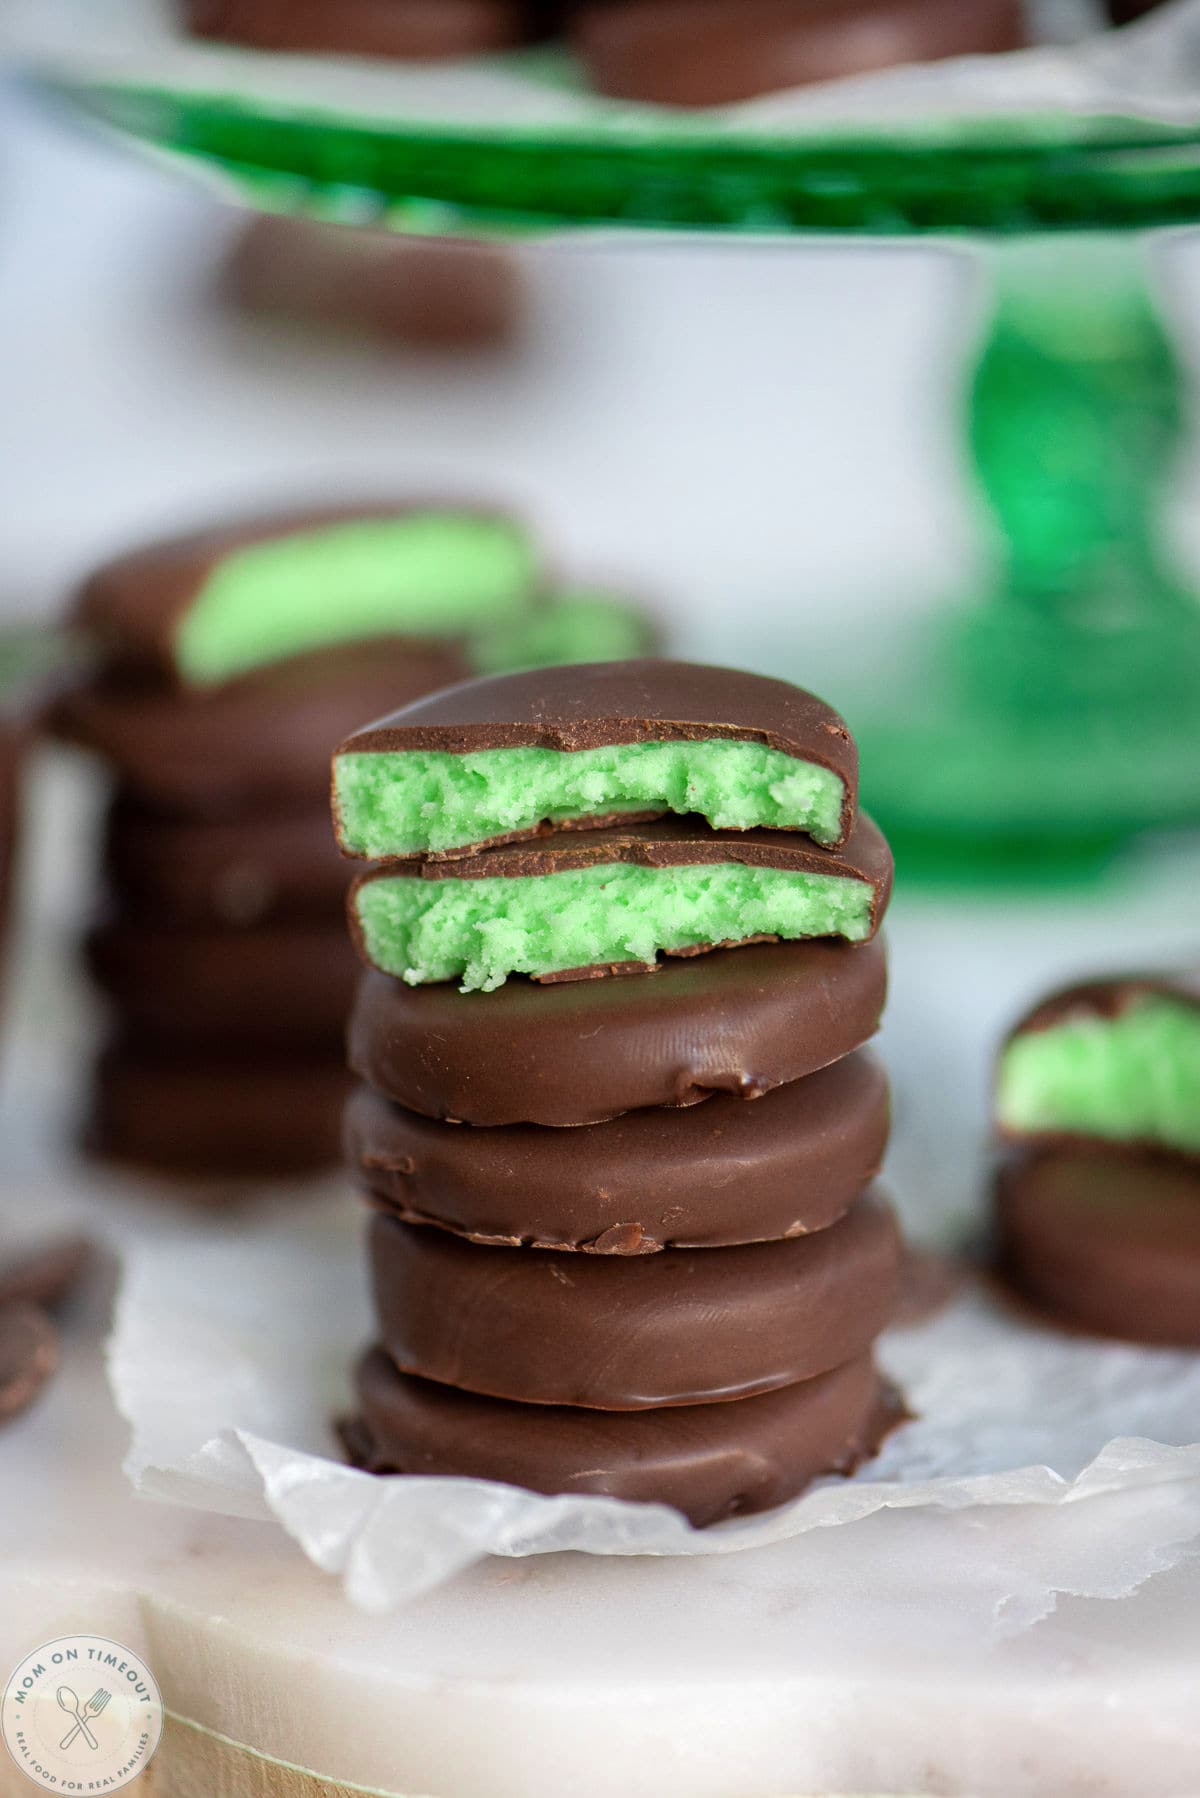
Mint Patties Recipe
These homemade Mint Patties are one of our favorite treats to make! So easy to customize by simply swapping the mint extract for another flavor – like peppermint – and you have a new and delicious candy to enjoy. With a smooth, creamy mint center and a rich chocolate coating, these candies deliver the perfect balance of cool and sweet in every bite. They’re simple enough for beginner candy makers and come together with just a handful of pantry ingredients.
These Mint Patties are perfect for holidays, gifting, or keeping tucked away in the freezer for a quick sweet treat. Their festive green center makes them especially fun for St. Patrick’s Day and Christmas dessert trays, but they’re delicious any time of year. If you love the classic combination of chocolate and mint, this homemade candy is sure to become a favorite.
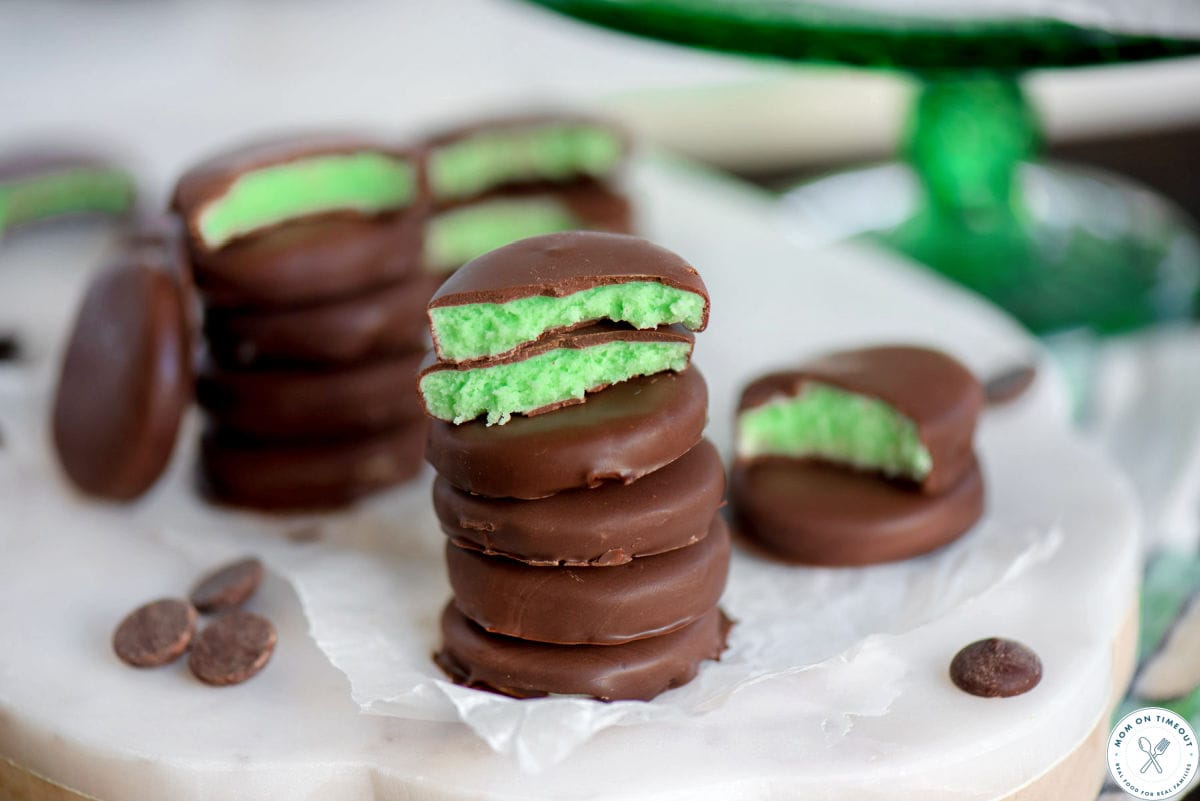
Mint vs. Peppermint
Some of you might be thinking, “Mint?! Gross! Tastes like toothpaste!” If that’s you, just use peppermint extract instead! You get the same bright, refreshing flavor that pairs perfectly with the chocolate exterior.
Chocolate Candy Coating
There are a lot of great options out there when it comes to candy coating. Here are some popular ones. I definitely recommend the Ghirardelli Melting Wafers for the best flavor.
- Ghirardelli Melting Wafers
- Almond Bark
- Merckens Melting Chocolate
- Chocolate Chips + Coconut Oil: Use 2 cups of semi-sweet or dark chocolate chips with 2 to 3 teaspoons of coconut oil (or shortening) in the microwave, using 20-30 second intervals at 50% power. Melt completely before dipping.
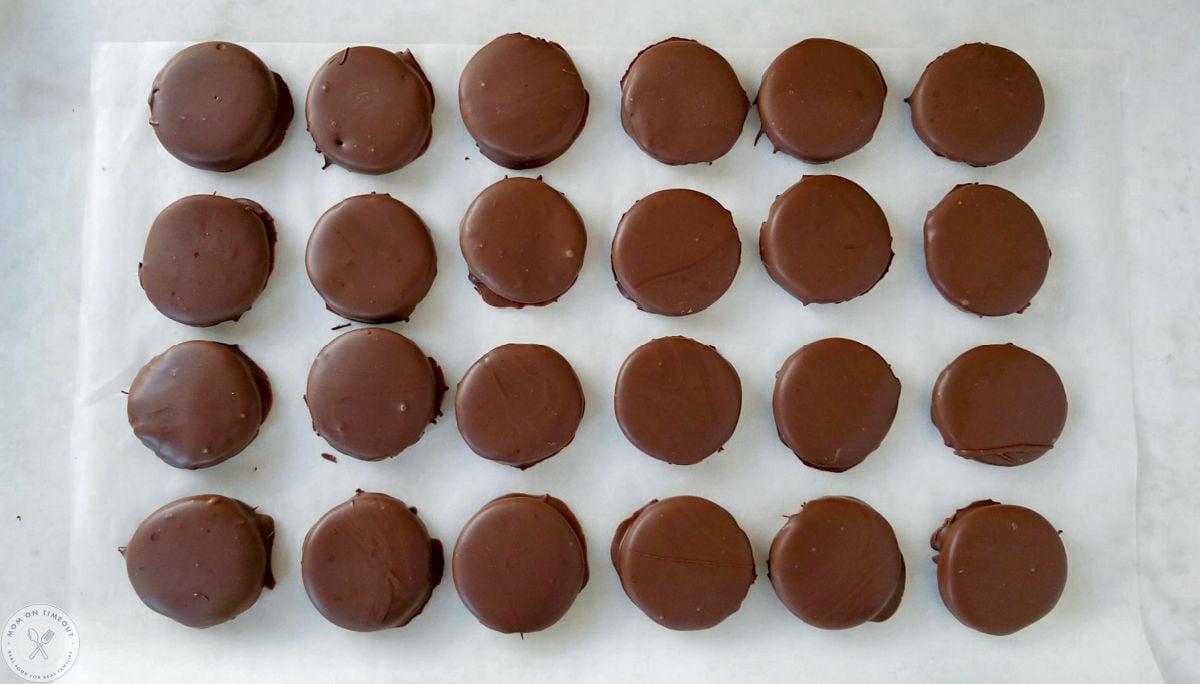
Why You’ll Love These Mint Patties
Homemade candies can seem intimidating, but these Mint Patties keep things wonderfully simple. With easy ingredients and straightforward steps, you’ll have a batch of refreshing chocolate candies ready to enjoy in no time. Here’s why we love them so much:
- Cool and Refreshing: The creamy mint filling provides a refreshing contrast to the rich chocolate coating. Not a fan of mint? Swap the mint extract with peppermint extract instead.
- Simple Ingredients: Made with pantry staples like powdered sugar, corn syrup, butter, and mint extract.
- Easy Homemade Candy: No candy thermometer required and minimal prep makes this a great beginner candy recipe.
- Perfect for Holidays: The green mint center makes these especially fun for St. Patrick’s Day treats and Christmas dessert trays.
- Great for Gifting: Package them in small boxes or bags for a thoughtful homemade gift.

How To Make Mint Patties
These Mint Patties come together with a simple mint filling that’s chilled until firm and then dipped in melted chocolate. The process is easy and doesn’t require any special candy-making equipment.
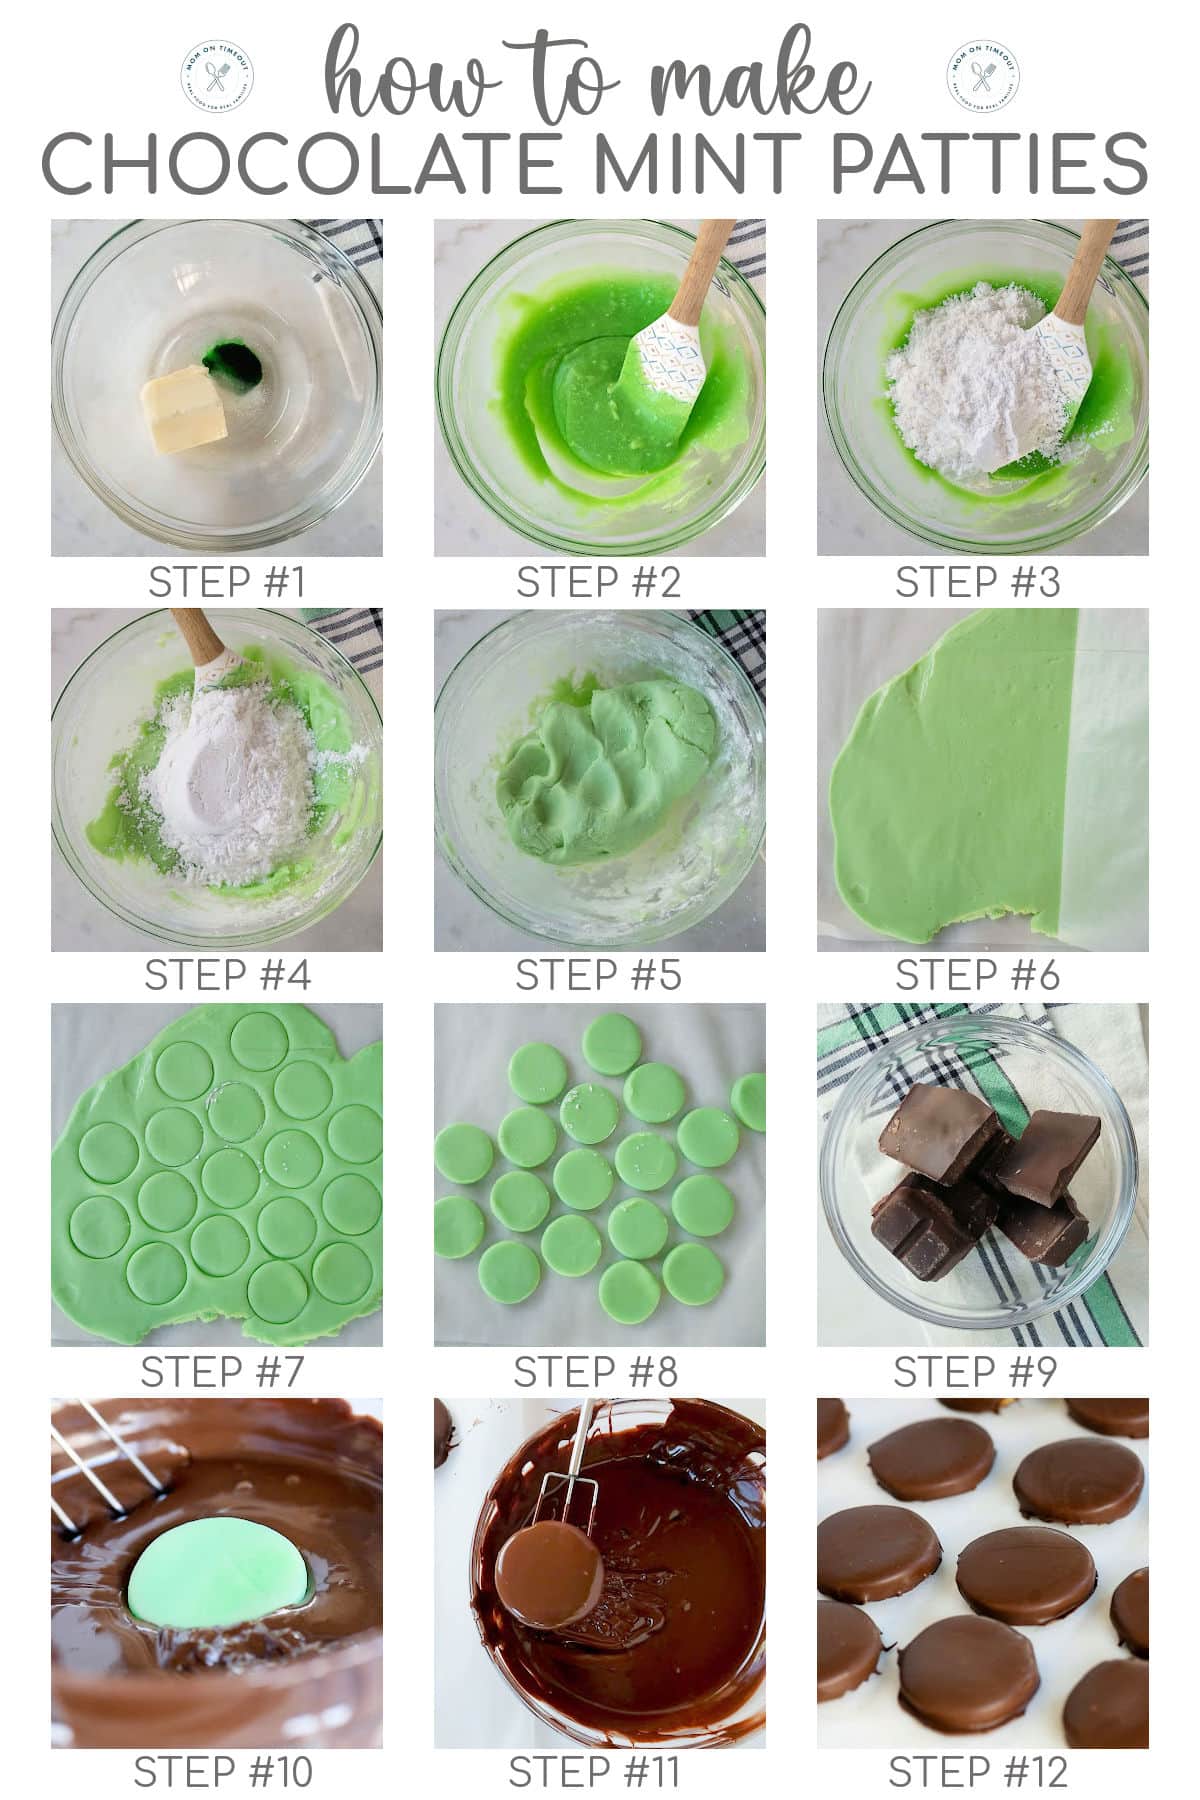
Let’s take a quick look at how to make these candies and as always, you can find the full printable recipe card at the end of this post.
- Combine corn syrup, butter, extract, salt and food coloring in medium bowl.
- Stir until well combined.
- Stir in one cup of powdered sugar and stir to combine.
- Continue adding powdered sugar one cup at a time until too stiff to stir.
- Add more powdered sugar and knead mixture until it no longer sticks to your hands.
- Roll out between two sheets of parchment paper and refrigerate for 60-90 minutes or until firm.
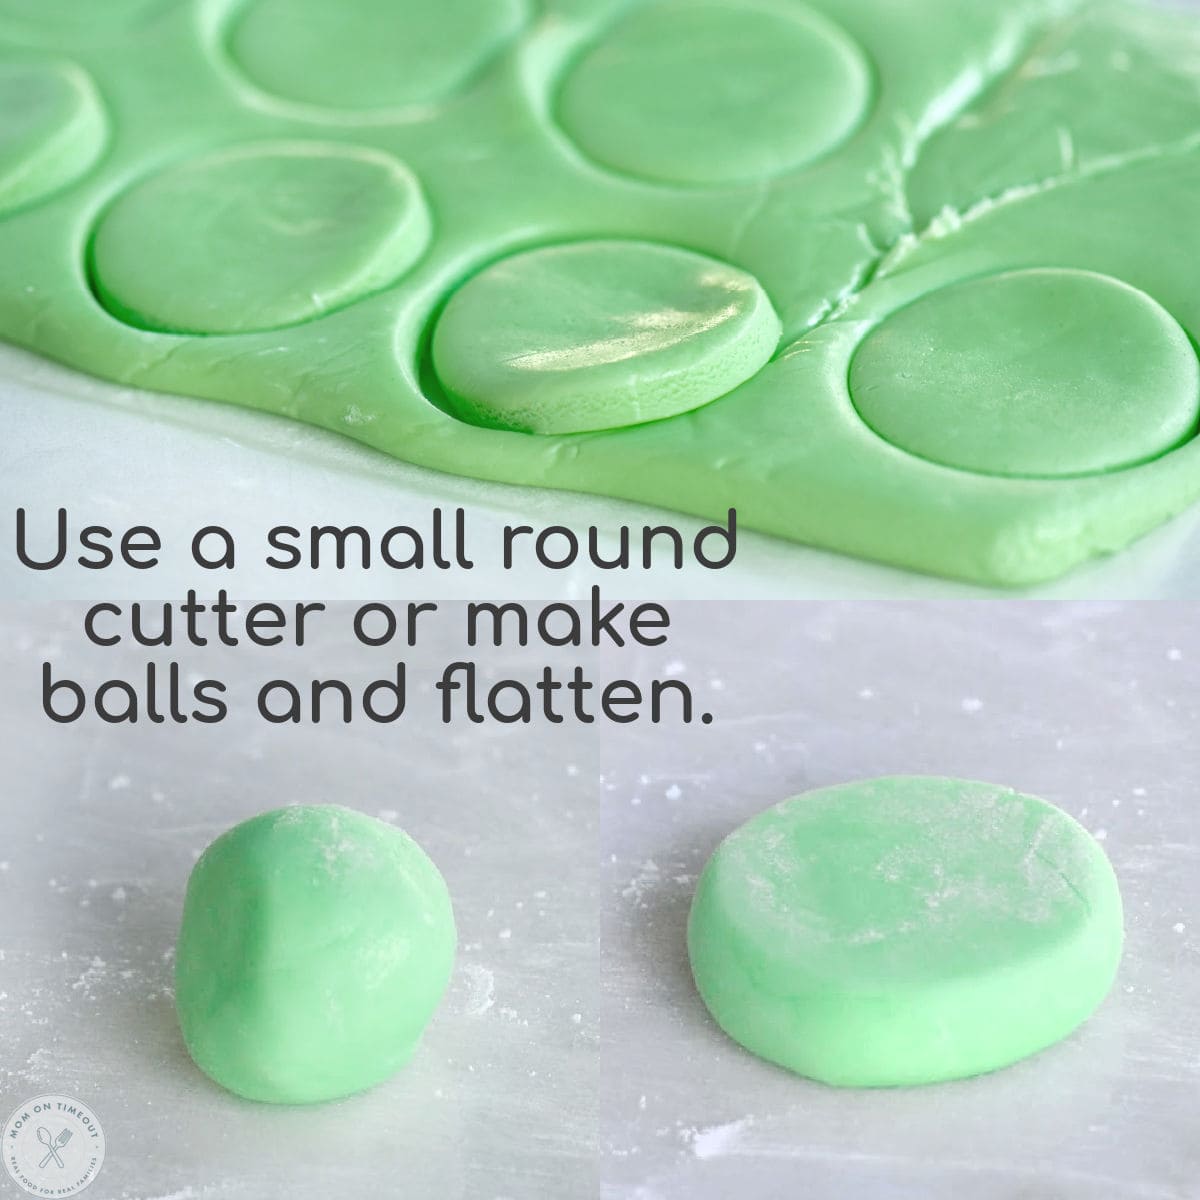
- Use a small round cutter to cut out candies.
- Remove excess and save to re-roll out later.
- Melt chocolate candy coating according to package directions.
- Dip the candies into the melted chocolate with a fork or use a dipping tool.
- Make sure to tap off the extra, and place on parchment or wax paper.
- Let candies set up until chocolate is firm before storing in an airtight container.
Storage Information
Mint Patties store very well, making them a great make-ahead treat. Because they freeze so well, many people like to keep a batch on hand for a quick chocolate treat.
- Room Temperature: Store in an airtight container for up to 1 week.
- Refrigerator: Keep in an airtight container for up to 2 weeks.
- Freezer: Mint Patties freeze beautifully. Store them in single layers separated by wax paper in an airtight container for up to 3 months. Thaw at room temperature before serving.
Two Ways to Make The Patties
If you don’t have small round cutters feel free to make them by hand. Simply roll into 1-inch balls and place on trays or baking sheets lined with wax or parchment paper. Flatten with a flat-bottomed cup or your hand. Cover with another sheet of wax or parchment paper and refrigerate for 60-90 minutes or until firm.
Sure, your patties may not be exactly the same size…but who cares! It’s fun and the rewards are these unbelievable patties! Smooth, refreshing mint centers surround by sweet, decadent chocolate. It just doesn’t get any better.
Variations To Try
These Mint Patties are easy to customize depending on the occasion or your flavor preferences.
- Use peppermint extract instead of mint extract for a slightly brighter peppermint flavor.
- Use dark chocolate candy coating for a richer chocolate contrast.
- Dip the mint centers in melted white chocolate for a sweeter variation.
- Change the filling color depending on the holiday – green is great for St. Patrick’s Day or Christmas but try pink or red for Valentine’s Day.
- Drizzle melted milk or white chocolate over the tops for a decorative finish.
Can I use chocolate chips instead of candy coating?
Candy coating works best because it melts smoothly and sets up firm without tempering. If using chocolate chips, add a small amount of coconut oil or shortening to help thin the chocolate.
Why is my mint filling sticky?
If the filling is sticking to your hands, simply knead in a bit more powdered sugar until it becomes smooth and manageable.
Can I make these ahead of time?
Yes! These candies are perfect for making ahead and actually taste even better after they’ve had time to set.
Do I have to use food coloring?
You sure don’t! The patties will taste exactly the same without it, but the green color makes them especially festive and fun.

Trish’s Tips
- Add powdered sugar gradually so the filling doesn’t become too stiff too quickly.
- Chill the patties well before dipping to help them hold their shape in the melted chocolate.
- Use a dipping fork for dipping to easily lift the patties from the chocolate and tap off excess coating.
- Work in batches when dipping so the mint centers stay cold and firm.
- Store extras in the freezer so you always have a cool chocolate treat ready when cravings hit.

More Homemade Candy Recipes

Chocolate Mint Patties
Ingredients
- ⅓ cup light corn syrup
- 5 tablespoons unsalted butter softened
- 1 ½ teaspoons mint extract
- ½ teaspoon salt
- green gel food coloring start with a couple drops and add more until desired color is achieved
- 4 to 5 cups powdered sugar
- 10 ounces chocolate candy coating (Ghirardelli Melting Wafers, Almond Bark, Candiquik, etc.)
Instructions
- Combine corn syrup, butter, extract, salt, and food coloring in a medium size bowl. Stir until well combined.⅓ cup light corn syrup, 5 tablespoons unsalted butter, 1 ½ teaspoons mint extract, ½ teaspoon salt, green gel food coloring
- Stir in 1 cup of powdered sugar at a time until mixture is too stiff to stir.4 to 5 cups powdered sugar
- Add more powdered sugar and knead mixture until it no longer sticks to your hands, adding more powdered sugar as necessary.
- Roll out between two sheets of parchment paper and refrigerate for 60-90 minutes or until firm. (Alternative method: Roll into 1-inch balls and place on trays or baking sheets lined with was or parchment paper. Flatten with a flat-bottomed cup or your hand.)
- Use a small round cutter to cut out patties.
- Melt chocolate candy coating according to package directions.10 ounces chocolate candy coating
- Dip the candies into the melted chocolate with a fork or dipping tool, tap off the extra, and place back on wax or parchment paper.
- Repeat until all candies have been coated. Let candies set up until chocolate is firm before storing in an airtight container.
Video
Notes
- Room Temperature: Store in an airtight container for up to 1 week.
- Refrigerator: Keep in an airtight container for up to 2 weeks.
- Freezer: Mint Patties freeze beautifully. Store them in single layers separated by wax paper in an airtight container for up to 3 months. Thaw at room temperature before serving.
Mint vs. Peppermint Some of you might be thinking, “Mint?! Gross! Tastes like toothpaste!” If that’s you, just use peppermint extract instead! You get the same bright, refreshing flavor that pairs perfectly with the chocolate exterior.
Chocolate Candy Coating There are a lot of great options out there when it comes to candy coating. Here are some popular ones. I definitely recommend the Ghirardelli Melting Wafers for the best flavor.
- Ghirardelli Melting Wafers
- Almond Bark
- Merckens Melting Chocolate
- Chocolate Chips + Coconut Oil: Use 2 cups of semi-sweet or dark chocolate chips with 2 to 3 teaspoons of coconut oil (or shortening) in the microwave, using 20-30 second intervals at 50% power. Melt completely before dipping.
Tools and Equipment (affiliate links): Mixing Bowls | Measuring Cups | Measuring Spoons | Half Sheet Baking Sheet | Parchment Sheets | Dipping Tools | Round Cutter Set
Please see post above for more information, step-by-step process photos, recipe tips and frequently asked questions.
Nutrition
Originally published February 19, 2014.




Karen says
These are fantastically easy to make! Thanks for the recipe 🙂 One question… I used salted butter and found my patties were a little salty. Should I have used unsalted butter or perhaps left out the 1/2 tsp of salt if using salted butter?
Trish - Mom On Timeout says
Exactly Karen. I always use unsalted butter but if you have salted butter on hand, just omit the salt. Thanks!
Brooke says
Wow these look delicious! These will be a great Christmas treat to make especially for my gluten-free friends. Also loved the linked mint recipes at the bottom. I want to try them all!
Trish - Mom On Timeout says
Thanks so much Brooke!
mary says
I am thinking of adding these to some Christmas cookie trays this year….any suggestions on storing and for how long?
Kim says
Trish, I pinned these awhile back and just tried to make them, but my mints are melting into my chocolate. I didn’t have any CandiQuik so I used chocolate chips and shortening. Just melted them over a bowl of warm water. The chocolate isn’t very warm at all but my mints are oozing all over my fork and chocolate. Any suggestions for next time? I know, buy CandiQuik LOL. FYI, the mint taste great!
Trish - Mom On Timeout says
Yeah, CandiQuik is really my favorite. It makes stuff like this SO easy. But honestly, the mints shouldn’t melt down at all. Maybe try chilling them for 30 minutes in the fridge first?
Melissa says
These look amazing! Now, this might be a silly question, but can you use peppermint extract or would it not taste the same as mint extract? Peppermint and mint extract are two different things, right…?!
Trish - Mom On Timeout says
You could use peppermint but mint and peppermint are two different flavors. Depends on which one you want 🙂
Cheryl @ That's What Che Said... says
I featured you at Monday FUNday! Thanks so much for linking up and please grab a feature button! xo- Cheryl
http://www.thatswhatchesaid.net/2014/st-patricks-day-projects-and-treats/
Trish - Mom On Timeout says
That’s so much for the feature Cheryl!
Jessi @ Practically Functional says
OMG peppermint patties are my favorite! I didn’t realize you could make them at home!!!!! Stopping by to pin this and let you know I featured it on my blog today!
Trish - Mom On Timeout says
Thank you so much Jessi!!
Kari @ the Sweetest Memory says
These look so amazing! Chocolate and mint are my two favorite flavors. I had no idea peppermint patties could be made homemade! I am pinning this, and so have to try this. Yum! Kari
Trish - Mom On Timeout says
Totally can Kari and they are SO easy too! You’re going to love this 🙂 Thanks for stopping by!
Cindy Eikenberg says
Trish, these look seriously amazing! I love using CandiQuik, it’s pretty great, isn’t it? Thank you so much for sharing at Best of the Weekend – pinning and sharing! Hope you have a happy Sunday and a wonderful week!
Trish - Mom On Timeout says
Thank you so much Cindy!
Kayla says
These are perfect! Now I won’t have to pay through my nose for thin mints 🙂
Trish - Mom On Timeout says
Thanks Kayla!
Arin says
I made these yesterday and they turned out fantastic. I needed a little more chocolate than the recipe called for and used about 4 cups and a little extra icing sugar. They’re not quite as pretty as the ones in the picture but they look better than I thought they would! I think next time I’ll add a little more mint flavour but my husband says they’re perfect the way they are, I guess it depends on preference! Thanks for the great recipe, I will definitely be making these again!
Trish - Mom On Timeout says
That’s awesome Arin! So glad you gave the recipe a try 🙂
Christine says
Wow! Peppermint patties were my favorite candy growing up. So much so that I splurged on peppermint extract while visiting civilization (aka-Hong Kong). I love that you get your boys in the kitchen doing this…I think mine would have great fun. Liking the no TV week idea-especially if it means more kids-on recipes like this! Pinning and following you!
Trish - Mom On Timeout says
Peppermint patties are the best! And this recipe is really a great way to have your kids get in the kitchen and help. Thanks so much for the pin and the follow!
Jocelyn @BruCrew Life says
We really do try to limit the tv during the week. But it sure would be easier if the weather would hurry up and get nice! I’m so ready for spring this year. These are the prettiest mint patties…love that pop of green!
Trish - Mom On Timeout says
I hear that Jocelyn! Get these kids outside 🙂 Thank you so much!
Sandra says
I loved these. I pinned them earlier this week and didn’t even know they were yours. Thanks for linking up to our party – Eat. Create. Party! Love that you posted these! xo San
Trish - Mom On Timeout says
Thank you so much Sandra!
Sarah @ Miss CandiQuik says
These look like pure perfection. The green color is so bright and perfect! In my mind, you can’t really go wrong with mint and chocolate…sharing! p.s. hope to see you at BlogHer Food ’14 🙂
Trish - Mom On Timeout says
Thank you Sarah! You’re so sweet 🙂 I am sadly not going to BlogHer Food this year. I’m going to BlogHer in San Jose instead. No flying 😉 Thanks for stopping by!