
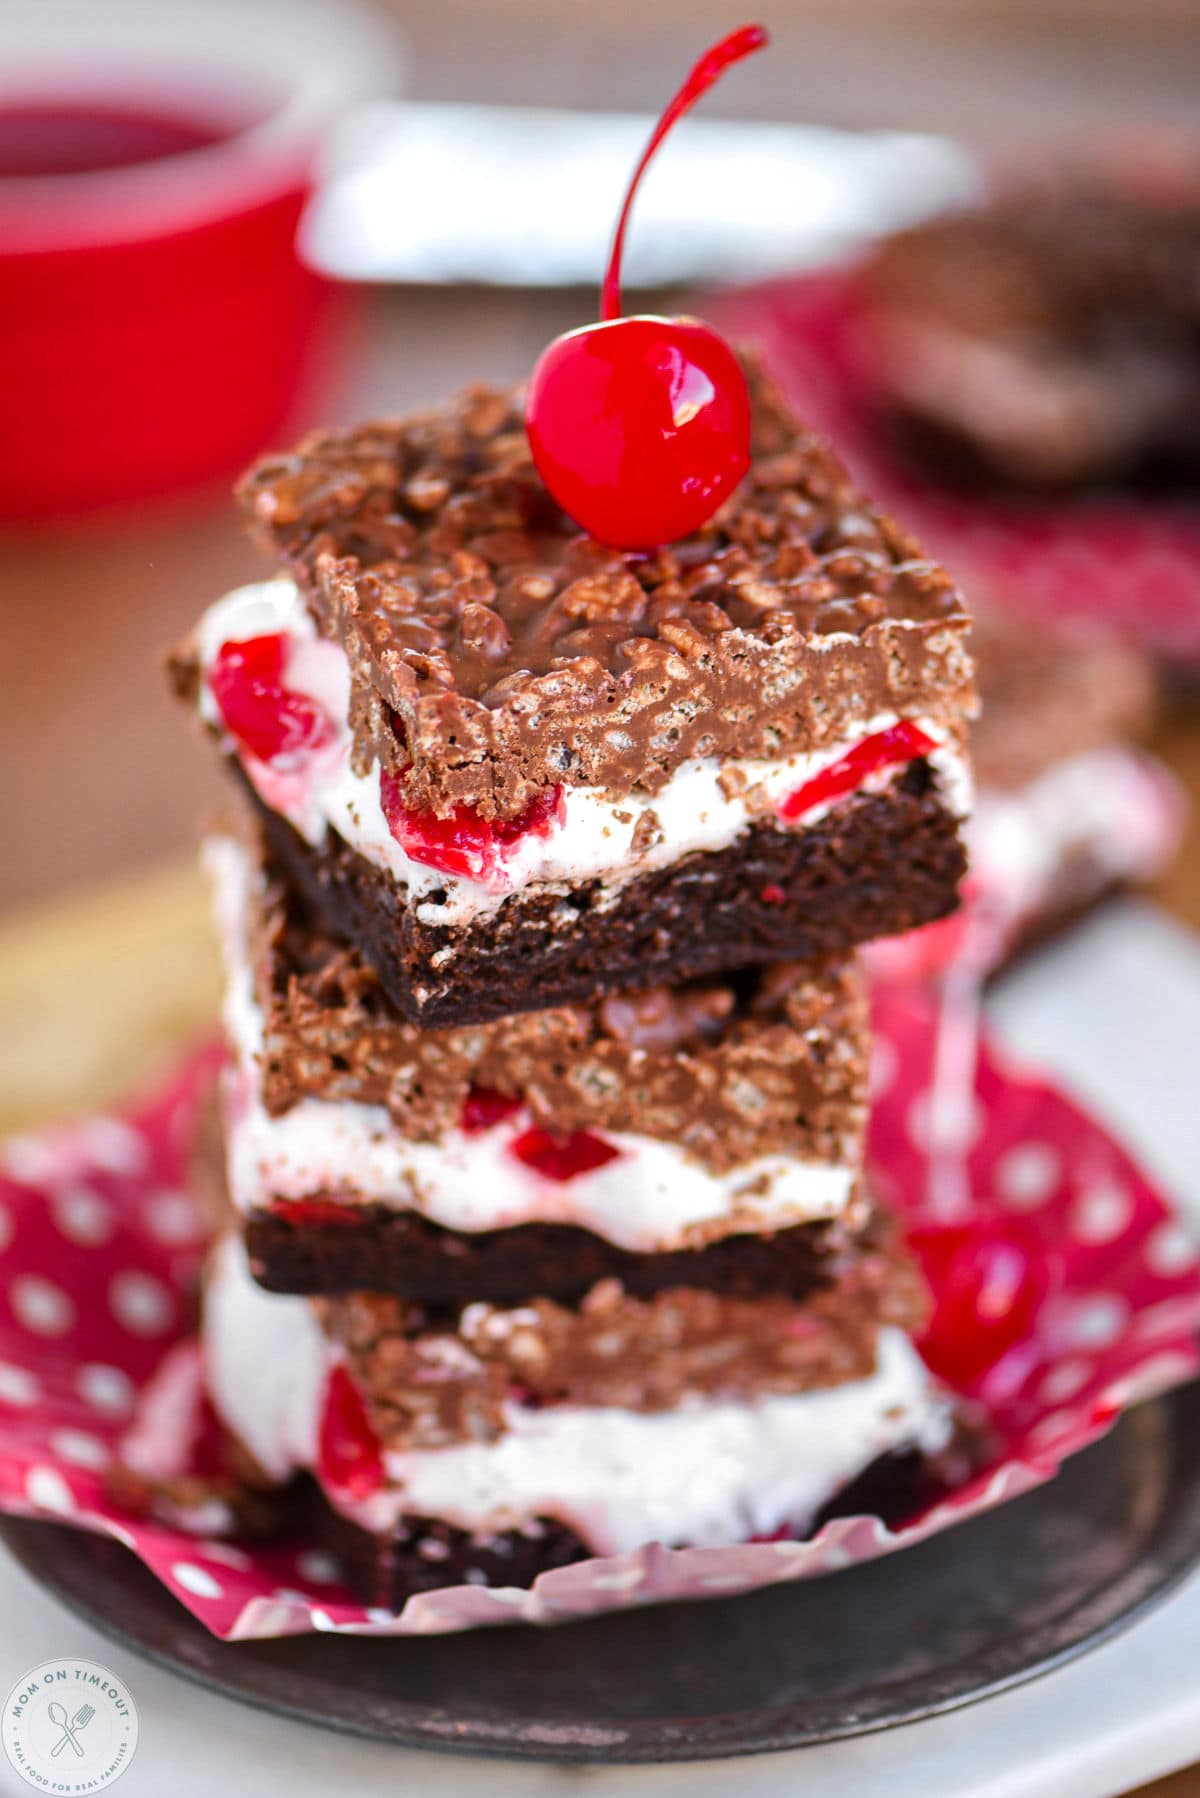
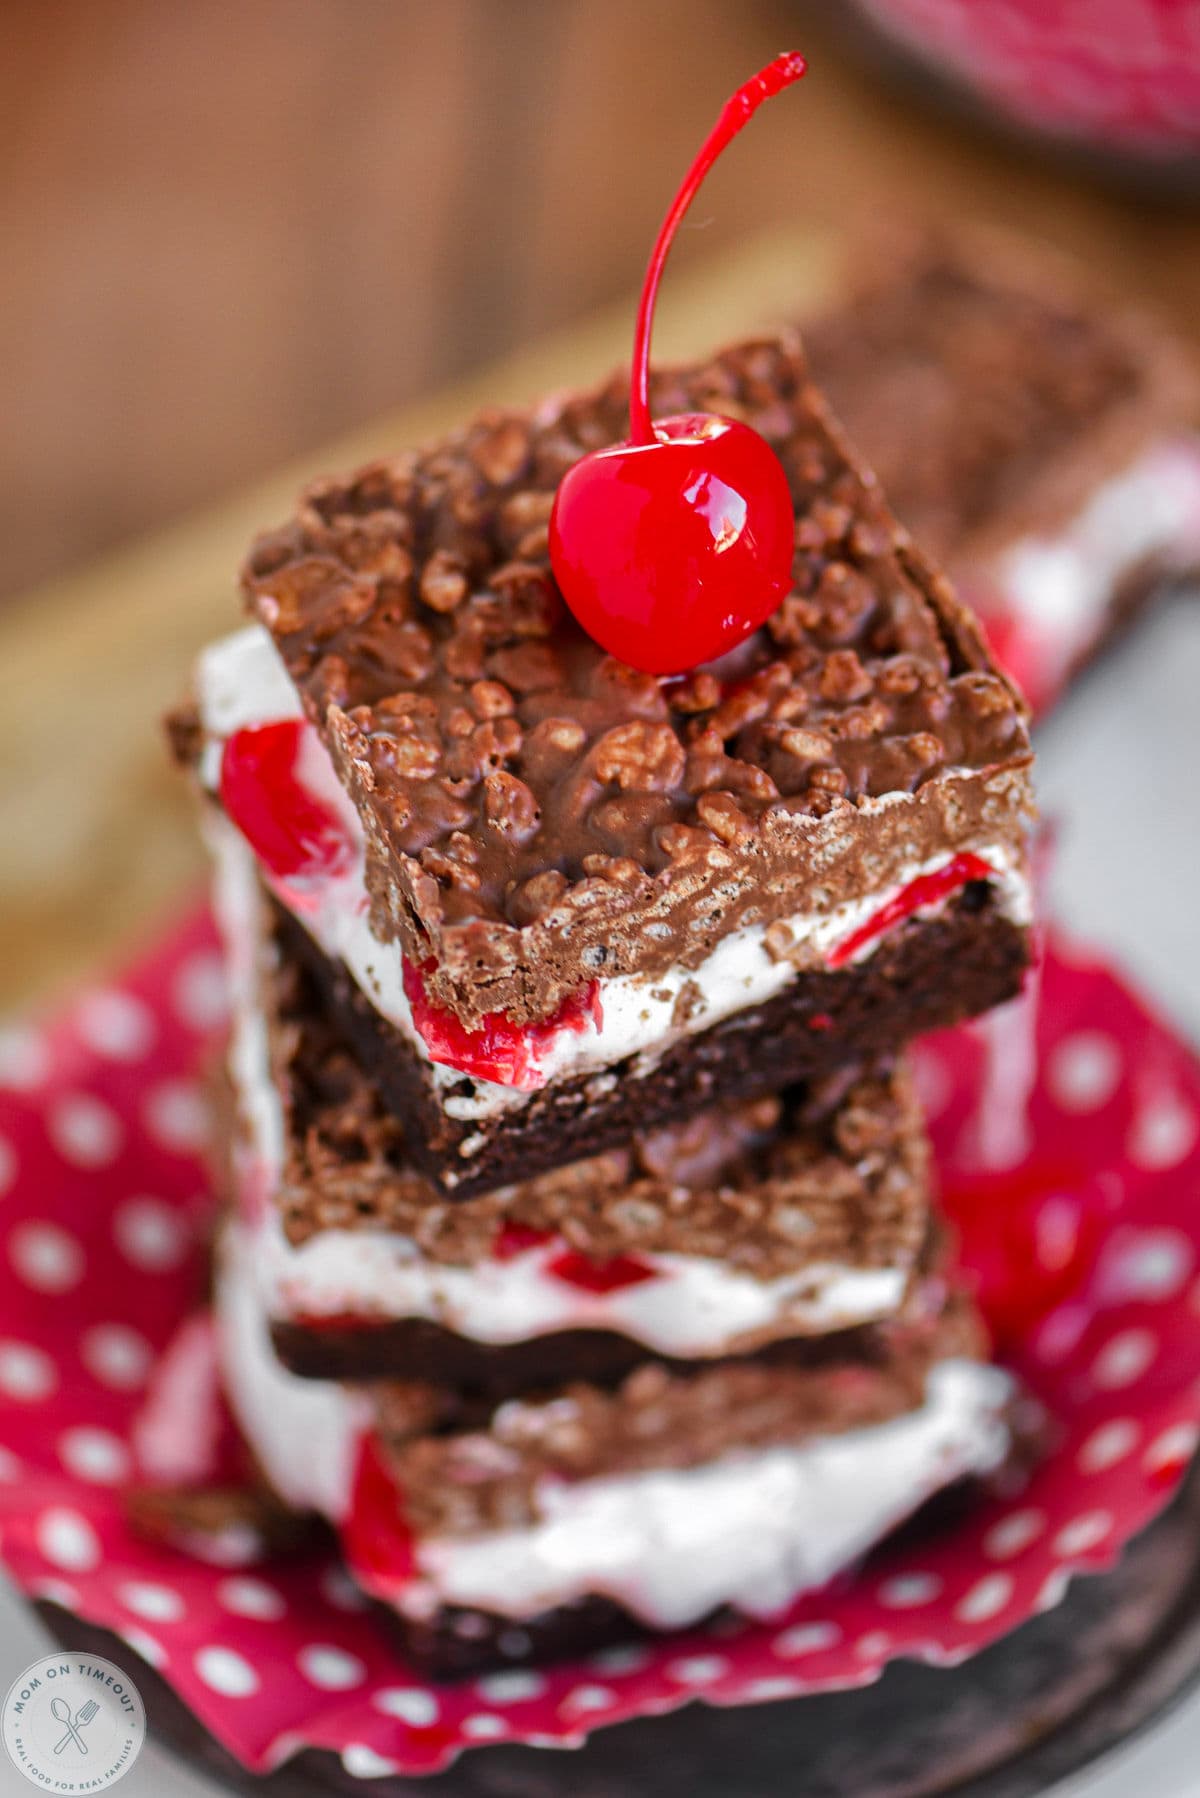
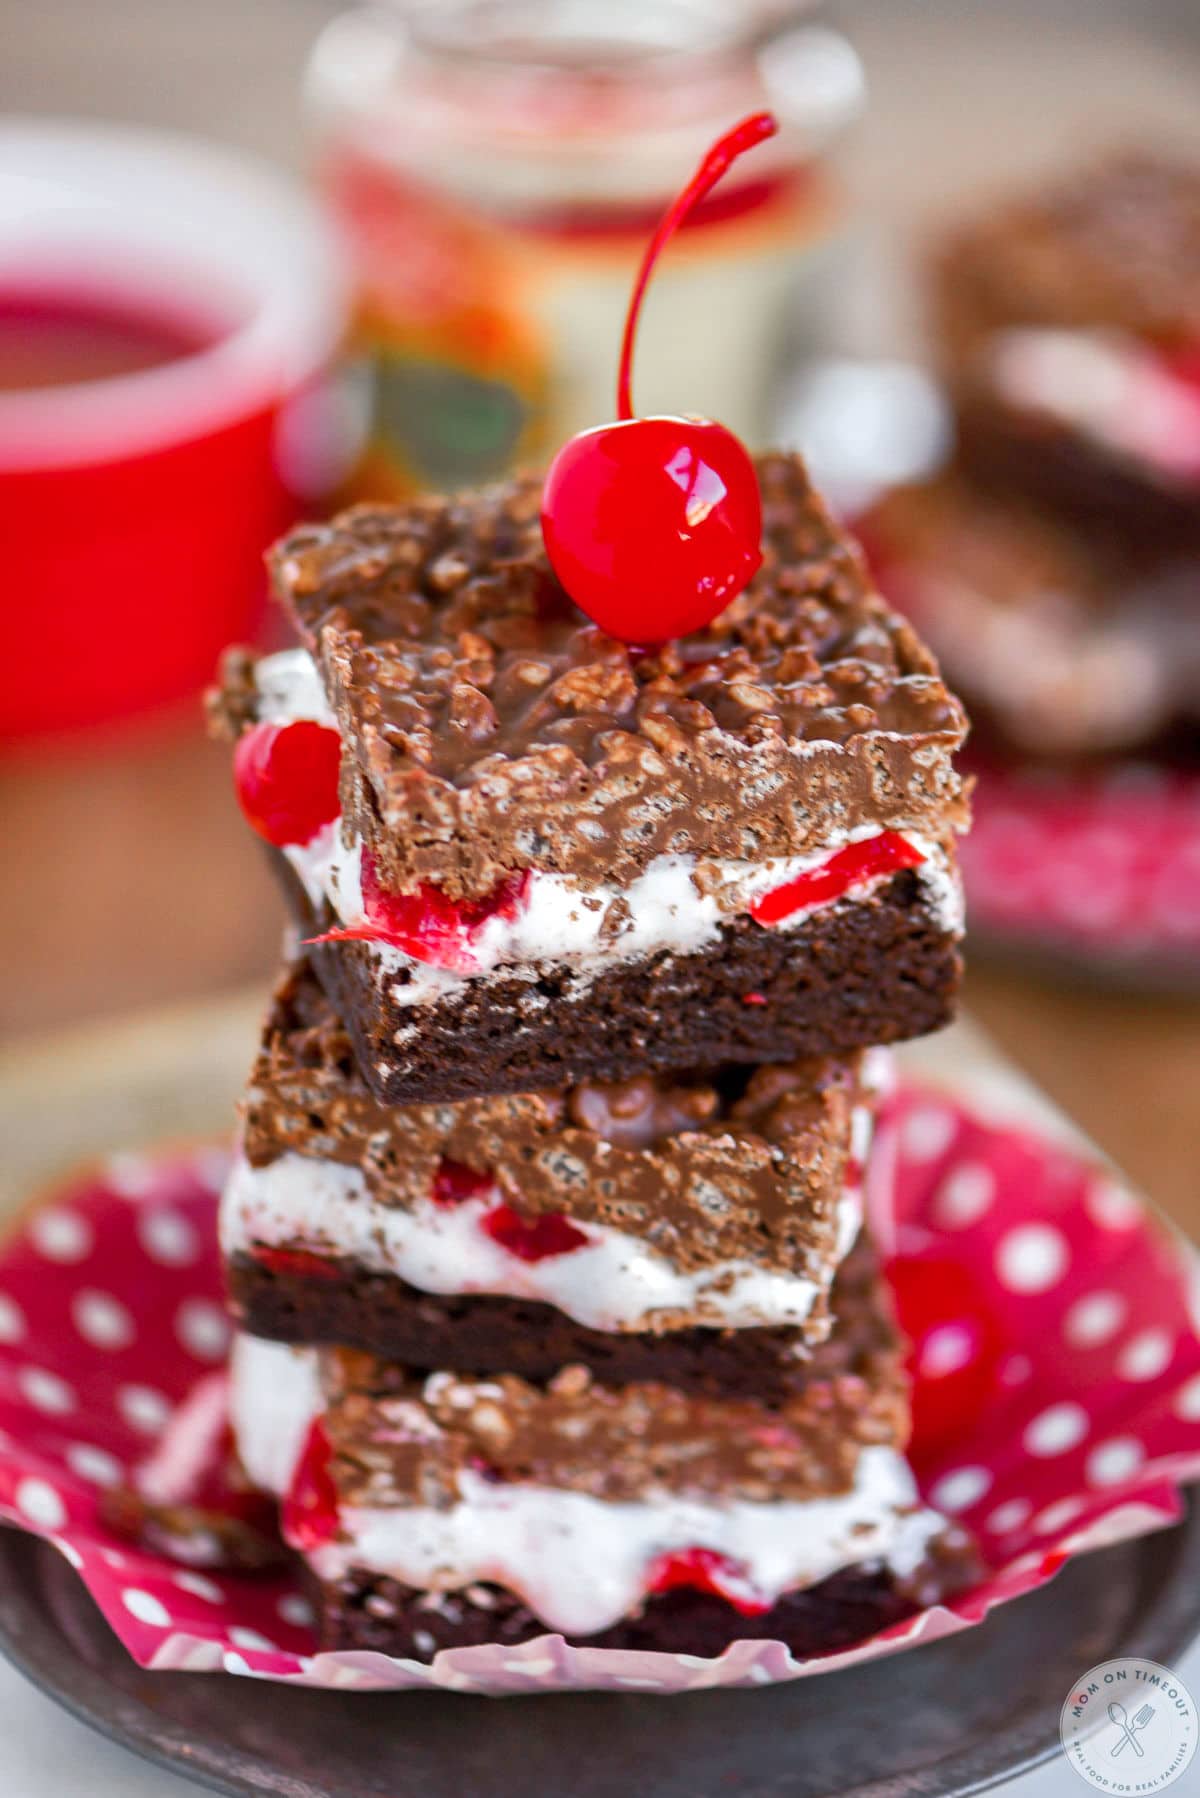
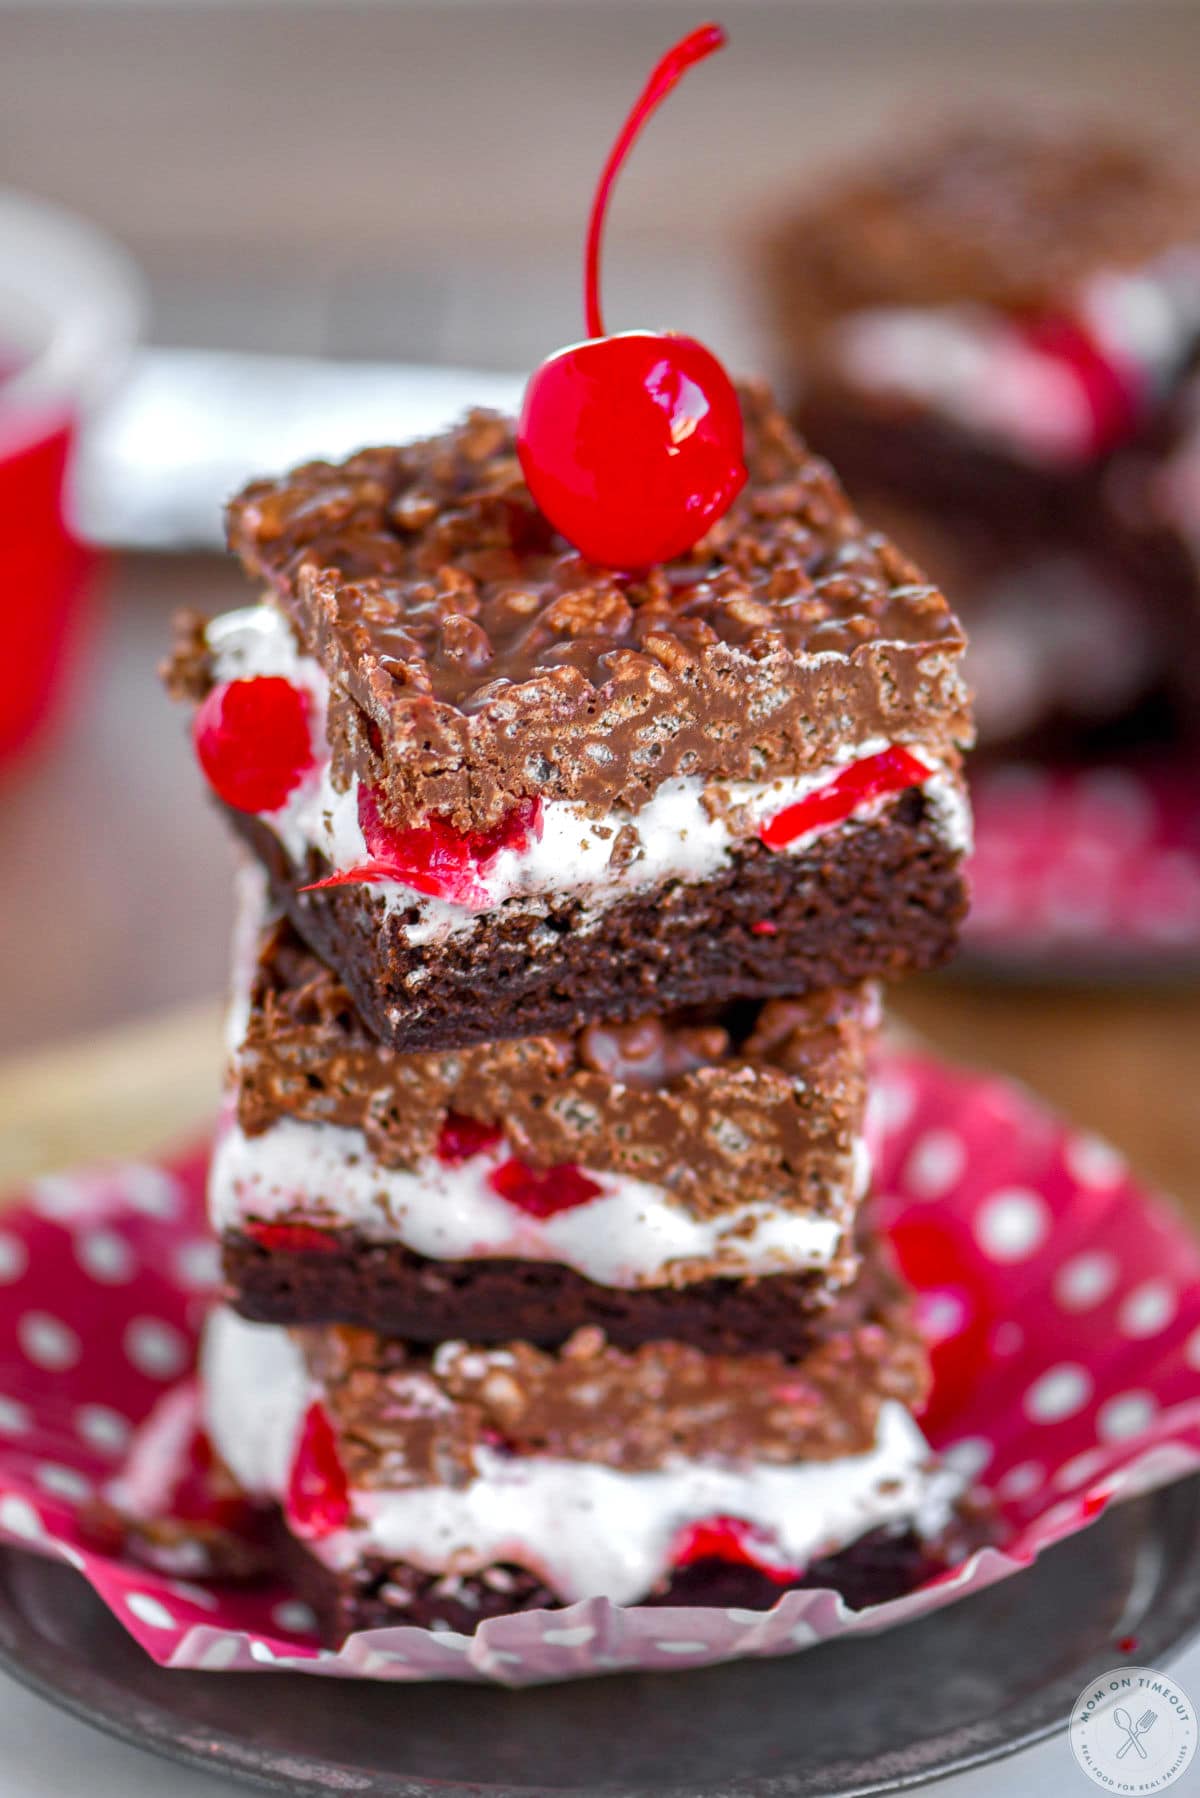
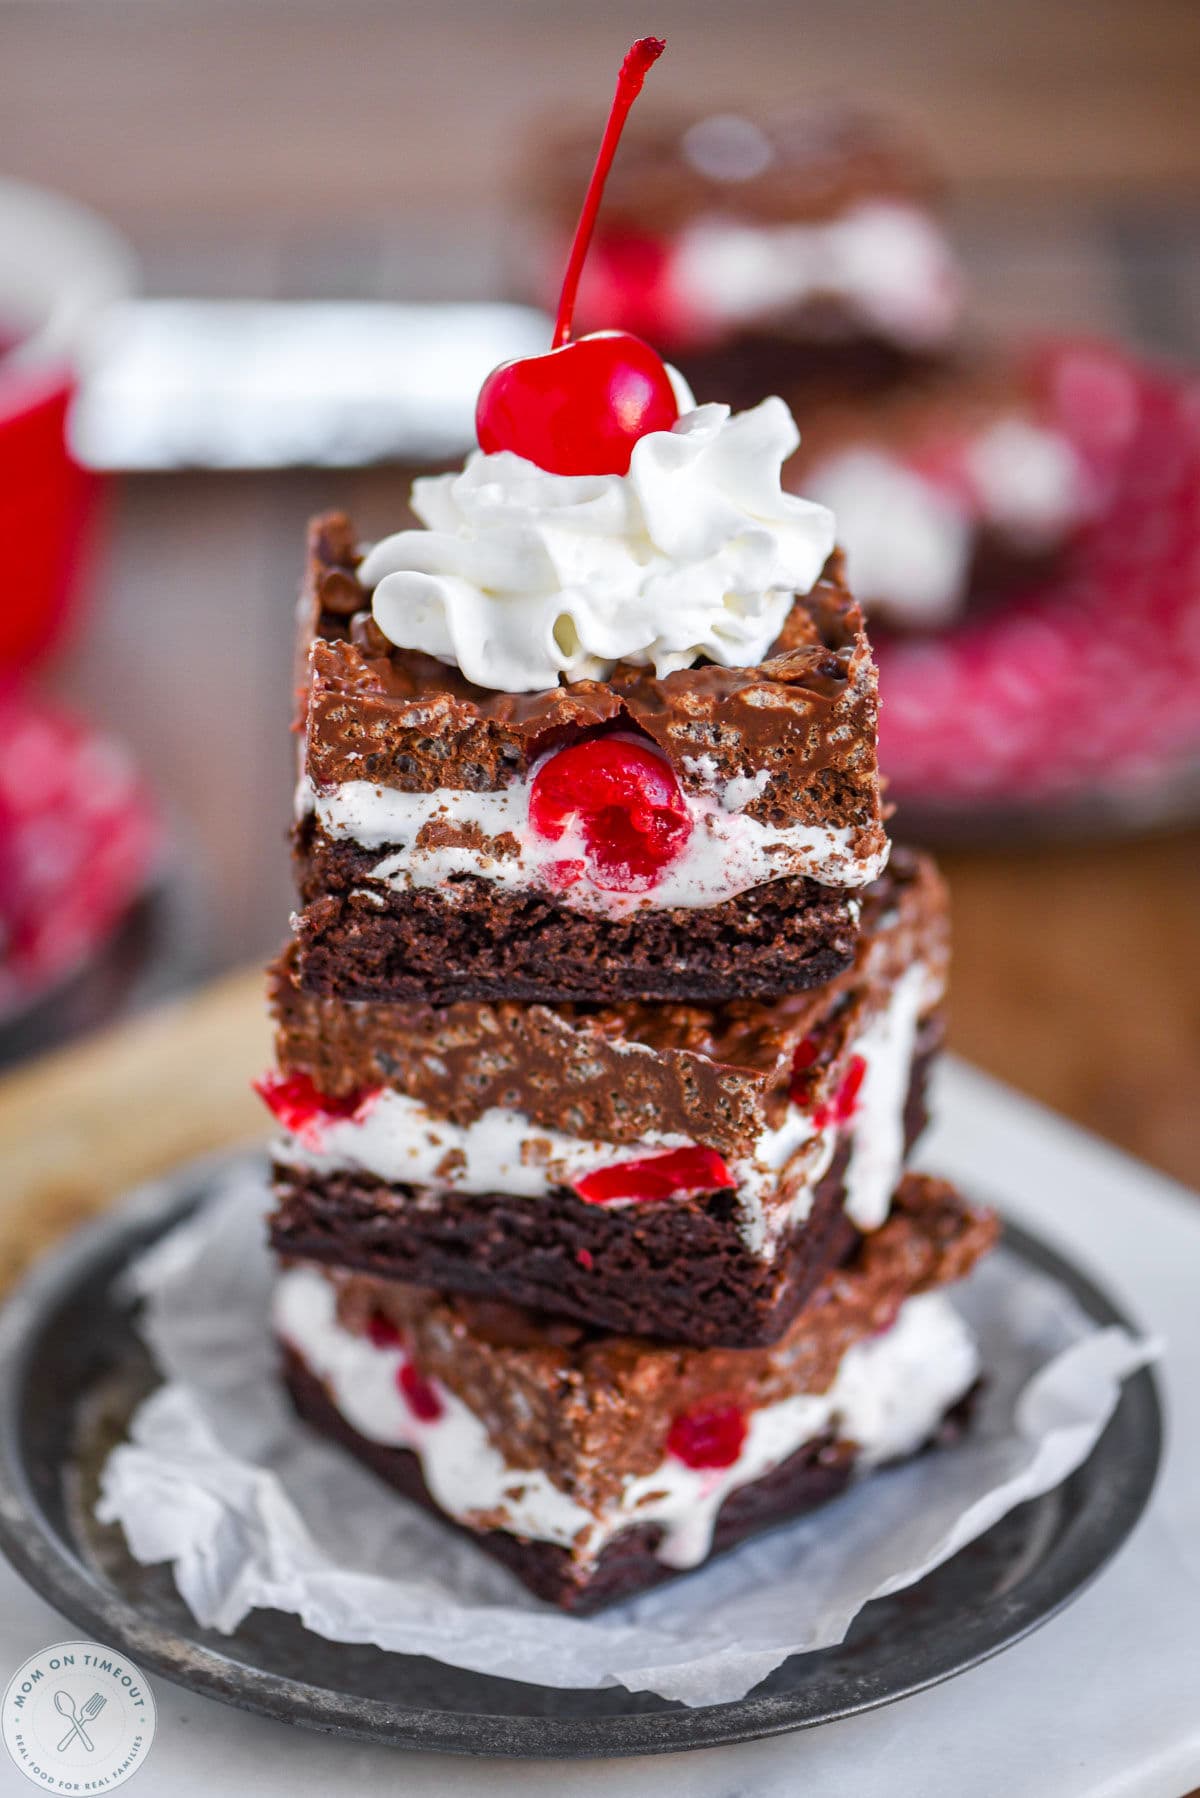
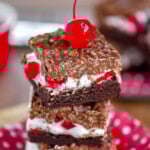
These Cherry Brownie Dream Bars are the ultimate dessert! These over-the-top brownie bars layer fudgy brownies, fluffy marshmallow cream, juicy cherries, and a rich chocolate peanut butter crunch topping. Every bite is a dream come true with the perfect balance of creamy, chewy and crispy textures. They’re a guaranteed hit for parties, holidays or anytime you want a show-stopping treat!
Love cherries? Make sure to try these favorites: Cherry Fluff, Cherry Cheesecake Dip, Cherry Almond Cupcakes and this No Bake Black Forest Cheesecake!
Cherry Brownie Dream Bars Recipe
If you’re looking for a dessert that truly has it all, these dream bars deliver in every single bite. We’re starting with a rich, fudgy brownie base and layering on marshmallow cream, marschino cherries, and a crispy chocolate peanut butter topping. The result is a decadent, bakery-style treat that’s surprisingly easy to make at home.
These bars are perfect for holidays, potlucks, bake sales, or anytime you need a dessert that wows. The layers chill beautifully, making them easy to prep ahead. Every bite has the perfect balance of creamy, chewy, crunchy, and chocolatey goodness. Trust me, these won’t last long once they hit the table. Dreamy and so delicious!
There’s a lot going on with these brownies in terms of layers so I really cut back on the workload and used a boxed mix for the brownie base. If you want, please feel free to make the brownies from scratch – it’s delicious that way too!
Why You’ll Love This Recipe
These bars aren’t just delicious, they’re a total texture and flavor experience! Here’s why they’re always a hit:
- Layered Perfection: Fudgy brownies, fluffy marshmallow cream, juicy cherries, and a crunchy chocolate peanut butter topping create irresistible layers.
- Make-Ahead Friendly: These bars need chill time, which makes them perfect for prepping in advance.
- Great for Sharing: They slice cleanly after chilling and are ideal for parties, gifting, or potlucks.
How To Make Cherry Brownie Dream Bars
From the fudgy brownie base to the crunchy topping – every bite of these bars is like a dream come true! These bars come together in layers, with chill time between each step to ensure clean slices and distinct layers. The recipe starts with a layer of brownies (I used a box mix but feel free to use your favorite brownie recipe or any of the many recipes I have on my site. Here are a few to consider: S’mores Brownies, Peanut Butter Brownies or these Fudgy Toffee Flourless Brownies.)
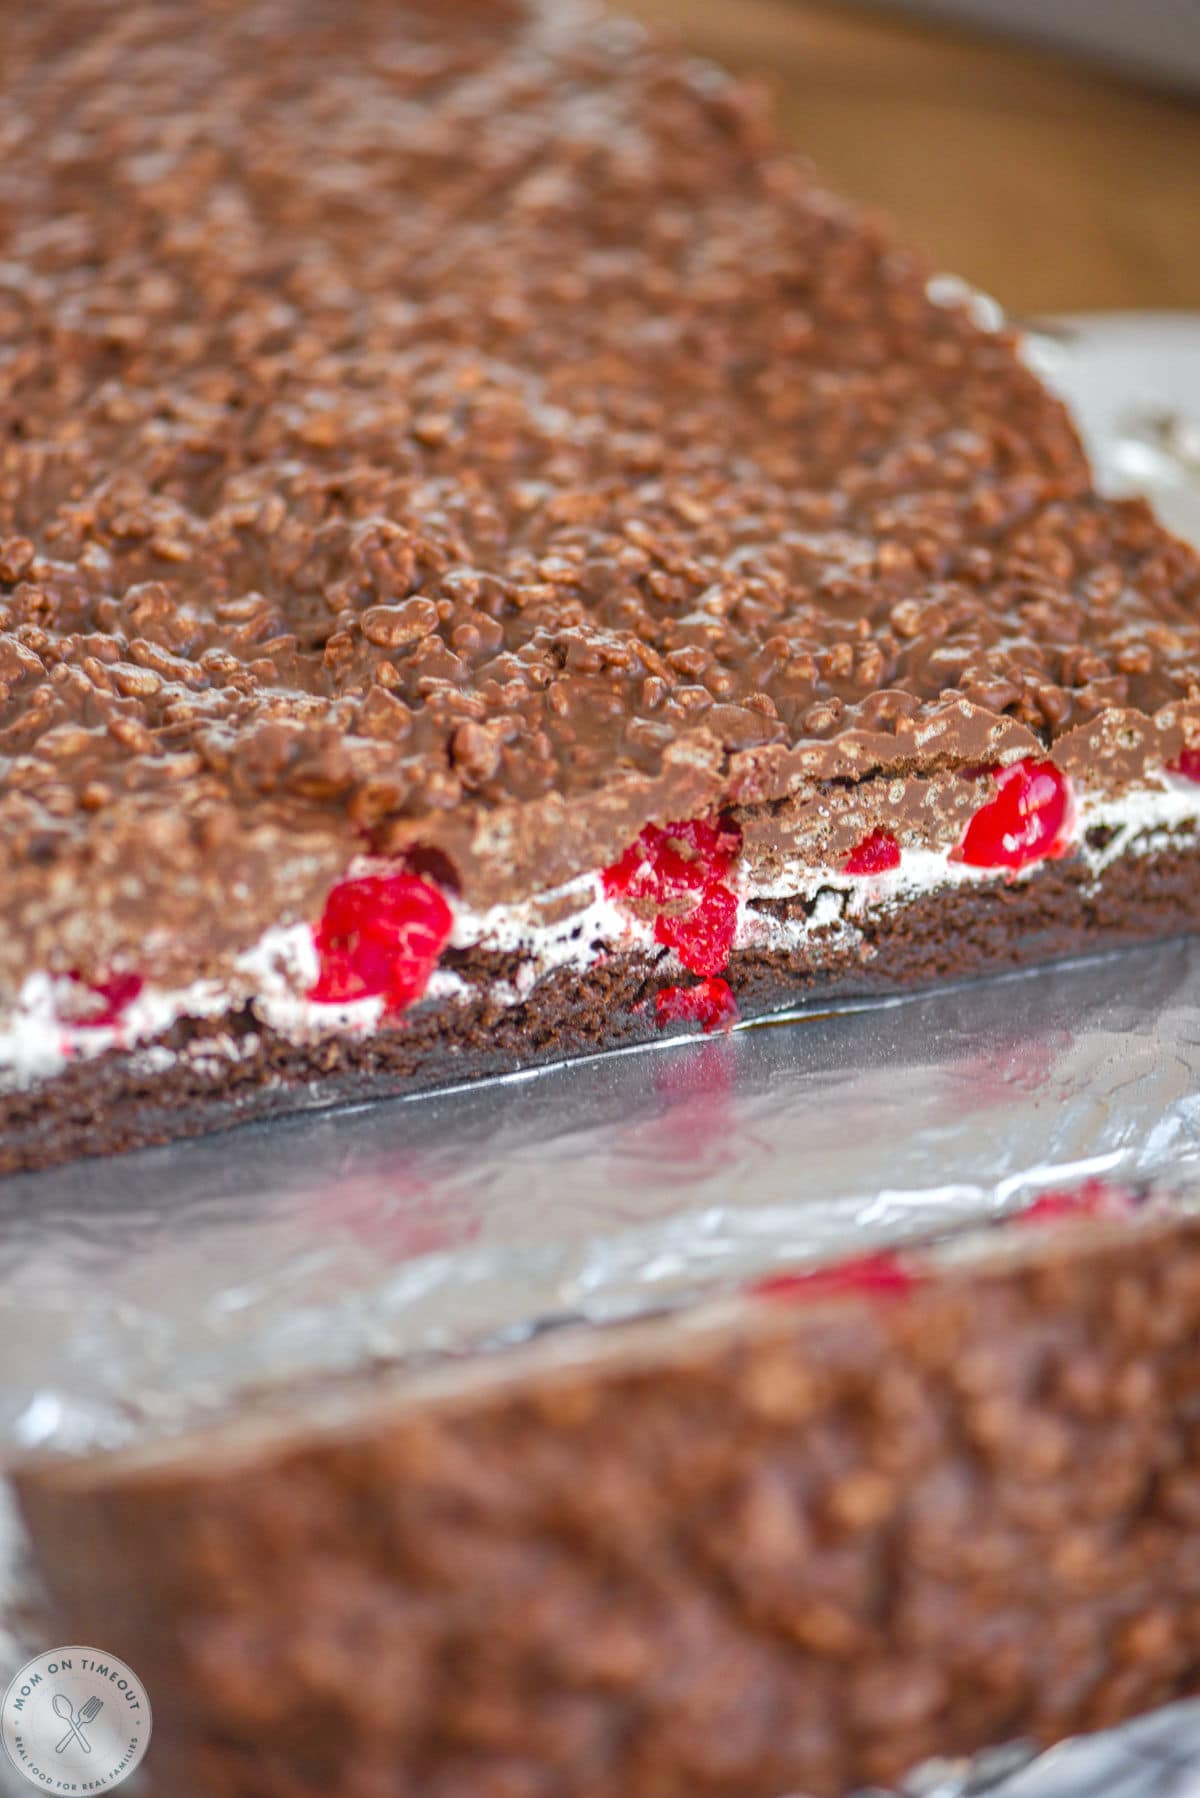
The brownies are topped with a layer of marshmallow creme, then cherries, and then everyone’s favorite layer – the chocolate peanut butter crispy layer. These take a bit because of the chill time but all in, are SO easy to make and come together beautifully.
Let’s take a quick look at how to make these bars and as always, you can find the full printable recipe card at the end of this post.
- Prepare brownies according to package directions. Cool completely and refrigerate for at least one hour.
- Spread marshmallow creme on top and chill for at least 30 minutes.
- Top with halved cherries that have been patted dry.
- Melt peanut butter and chocolate chips together.
- Stir in crispy rice cereal until completely coated.
- Spread mixture carefully over the top of the cherries.
- Chill for another hour before cutting into bars.
Storage Information
- Refrigerator: Store leftover brownies in an airtight container in the fridge for up to 3-4 days. Sit out at room temperature for 10 minutes or so before enjoying.
- Make Ahead: You can make these bars 1 to 2 days in advance, making them perfect for entertaining.
- Freezer: Brownies can be frozen for up to 3 months as a whole pan or in individual slices. Whichever method you choose, wrap the brownies in plastic wrap, then aluminum foil, and placed in a freezer-safe container.
- Thawing: Thaw brownies on the counter before enjoying.
Variations To Try
- Top with a layer of cherry frosting for even more cherry flavor and richness.
- Swap semi-sweet chips for dark chocolate chips for a richer, deeper chocolate flavor.
- Adds even more texture to the topping by swapping the creamy peanut butter for crunchy peanut butter.
- Stir in chopped peanuts or other nuts into the brownie mix for extra crunch.
- Add a drizzle of melted chocolate or white chocolate over the top before chilling for a decorative touch.
Do I have to refrigerate the brownies before adding the marshmallow layer?
Yes. Chilling helps the marshmallow creme spread easily and keeps the layers neat.
Can I use homemade brownies instead of a mix?
Absolutely. Just bake them in a 9×13 pan and cool completely before layering.
Why do I need to pat the cherries dry?
Excess moisture can make the layers slide or prevent the topping from setting properly.
Can these sit out at room temperature?
They can sit out for a short time while serving, but should be stored in the refrigerator.
Trish’s Tips
- Letting the brownies cool completely before adding the marshmallow layer is essential, this ensures the marshmallow cream won’t melt everywhere.
- Sprinkle a touch of flaky sea salt over the top of the crispy rice topping before it sets. The salty contrast will enhance the flavor and sweetness of the other ingredients.
- Check out this peanut butter version for a yummy twist on this recipe!
- Opt for a non-natural peanut butter (classic creamy peanut butter – Skippy or Jif) for this recipe. The natural peanut butters tend to be too oily and will cause issues with the texture.
- Line your baking dish with parchment paper or foil for easy removal and cleaner slicing.
- Use a sharp knife and wipe it clean between cuts for perfect layers.
More Brownie Recipes
- Cheesecake Brownies
- Magic Brownie Cookies
- S’mores Brownies
- Mint Brownies
- Peanut Butter Brownies
- Triple Chocolate Cherry Brownies
- Brownie Batter Dip
Cherry Brownie Dream Bars
Ingredients
- 10 ounces maraschino cherries
- 18 ounces brownie mix plus ingredients needed to make brownies
- 7 ounces marshmallow creme
- 1 cup creamy peanut butter
- 12 ounces semi-sweet chocolate chips
- 3 cups crispy rice cereal
Instructions
- Drain maraschino cherries and pat dry with a paper towel. Cut in half and set aside.10 ounces maraschino cherries
- Prepare brownies according to package directions for 9×13 baking dish. Cool completely and refrigerate for at least one hour.18 ounces brownie mix
- Spread marshmallow creme on top of chilled brownies and return to the refrigerator for at least 30 minutes.7 ounces marshmallow creme
- Top with halved cherries..
- Melt peanut butter and chocolate chips together in a microwave safe-container. Heat on high heat in 30 second intervals, stirring in between.1 cup creamy peanut butter, 12 ounces semi-sweet chocolate chips
- Stir in crispy rice cereal until completely coated. Spread mixture carefully over the top of the cherries.3 cups crispy rice cereal
- Return to refrigerator for another hour before cutting into bars.
Notes
- Refrigerator: Store leftover brownies in an airtight container in the fridge for up to 3-4 days. Sit out at room temperature for 10 minutes or so before enjoying.
- Make Ahead: You can make these bars 1 to 2 days in advance, making them perfect for entertaining.
- Freezer: Brownies can be frozen for up to 3 months as a whole pan or in individual slices. Whichever method you choose, wrap the brownies in plastic wrap, then aluminum foil, and placed in a freezer-safe container.
- Thawing: Thaw brownies on the counter before enjoying.
Tools and Equipment (affiliate links): Offset Spatula | Mixing Bowls | Straight Sided 9×13 Baking Dish
Please see post above for more information, step-by-step process photos, recipe tips and frequently asked questions.
Nutrition
Originally published February 9, 2016.


Laura @ Laura's Culinary Adventures says
What a yummy treat to share!
Heather | Heather Likes Food says
Cherries must add a great flavor to these bars! I am excited to try these!
Laura| Petite Allergy Treats says
Cherries always look brighter sitting on a pillow of cream! These bars look beautiful!
Mir says
Layers are the best, really. And these are beautiful! Not only are the cherries delicious, but that pop of color is nothing but happy!