↑
  • Dinner Recipes
  • Breakfast Recipes
  • Dessert Recipes
  • Side Dishes
  • Recipes
    • Dinners
    • Slow Cooker
    • Appetizers and Sides
    • Breakfast
    • Dessert
    • Beverages
    • Bread
    • Holiday Recipes
    • Kid-Friendly
  • Blog View
  • About
    • Disclosure/Privacy Policy
  • Facebook
  • Pinterest
  • Instagram
  • Twitter
  • Youtube
  • Blog View
  • About
  • Privacy Policy
  • Advertise/PR
  • DISNEY
  • DINNERS
  • DRINKS
  • DESSERTS

Mom On Timeout

Serving up real food for real families!

  • Home
  • Recipes
    • Slow Cooker
    • Appetizers and Sides
    • Breakfast
    • Entree
    • Dessert
    • Beverages
    • Holiday Recipes
      • Christmas Recipes
      • Thanksgiving Recipes
      • Valentine’s Day Recipes
      • St. Patrick’s Day Recipes
      • Easter Recipes
      • Halloween Recipes
    • Bread
    • Kid-Friendly
  • 5 Ingredients
  • Appetizers
  • Favorites


free email course!

5 SECRETS TO GETTING DINNER ON THE TABLE...FAST!

You are here: Home / Crafts / Scrappy Pumpkins

Scrappy Pumpkins

October 5, 2011

  • 186

Scrappy Pumpkins are a fun way to decorate for the Fall season!
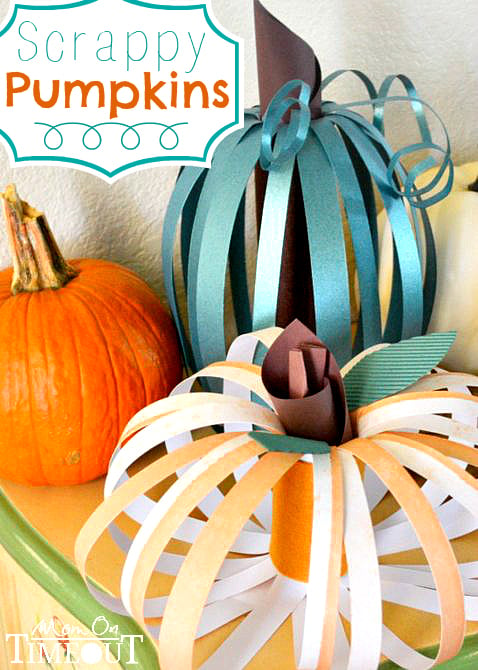
Scrappy Pumpkins are a super fun and easy way to decorate your home! | MomOnTimeout.com #craft #pumpkin

As Halloween quickly approaches, I have had fun recalling some “oldies but goodies” pumpkin crafts. One of these classics makes use of a cardboard roll and strips of paper to make a pumpkin. I put my own spin on this craft using decorative scrapbook paper and some felt – hence the name “Scrappy Pumpkins”. This craft is wonderful because you can make a variety of shapes and sizes of pumpkins just by changing the height of your roll. Use any colors you want to create pumpkins that are uniquely your own.
Scrappy Pumpkins are a super fun and easy way to decorate your home! | MomOnTimeout.com #craft #pumpkin

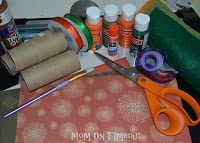
Materials Needed:
12×12 scrapbook paper
tape
glue
scissors or paper cutter
cardboard rolls
assorted card stock for stems
felt – optional
paint – optional

Directions:

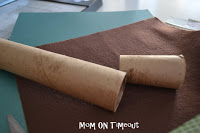
The base of the pumpkin is a cardboard roll (from either a roll of toilet paper or paper towels). There are many ways to decorate the base: paint, felt, or paper. For this pumpkin I chose brown felt and an 8″ roll. (I cut a paper towel roll down to 8 inches.)
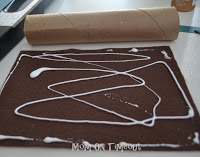
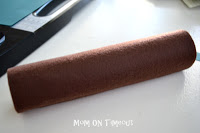
 

To cover your roll with felt, cut the felt as wide as the roll and then as long as it takes to cover the roll. It is okay if there is some overlap. Put glue on the felt and then roll the felt around the cardboard roll making sure to smooth the felt.
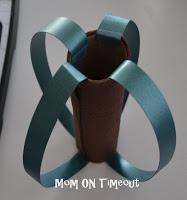
After deciding on the height of your pumpkin (mine ranged from 3 – 8 inches), pick out your paper. I used a variety of papers, all 12×12 inches. My favorite was the double-sided metallic teal paper. (If you don’t have double-sided paper and you don’t want the white showing, use a glue-stick to glue two pieces together. It really makes for some neat color combinations and gives the pumpkin some added dimension as well.)
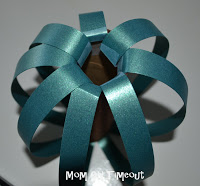
 

Cut your paper into strips. I used 3/4″ strips to start and then finished with 1/2″ strips but you can make them whatever width you want. Put a piece of tape on one of your strip of paper and press it firmly to the inside of the roll. Put a piece of tape on the other end of the strip and press it to the inside of the bottom of the roll. Keep repeating until your pumpkin has the look you desire.
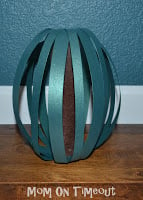
The height of your roll will determine the size and shape of your pumpkin. A taller roll results in a taller, narrower pumpkin while a short roll results in a shorter, wider pumpkin.

For the stem, I rolled up a piece of brown cardstock and stuck it in the opening at the top.
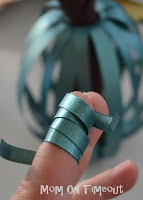
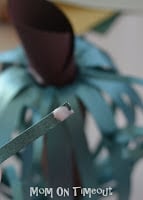
I cut some thin strips of paper and rolled it around my finger creating some curl. I glued the tip of those strips and pressed it to the inside of the roll.

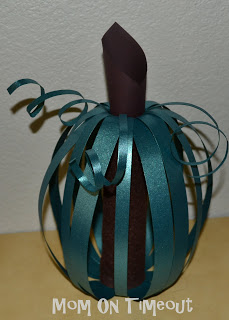
Here is the finished product:
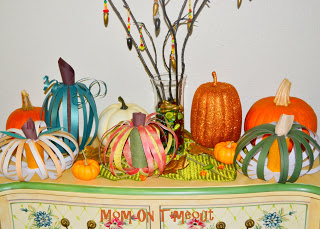
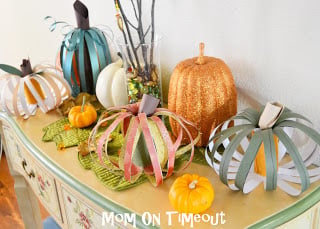
Here are some others that we made…
Scrappy Pumpkins are a super fun and easy way to decorate your home! | MomOnTimeout.com #craft #pumpkin

I hope you get crafty this week and make yourself some “Scrappy Pumpkins”!

More Fall fun:

free-fall-subway-art-printable

FREE Fall Subway Art Printable

stained-glass-fall-leaves-craft-project

Stained Glass Fall Leaves

b-witchin-pumpkins-halloween-craft

B-Witchin’ Pumpkins

Mom On Timeout Signature

Connect with me!

Follow on Bloglovin

       
 Linking up at some of these parties.

free email course

5 SECRETS TO GETTING DINNER ON THE TABLE...FAST!

enjoy!
  • 186

By Trish - Mom On Timeout October 5, 2011 Crafts, Fall, Favorites, Halloween, Holiday Crafts, Thanksgiving

Previous article:
« Chicken Cordon Bleu – A Family Recipe
Next article:
Candy Corn Fudge Recipe »

Comments

  1. Amy says

    October 14, 2014 at 3:46 PM

    I love these pumpkins!! They are so cute. I will love making them and so will my kids! So glad I found them on pinterest. I love your site!! great work. 🙂

    thanks for sharing!

    Amy
    founder of http://www.babyandkidshoes.com

    Reply
  2. google.com says

    December 16, 2013 at 2:02 PM

    I loved as much as you’ll receive carried out right
    here. The sketch is attractive, your authored subject matter stylish.
    nonetheless, you command get bought an edginess over
    that you wish be delivering the following. unwell unquestionably come further formerly again since exactly the same nearly very often inside case you shield this increase.

    Reply
  3. Hani Shabbir says

    October 5, 2013 at 5:35 PM

    Love the new look of your blog.. 🙂 And the pumpkins are so cute and look very easy to make.. Have a great weekend!

    Reply
  4. rhonda says

    September 29, 2013 at 5:46 PM

    What a great idea just made 6 of these with my grand daughter but made them with color paper strip ,we had tons of fun thanks

    Reply
    • Trish - Mom On Timeout says

      October 1, 2013 at 5:19 PM

      That’s a great idea Rhonda! So glad you enjoyed the craft!

      Reply
  5. melissa says

    September 20, 2013 at 5:53 AM

    I am featuring this on my blog today! I hope you’ll come by to check it out! You’ve inspired me to start saving my cardboard tubes! Incidentally…I love the name of your blog! The only thing is, I want to be in time out with you! Phew!

    Reply
    • Trish - Mom On Timeout says

      September 24, 2013 at 8:08 PM

      LOL! Thanks Melissa!

      Reply
  6. Dana says

    September 15, 2013 at 9:35 AM

    Thank you for the idea! These will be great to teach my occupational therapy class! We have to teach a craft – these look so cool!

    Reply
    • Trish - Mom On Timeout says

      September 18, 2013 at 6:37 PM

      That sounds perfect Dana!

      Reply
  7. melanie says

    September 14, 2013 at 3:55 PM

    I just made 3 of the pumpkins and they turned out great. So easy as well.

    Reply
    • Trish - Mom On Timeout says

      September 18, 2013 at 6:52 PM

      Yay! Aren’t they fun? I need to make some more for this year… Thanks so much for stopping by!

      Reply
« Older Comments

Leave a Reply Cancel reply

Your email address will not be published. Required fields are marked *

Recipe Rating


This site uses Akismet to reduce spam. Learn how your comment data is processed.

Hi, I’m Trish!

Welcome to Mom On Timeout where I’m serving up real food for real families! Dinners, desserts, and everything in between!
Read More…

categories

archives

Popular Posts

white bowl with handles filled with zuppa toscana soup and topped with cheese. Kale, sausage and bacon can be seen in the soup.
crockpot chili in a ladle held above the crockpot and the rest of the chili.
chicken-stir-fry
best-tater-tot-casserole-recipe-hamburger-green-beans

Some of my favorites…

slice being removed from a vanilla cake with raspberry buttercream. cake is decorated with fresh raspberry and mint leaves.
plate filled with cherry pineapple dump cake and topped with a scoop of vanilla ice cream that is just beginning to melt. cherries and pineapple chunks are visible in the cake.
lemon meringue cupcake with bite taken showing the lemon curd in the middle of the cupcake and the pretty white interior of the meringue.
mini cheesecakes sitting on a gray plate topped with whipped cream, raspberries and mint leaves.
cake made with cinnamon rolls on a white cake stand and topped with cream cheese frosting and mini cinnamon rolls.

Copyright ©2023, Mom On Timeout. All Rights Reserved.
Design by Pixel Me Designs
  • Facebook
  • Twitter
  • Pinterest