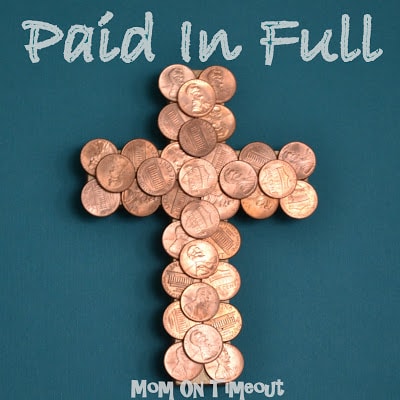
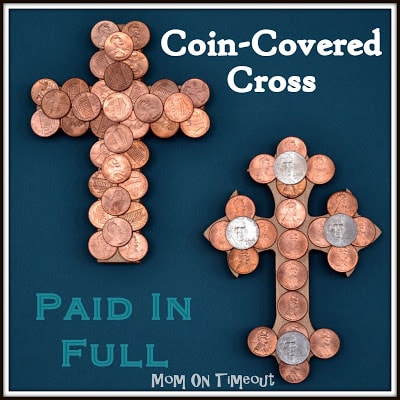
Wooden crosses are covered in coins – “Paid In Full” Easter Craft.

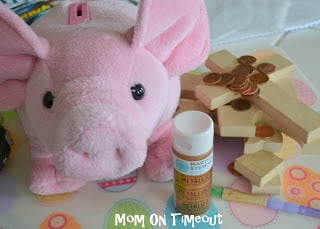
Materials Needed:
Copper paint (or your choice of metallic paint)
Wood cross (I ordered mine from Mr. Woody’s Etsy shop )
paint brush
coins (your choice)
glue
The first thing I did was raid my children’s piggy banks – literally. I was trying to find “pretty” pennies and those are apparently hard to come by in our house. This was an excellent opportunity for me to explain what this craft and Easter was all about to Reece and Bryce.
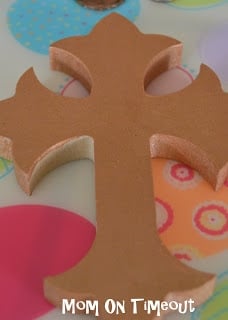
Next step was painting the crosses. You can paint them any color you want. I knew I was going to be using pennies, so I used a Martha Stewart copper metallic paint that worked beautifully.
They really only needed one coat but I had to wait for the first area to dry before I finished painting. Since this is multi-dimensional, should anyone be viewing it from the side it will look cohesive.
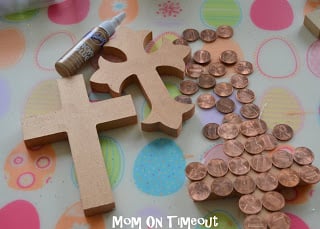
The next step is to lay out your coins. Figure out if you want heads or tails showing, or both. If you want all of one type of coin or different colors.
Once you have the coins laid out you can start gluing them on. Having the cross painted allows you the option to not cover the entire surface should you desire.
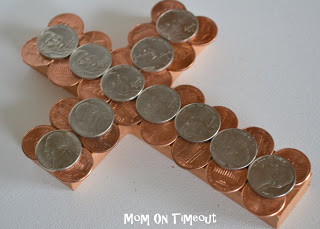
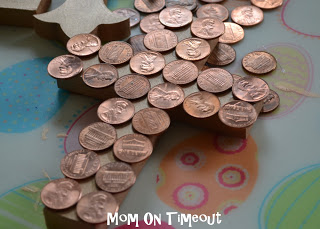
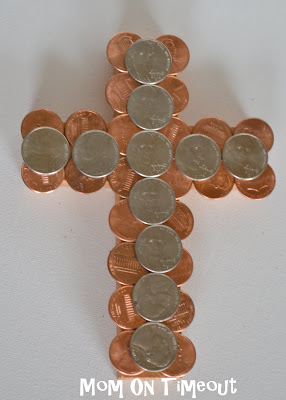
I really liked the look of the copper pennies by themselves but you can add dimension and color by adding another layer of a different coin – I used nickels.
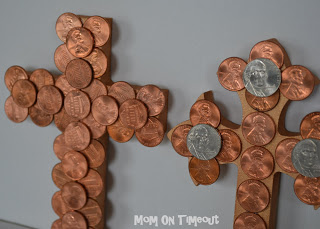
I think these turned out really beautiful and I love the symbolism.


Ruth says
What a beautiful illustration! Will be making these with my little boy this week for sure!
Dixie n Dottie says
What a great idea and so true! I am so glad that Jesus did pay it in full! What a wonderful and loving Saviour He is!!! Thanks for sharing your idea!
http://dixie-n-dottie.blogspot.com/
cathy@my1929charmer says
I so love the coin covered crosses, I favor the one with all the same copper pennies. It is great to have projects that are centered on our faith. Love it. Thanks for sharing your creative inspiration at Sunday’s Best!
Kathryn says
These look great!
Anonymous says
I’m going to do this as a 2 week project with my Sunday School class. I am going to take the first week to have the students clean the pennies and talk about how Jesus “cleans” us when we except Him as our Lord and Savior. The second week we will glue the pennies on. Thanks for this wonderful idea.
I love it
Jackie H. says
I LOVE these! I was thinking about doing some work with finding area by covering a cross with squares and counting the number of squares but I think we’re going to have to do this too. maybe some estimation? Let them guess how many coins it would take to cover. These are just so cool and so great to keep and talk about the meaning behind them.
Erika Dawson says
LOVE this idea! This is one of the first “unique” activities I’ve seen this year!
I’m doing a compilation of Easter activities for families and wondered if I could use one of your images (and link here, of course). Let me know….thanks!!
Trish - Mom On Timeout says
Thank you Erika! Sounds good to me 🙂
Julie@teachinggoodeaters says
I love blogging because it makes me think about things that I would not have otherwise. This Easter I have seen multiple posts about focusing on the real meaning of Easter… it has really helped me to stay focused and to think more about where my family’s focus needs to be. This is such a beautiful idea (though I’m sure I’d have trouble finding shiny coins in my house!!)
Trish - Mom On Timeout says
I agree Julie! That’s what I love about blogging too – being inspired in every way imaginable! Hope you have a wonderful weekend 🙂
Jan@southernjunkin' says
so appropriate! Thanks for sharing! Visiting from Bacon Time…
Alison @ Oopsey Daisy says
I LOVE when the real meaning of Easter is mentioned, too! We don’t always see that in blogging land! 🙂 Very sweet idea. Thanks for sharing at oopsey daisy!
Becky says
God bless you and your family. Totally awesome and rare these days to find the real meaning of Easter mentioned. I made the empty tomb planter for my granddaughters but I don’t think the grass is growing. You are all awfully talented
Trish - Mom On Timeout says
Thank you Becky and God bless you and yours 🙂
michael says
God bless you and your family. Totally awesome and rare these days to find the real meaning of Easter mentioned……………………if you want to be real about Easter, its a pagan holiday, melded into christianity. Easter is always the first sunday following the spring equinox. a pagan tradition. the Holy Bible tells of king Herod preparing to celebrate Easter when word of Jesus birth was brought to him. easter has absolutely nothing to do with Jesus until the council of nicaea… which picked what books went into the bible in the first place
Chessa @ Antsi-Pants says
I love the message in this! thanks for sharing.
andie jaye says
i love this! i love this! i love this! pinning it, sharing it on my blog fb page, and would love it if you linked it up to my tip-toe thru tuesday party!
andie @ crayonfreckles
Anonymous says
Beautiful! what size cross did you use? Do you hae the item# from Mr. Woody? what glue did you use? Also, pennies can be cleaned with mayonaise! THANKS! i dont have a blog spot so have to publish as anonymous. Robin
Trish - Mom On Timeout says
Hi Robin! I used 4X6 crosses from Mr. Woody is various styles. I ordered (25) 4 x 6 Inch Wooden Cross made from 1/2 MDF, (Styles C20, C6, and C2) there are lots of styles to choose from.
I used a combination of tacky glue and hot glue and did not know that pennies can be cleaned with mayonnaise – brilliant! Hope this helps!
Anonymous says
Pennies can also be cleaned with 1/4 c vinegar & 1 tsp salt in a plastic or glass bowl. You just put them in there for a few minutes, & they come out clean.
Anonymous says
Soak pennies in Coke and they clean up real pretty.
Amanda says
neat idea, would be great for a craft at church
http://www.newlifeovernight.blogspot.com