
These Crescent Rolls are so buttery, flaky and totally delicious! A perfect addition to any occasion and sure to become a new favorite with family and friends. Homemade crescent rolls are way better than store bought and use ingredients you probably already have on hand. I’ve been making these rolls for over 25 years and they are an absolute must for family dinners and holiday meals. If we aren’t eating these crescent rolls, I’m making The BEST Dinner Rolls or Cheesy Bacon Ranch Bread!

Crescent Rolls
This crescent roll recipe is a family recipe that means so much to me. Every Christmas my Mom would make these for us and they were a treat all five of us kids looked forward to. She would bake them so that one batch was ready right as we were sitting down. She would put the second batch in and they would be hot out of the oven just as the first basket was emptied.
These crescent rolls are true perfection. Beautiful and golden – they melt in your mouth and are guaranteed to make you smile. I hope you will bake these up and share them with your family this holiday season. Who knows – maybe they will become a tradition for you as well 🙂
You start by dissolving the yeast in warm water. You want to let it get nice and foamy before adding in the rest of the ingredients. Make sure the eggs and butter are at room temperature!
I like to use a stand mixer to incorporate all the ingredients but if you don’t have one, you can use a wooden spoon. You’re going to add about half the flour in first. Make sure that it’s completely incorporated before adding in the rest of the flour. You’ll know you’ve added in enough flour when the dough starts pulling away from the bowl.

Shape the dough into a ball and place in a greased bowl and cover with a towel or plastic wrap. Let the dough rise until doubled in size, this could take an hour or two depending on how warm your house is.
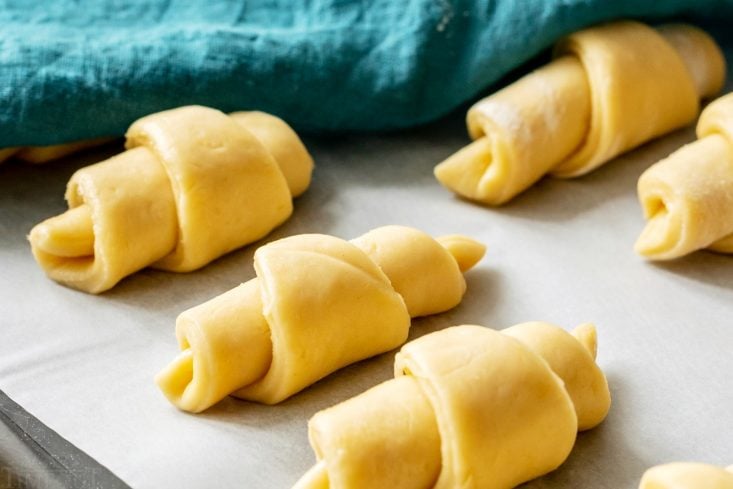
Divide the dough in half and roll out into roughly a 12 inch circle on a lightly floured surface. Spread on the melted butter (yes, more butter!), cut the dough into wedges and then roll up into crescents.

Place the rolls on a baking sheet, cover and let them rise until doubled in size again. This second rise is where the magic happens so don’t rush it. If you don’t let the rolls rise all the way, they will be a bit denser. Still delicious, just not quite as soft and flaky.
Now it’s time to bake! I usually wait until we are literally minutes away from eating before throwing the first batch in the oven. The smell of these crescent rolls works better than a dinner bell any day.
I keep a close eye on the rolls while they’re baking. Usually I have both ovens going, four burners, etc. and I know that can affect how quickly they bake. I start checking at 10 minutes but they can take up to 14. Be careful, they go from golden to dark fast.
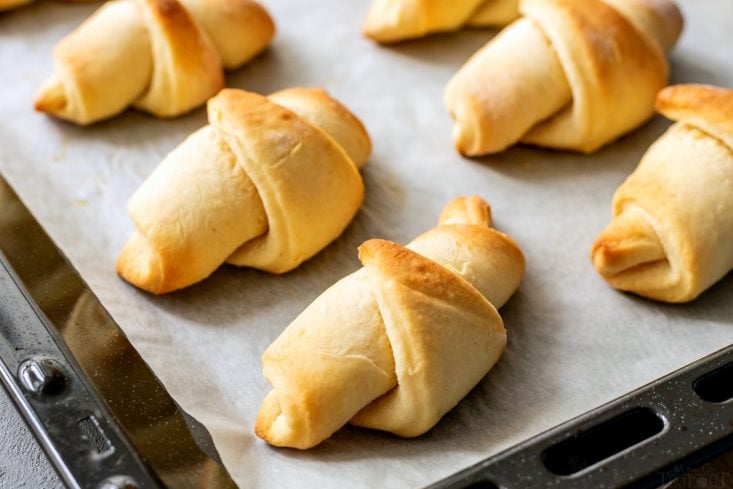
The rolls are just incredible warm and soft from the oven.
Fresh from the oven, brush on a little melted butter…

My dad insists that a couple different jams and jellies and nice and soft warm butter be served alongside the rolls. I quite agree.
I sure hope you give these amazing crescent rolls a try this holiday season and every weekend after 🙂
What Do I Need To Make Crescent Rolls?
- While you can make these rolls by hand, I really do recommend a stand mixer. The rolls are so easy to make with a mixer and really frees up your time to do other things.
- I cut the rolls into wedges using a pizza wheel.
- Rolling out the dough onto a silpat is a great idea.
- I like to bake my crescent rolls on parchment paper. Clean up is easy, never any issues with sticking, it’s just a win-win.
How To Make Crescent Rolls

Crescent Rolls
Ingredients
- 2 packages of dry yeast or 5 tsps
- 3/4 cup warm water
- 1 tsp salt
- 1 cup butter softened
- 3 1/2 to 4 1/2 cups all purpose flour
- 1/2 cup granulated sugar
- 2 eggs room temperature
- 4 tbsp butter
Instructions
- Dissolve the yeast in warm water and let sit until foamy, about 5 minutes.
- Stir in sugar, eggs, butter, salt, and two cups of flour. Make sure the eggs and butter are room temperature before you add them to the yeast mixture. Beat until smooth.
- Add in the remaining flour a little at a time and mix until smooth. The dough should be pulling away from the bowl.
- Shape the dough into a ball, place in a large bowl and cover with a towel or plastic wrap. Let rise until it is doubled in size. (Set the bowl in a warm area to speed up the rising process.)
- Divide the dough in half. Roll each half into a 12 inch circle. Melt the four tablespoons of butter and spread onto the dough. Cut the dough into quarters and then into wedges. You should end up with 12 crescents per circle or 24 total. .
- Roll up the wedges and place crescent rolls on a baking sheet lined with parchment paper or lightly greased. Cover, and let them double in size again.
- Bake the crescent rolls at 400 degrees for 10 to 14 minutes. Start checking at 10 minutes because these rolls can go from golden to dark in an instant. Quickly spread a little melted butter over the top of the rolls to finish them off. Perfection!
Video
Nutrition
Originally published November 21, 2011.


For all appetizer recipes, go HERE.
For all dessert recipes, go HERE.
Sign up to get emails when I post new recipes!
For even more great ideas follow me on Facebook – Pinterest – Instagram – Twitter – Bloglovin’.


Rhea McCoy says
So yummy! Way better than the store made dough. I mistakenly put them in a 350° oven and realized at 10 mins in that the temp was wrong. Cooked for an additional 8 mins and they were perfect!
Rhea McCoy says
And I made the recipe in my bred machine on the dough only setting.
Judy Doiel says
I just made these to go around my jalanpenos filled with cream cheese. MMMmmmm….hubby likes them better than store bought. Said they are flakier.
Thank you!
June says
Yuummmy!!!!!
Debbie says
I have been trying for days now to get the FULL recipe for the hummingbird cake and have not been able to do so. ?????
Trish - Mom On Timeout says
I’m not sure what you mean Debbie… I have a search bar at the top of my site and on my sidebar, you just have to type in “hummingbird” and it would come right up. Here is the direct link to help: https://www.momontimeout.com/hummingbird-bundt-cake-cream-cheese-glaze/
Jen the baking mom says
Thank you Soooooo Much for sharing these things are amazing. I have tried so many different ways to make these and they came out PEeerfect WITH your recipe! THANK YOU AGAIN! Happy baking. 🙂
Trish - Mom On Timeout says
You are so welcome Jen! I’m so glad you enjoyed the recipe. It really is a family favorite! Happy New Year!
Amy says
I’ve used this recipe several times and I love it! I’ve even used it as a crust for a giant chicken pot pie. Absolutely wonderful! I have, however, made a few minor adjustments.
My entire family is lactose intolerant, so I use Earth Balance Buttery sticks instead of real butter and I increased the amount to 1 1/2 cups.
I only used 2 Tablespoons of sugar.
I increased the salt to 1 1/4 tsp.
and lastly I increased the water to 1 1/4 cups.
Trish - Mom On Timeout says
I’m so glad you’ve enjoyed the recipe and have made the tweaks that work for your family! Thanks so much for stopping by!
Anonymous says
Made these & fantastic. Will most definitely make more. Thanks for sharing 🙂
Stephanie says
Pinning this!
Alison @ Oopsey Daisy says
Oh yum!! These look so delish. Love how golden they are!
Trish - Mom On Timeout says
@Teddi Hey Teddi! Usually about an hour but it really depends on the temp in your house. Let me know how they turn out!
Teddi says
These look amazing and Im making them tonight! About how long (estimate) does it take for them to double in size?