
These Crescent Rolls are so buttery, flaky and totally delicious! A perfect addition to any occasion and sure to become a new favorite with family and friends. Homemade crescent rolls are way better than store bought and use ingredients you probably already have on hand. I’ve been making these rolls for over 25 years and they are an absolute must for family dinners and holiday meals. If we aren’t eating these crescent rolls, I’m making The BEST Dinner Rolls or Cheesy Bacon Ranch Bread!

Crescent Rolls
This crescent roll recipe is a family recipe that means so much to me. Every Christmas my Mom would make these for us and they were a treat all five of us kids looked forward to. She would bake them so that one batch was ready right as we were sitting down. She would put the second batch in and they would be hot out of the oven just as the first basket was emptied.
These crescent rolls are true perfection. Beautiful and golden – they melt in your mouth and are guaranteed to make you smile. I hope you will bake these up and share them with your family this holiday season. Who knows – maybe they will become a tradition for you as well 🙂
You start by dissolving the yeast in warm water. You want to let it get nice and foamy before adding in the rest of the ingredients. Make sure the eggs and butter are at room temperature!
I like to use a stand mixer to incorporate all the ingredients but if you don’t have one, you can use a wooden spoon. You’re going to add about half the flour in first. Make sure that it’s completely incorporated before adding in the rest of the flour. You’ll know you’ve added in enough flour when the dough starts pulling away from the bowl.

Shape the dough into a ball and place in a greased bowl and cover with a towel or plastic wrap. Let the dough rise until doubled in size, this could take an hour or two depending on how warm your house is.
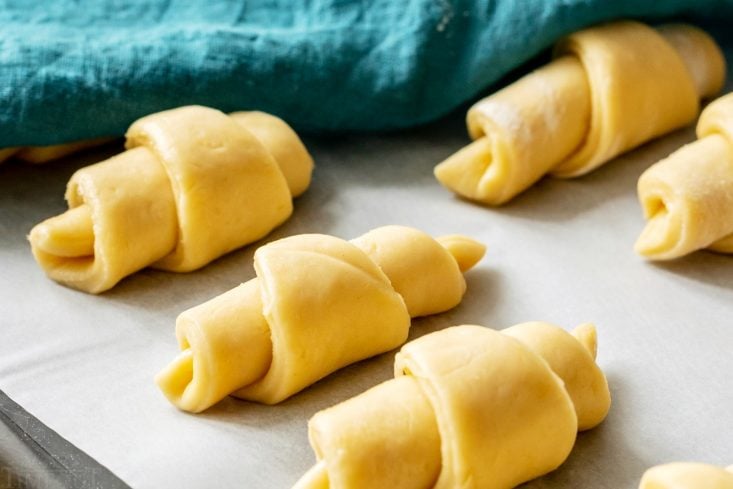
Divide the dough in half and roll out into roughly a 12 inch circle on a lightly floured surface. Spread on the melted butter (yes, more butter!), cut the dough into wedges and then roll up into crescents.

Place the rolls on a baking sheet, cover and let them rise until doubled in size again. This second rise is where the magic happens so don’t rush it. If you don’t let the rolls rise all the way, they will be a bit denser. Still delicious, just not quite as soft and flaky.
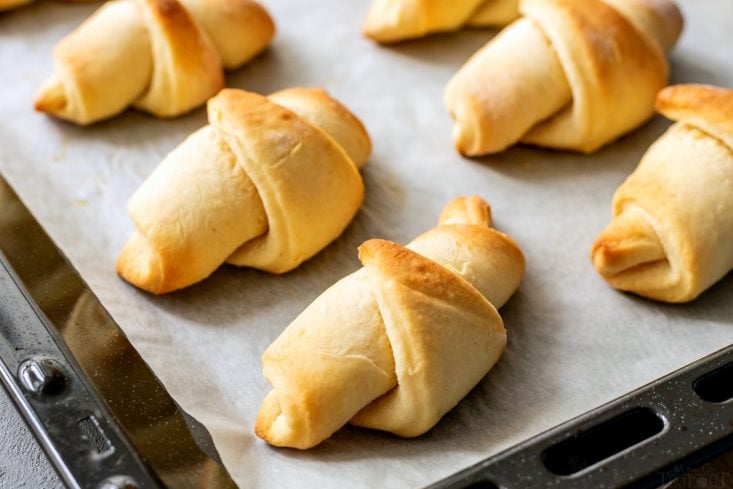
Now it’s time to bake! I usually wait until we are literally minutes away from eating before throwing the first batch in the oven. The smell of these crescent rolls works better than a dinner bell any day.
I keep a close eye on the rolls while they’re baking. Usually I have both ovens going, four burners, etc. and I know that can affect how quickly they bake. I start checking at 10 minutes but they can take up to 14. Be careful, they go from golden to dark fast.
The rolls are just incredible warm and soft from the oven.
Fresh from the oven, brush on a little melted butter…

My dad insists that a couple different jams and jellies and nice and soft warm butter be served alongside the rolls. I quite agree.
I sure hope you give these amazing crescent rolls a try this holiday season and every weekend after 🙂
What Do I Need To Make Crescent Rolls?
- While you can make these rolls by hand, I really do recommend a stand mixer. The rolls are so easy to make with a mixer and really frees up your time to do other things.
- I cut the rolls into wedges using a pizza wheel.
- Rolling out the dough onto a silpat is a great idea.
- I like to bake my crescent rolls on parchment paper. Clean up is easy, never any issues with sticking, it’s just a win-win.
How To Make Crescent Rolls

Crescent Rolls
Ingredients
- 2 packages of dry yeast or 5 tsps
- 3/4 cup warm water
- 1 tsp salt
- 1 cup butter softened
- 3 1/2 to 4 1/2 cups all purpose flour
- 1/2 cup granulated sugar
- 2 eggs room temperature
- 4 tbsp butter
Instructions
- Dissolve the yeast in warm water and let sit until foamy, about 5 minutes.
- Stir in sugar, eggs, butter, salt, and two cups of flour. Make sure the eggs and butter are room temperature before you add them to the yeast mixture. Beat until smooth.
- Add in the remaining flour a little at a time and mix until smooth. The dough should be pulling away from the bowl.
- Shape the dough into a ball, place in a large bowl and cover with a towel or plastic wrap. Let rise until it is doubled in size. (Set the bowl in a warm area to speed up the rising process.)
- Divide the dough in half. Roll each half into a 12 inch circle. Melt the four tablespoons of butter and spread onto the dough. Cut the dough into quarters and then into wedges. You should end up with 12 crescents per circle or 24 total. .
- Roll up the wedges and place crescent rolls on a baking sheet lined with parchment paper or lightly greased. Cover, and let them double in size again.
- Bake the crescent rolls at 400 degrees for 10 to 14 minutes. Start checking at 10 minutes because these rolls can go from golden to dark in an instant. Quickly spread a little melted butter over the top of the rolls to finish them off. Perfection!
Video
Nutrition
Originally published November 21, 2011.


For all appetizer recipes, go HERE.
For all dessert recipes, go HERE.
Sign up to get emails when I post new recipes!
For even more great ideas follow me on Facebook – Pinterest – Instagram – Twitter – Bloglovin’.


Elena says
wow! I am just making them, so far so good.. the dow was easy to make, now I am waiting for them to double up in size again before I put them in the oven. Thanks for this recipe!!
lynndianne says
Is it too early to eat crescent rolls?….
Lynn
Jenny@daysofchalkandchocolate says
ooops, wrong link! Sorry!
http://daysofchalkandchocolate.blogspot.com/2011/12/garage-sale-table-redo-link-party.html
Jenny@daysofchalkandchocolate says
Those look amazing! I wish for one right now! I’d love it if you’d link it up to my party!
http://daysofchalkandchocolate.blogspot.com/2011/11/christmas-chair-monogram.html
Deana@ says
These look great…found you at Whipperberry Party….
Trish@MomOnTimeout says
@Laura at Ms. Smartie Pants Well sometimes I still do 😉 So good!
Trish@MomOnTimeout says
@Shabby chic Sandy That is too funny! Aren’t they amazing? I made up a triple batch and brought them to my Grandma’s for Thanksgiving – they were gone so quick! Thanks for stopping by Mom On Timeout!
Shabby chic Sandy says
This is almost exactly the recipe for what we call in our family “Aunt Eva’s rolls”. I have the same story..Mom would make these for every holiday and would cook the second batch as we were eating. Now I make them every holiday and I’m the one baking them rather than sitting to eat with everyone! I posted a picture of them on my Thanksgiving post. I love them cold for breakfast the next day. We thought it was a secret family recipe!:)
Laura at Ms. Smartie Pants says
You mean you don’t buy yours out of a can??? My mouth is watering just looking at them! Delicious!!!
Evie says
They look oh-so-yummy!!
evie @ brown paper packages
momphotographer says
They look so pretty. I just pinned it to keep for further use (I hope you don’t mind). thanks for sharing.
South Bay Studio says
Those look pretty great, I’ll have to try making
them.Thanks for sharing your recipe. Kathi
Melanie @ bear rabbit bear says
Yummy! Thanks for linking to Things I’ve Done Thursday!
Melanie
Our Delightful Home says
I look forward to making this recipe. Thanks for sharing!
~Mrs. Delightful
ourdelightfulhome.blogspot.com
Pati @ A Crafty Escape says
These look absolutely amazing! I love that you shared the story of what they mean to you. We lost my mom this past May so I am trying really hard to keep the traditions alive for my kids. Thank you.