↑
  • Dinner Recipes
  • Breakfast Recipes
  • Dessert Recipes
  • Side Dishes
  • Recipes
    • Dinners
    • Slow Cooker
    • Appetizers and Sides
    • Breakfast
    • Dessert
    • Beverages
    • Bread
    • Holiday Recipes
    • Kid-Friendly
  • Blog View
  • About
    • Disclosure/Privacy Policy
  • Facebook
  • Pinterest
  • Instagram
  • Twitter
  • Youtube
  • Blog View
  • About
  • Privacy Policy
  • Advertise/PR
  • DISNEY
  • DINNERS
  • DRINKS
  • DESSERTS

Mom On Timeout

Serving up real food for real families!

  • Home
  • Recipes
    • Slow Cooker
    • Appetizers and Sides
    • Breakfast
    • Entree
    • Dessert
    • Beverages
    • Holiday Recipes
      • Christmas Recipes
      • Thanksgiving Recipes
      • Valentine’s Day Recipes
      • St. Patrick’s Day Recipes
      • Easter Recipes
      • Halloween Recipes
    • Bread
    • Kid-Friendly
  • 5 Ingredients
  • Appetizers
  • Favorites


free email course!

5 SECRETS TO GETTING DINNER ON THE TABLE...FAST!

You are here: Home / Crafts / Stained Glass Cross Craft

Stained Glass Cross Craft

March 29, 2012

  • 509

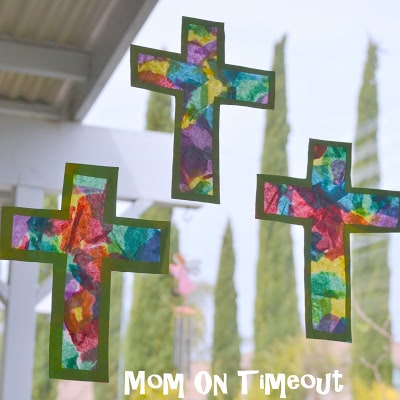
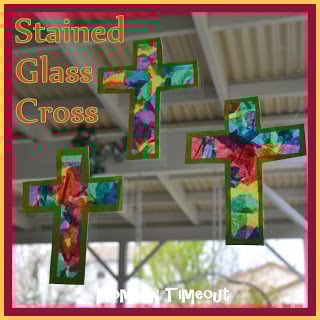
This Stained Glass Cross craft is perfect for kids of all ages and ideal for an Easter craft.

Stained Glass Cross Craft | MomOnTimeout.com #Easter #craft #cross

I love craft projects that I can do with both of my boys. Stained Glass Crosses is a craft project that all ages can help with and the results are spectacular! I think this is a great project to do for Easter and the crosses look beautiful on our sliding glass door.
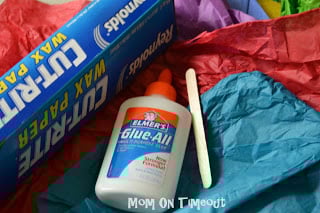
Materials Needed:

  • tissue paper – variety of colorswax paper
  • white glue
  • popsicle stick
  • craft knife
  • scissors
  • cross template (or just draw your own)
  • helpers

Directions:

Find a helper to tear tissue paper into small pieces. Roll out a piece of wax paper that is double the width of the template.

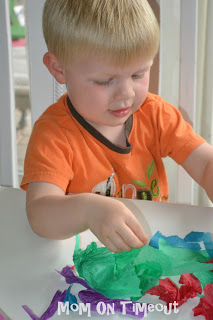
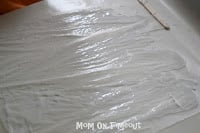
Spread glue onto half of the wax paper using a popsicle stick.

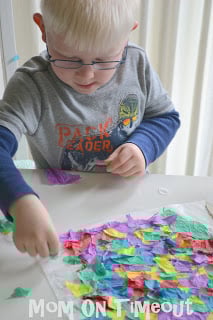
Piece by piece add the tissue paper until all the glue is covered.

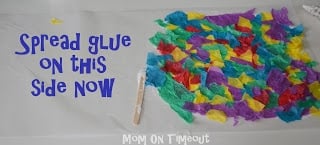
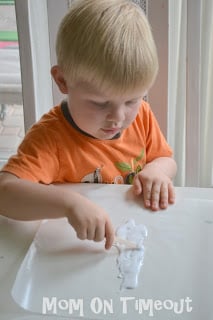
Spread glue onto the other half of the wax paper and fold over on top of the tissue.

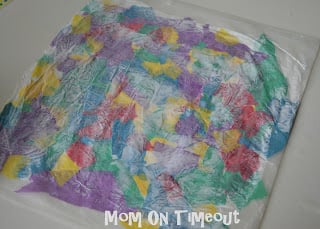
Smooth the paper and let dry. I like to put something heavy on top so it dries nice and flat.

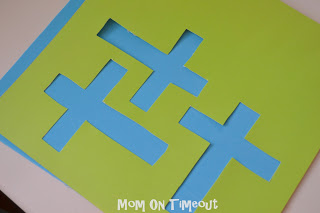
Print out the template and cut out the crosses. I used a craft knife.

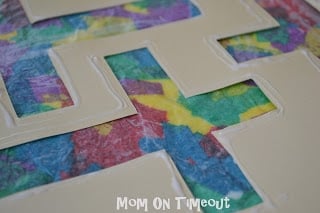
Run a thin line of glue around the perimeter of the crosses on the back of the paper.

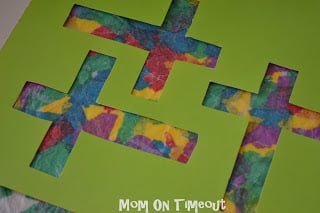
Turn the paper over and glue it to the wax paper. Let dry.

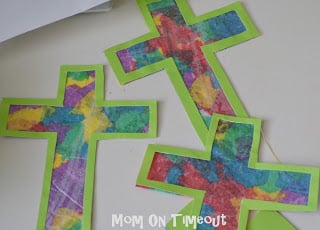
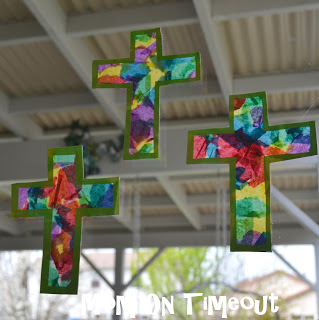
Cut out around the crosses and tape to a well-lit window and enjoy!

Here is some more Easter inspiration!

20-non-candy-easter-egg-stuffers

20+ Non-Candy Easter Egg Stuffers

Coin-Covered-Cross

Coin-Covered Cross

Easter Printables

5 Easter Printables

Mom On Timeout Signature

Connect with me!


Linking up here, Home Stories A2Z, Savvy Southern Style, and My Repurposed Life.

free email course

5 SECRETS TO GETTING DINNER ON THE TABLE...FAST!

enjoy!
  • 509

By Trish - Mom On Timeout March 29, 2012 Crafts, Easter, Easter Crafts, Holiday Crafts, Kids

Previous article:
« 20+ Non-Candy Easter Egg Stuffer Ideas
Next article:
Reese’s Brownie Mini Trifles »

Comments

  1. Allison {A Glimpse Inside} says

    April 5, 2012 at 10:26 PM

    I’ve done projects similar to this before. They look fabulous!
    Thanks for linking up to this week’s Catch a Glimpse Party. I will be featuring these tomorrow!

    Reply
  2. Sara says

    April 5, 2012 at 9:35 AM

    This is so darling!! Hope you can link it up at my turquoise lovin’ party!! (accept all other projects too) http://www.sweetlittlegals.com

    Reply
  3. Mama Jodi says

    April 2, 2012 at 9:56 AM

    Thee turned out beautiful. I absolutely love them, and I appreciate the clear instructions. Thanks!

    Reply
  4. Molly says

    April 2, 2012 at 8:55 AM

    I really love projects that little ones can get involved with, and this is perfect. I’ll be giving it a try this week with my three year old.
    I’d like to invite you to come link these and any of your creative projects up at my *Get Creative* linky party!
    http://www.justalittlecreativity.com/2012/03/get-creative-linky-party-6-and-fabulous.html
    Hope to see you there!
    -Molly

    Reply
  5. sassyaggie says

    April 2, 2012 at 6:51 AM

    These will work great for my CCE class – pinning it!

    Come link it up at http://sassypantsstudio.blogspot.com/2012/04/sassy-sunday-bloghop-9-and-surprise.html

    Cheers – Jen

    Reply
  6. Kathy says

    March 31, 2012 at 9:23 AM

    Great tutorial and thank you for sharing!

    Reply
  7. Michelle Paige says

    March 30, 2012 at 8:59 PM

    Such a fun project! I’m loving your Easter posts! Will you link them up to my Springtime Holiday Link party? I’d love to have you again! –Michelle
    http://michellepaige.blogspot.com/2012/02/springtime-holiday-link-party.html

    Reply
  8. Linda says

    March 30, 2012 at 8:55 PM

    Very, very nice. I love them. Happy Easter! Linda

    Reply
  9. Danni Baird @ Silo Hill Farm says

    March 30, 2012 at 5:35 PM

    These are so beautiful! I was stunned to see they were made by children! Nice job and super simple!

    Reply
  10. Cari and Cortnee @ Two Sasters says

    March 30, 2012 at 11:05 AM

    Love this!!! They came out really nice! We are hosting a party today and would love to have you stop by and share this!!
    Have a great weekend!
    Cari
    twosasters.com

    Reply
  11. Barb @ A Life in Balance says

    March 30, 2012 at 6:55 AM

    The perfect Easter craft for spring break! My kids did something similar at school though I love the green frame on yours.

    Reply
  12. Aisling Beatha says

    March 30, 2012 at 12:12 AM

    Thats a new way to me for doing the stained glass. I like it.

    Reply
  13. Lisa @ Fern Creek Cottage says

    March 29, 2012 at 7:30 PM

    These are really beautiful! I’ve been looking for a Easter project that my boys could do together (they are 12 and 3 so it’s hard to find something). I think this will be the perfect thing!

    Reply
  14. Charley says

    March 29, 2012 at 6:10 PM

    Love it! I have used contact paper before for the same effect but this is no fun with little ones. I am going to use this with my Wed. night preK class. Thanks!

    Reply
  15. Kristin says

    March 29, 2012 at 2:17 PM

    These are the PERFECT Easter craft project for all of us. Thank you for sharing and reminding me of how beautiful this project really is!

    Reply
Newer Comments »

Leave a Reply Cancel reply

Your email address will not be published. Required fields are marked *

Recipe Rating


This site uses Akismet to reduce spam. Learn how your comment data is processed.

Hi, I’m Trish!

Welcome to Mom On Timeout where I’m serving up real food for real families! Dinners, desserts, and everything in between!
Read More…

categories

archives

Popular Posts

white bowl with handles filled with zuppa toscana soup and topped with cheese. Kale, sausage and bacon can be seen in the soup.
crockpot chili in a ladle held above the crockpot and the rest of the chili.
chicken-stir-fry
best-tater-tot-casserole-recipe-hamburger-green-beans

Some of my favorites…

slice being removed from a vanilla cake with raspberry buttercream. cake is decorated with fresh raspberry and mint leaves.
plate filled with cherry pineapple dump cake and topped with a scoop of vanilla ice cream that is just beginning to melt. cherries and pineapple chunks are visible in the cake.
lemon meringue cupcake with bite taken showing the lemon curd in the middle of the cupcake and the pretty white interior of the meringue.
mini cheesecakes sitting on a gray plate topped with whipped cream, raspberries and mint leaves.
cake made with cinnamon rolls on a white cake stand and topped with cream cheese frosting and mini cinnamon rolls.

Copyright ©2023, Mom On Timeout. All Rights Reserved.
Design by Pixel Me Designs
  • Facebook
  • Twitter
  • Pinterest