
I often feel bad for Thanksgiving. It seems that it is often overlooked in the rush of excitement to get to Christmas. Thanksgiving is an important holiday for families and I love that there is not much stress involved in the planning and preparation. It’s a holiday that can be enjoyed by everyone and a chance to express what we are thankful for in our lives.
To help my children experience the true meaning of Thanksgiving and to place more emphasis on this sometimes forgotten holiday, I made a Thanks Giving Tree. I put it up right in our entry hall so we will all pass by it many times a day reminding us of all that we have to be thankful for.
This tree would be awesome for any Thanksgiving guests you are having. Have each guest write down one or two (or more!) things that they are thankful for in their lives and watch the tree grow right before your eyes. Just a fantastic way to visualize and represent how much we all have to be thankful for.
 Materials:
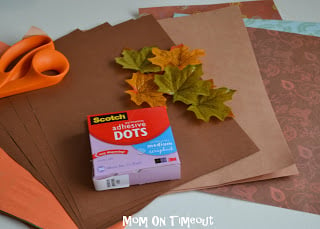
brown and fall colored paper
leaf template
scissors
glue dots, adhesive putty, or tape
Instructions:
I made the tree out of brown paper. Just cut out a trunk and some branches and stick it to your wall. I used glue dots but adhesive putty or even tape would work just fine.

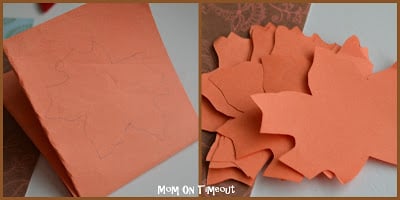
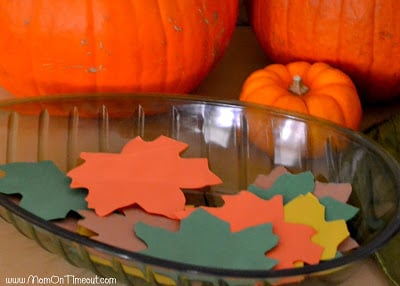
Once your tree is looking good, it’s time to cut out some leaves. I traced the leaf onto four different colors of paper and cut them out. You can use the template here. Make sure you cut out plenty so that when you want to add a leaf to the tree you don’t have to cut more out.
I supplemented the paper leaves with some leaves that I got at the dollar store. I don’t have any fancy machines but I printed out “Give Thanks” in a font and size that I liked. Cut it out and put it above the tree.
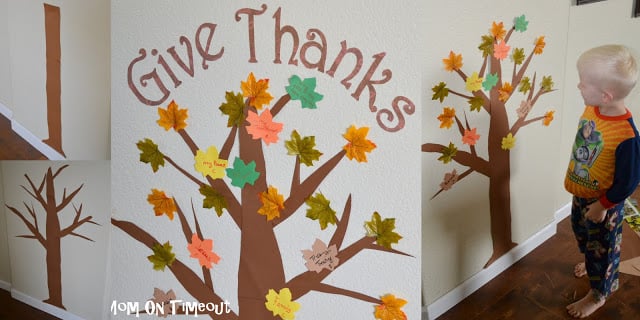
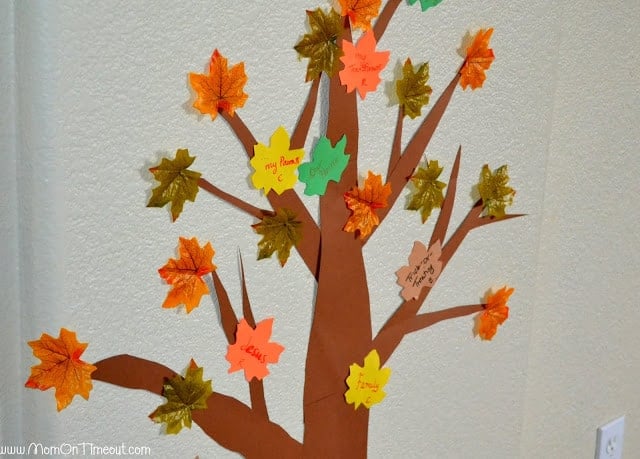
Each person in our family has different color leaves and anytime we are feeling thankful for something, we can write it down on the leaf and add it to the tree. As we realize how much we have to be thankful for, our tree continues to grow.


Connect with me!


Mom to 2 Posh Lil Divas says
Thanksgiving definitely gets the short end of the stick. It is one of my favorite holidays.
I really like your thankful tree – we did a mini version of this with a wreath. I would love to do something like this though.
Thanks for sharing & linking to the Sunday Showcase! Hope to see you this week.
Bern
http://momto2poshlildivas.blogspot.com/search/label/Sunday%20Showcase
Jessica Blankenship says
That is so adorable. If I didn’t live in an apartment, I’d make one =)
Im your newest follower. WOuld love a follow back.
Lowri says
Thanks so much for letting me link this post up at Tip Junkie!
You can see it here http://www.tipjunkie.com/15-terrific-thanksgiving-papercraft-tutorials-paper-crafts/
Lowri
Lindsay says
This is the best idea for kids! Perfect for this time of year, and a great reminder of all the blessings we have! Thanks for linking up at Show & Share! I appreciate your support!
Flair For Home says
How cute!!!!!! I love this!!!!! Thank you for this great post!!!!!!
Audra says
Love this idea. Such a great visual reminder of what this holiday is all about!
Kelli says
This is so adorable! I’d love for you to come link up in my Thanksgiving Crafts & Recipes Link up! It just went live! Thank you!
Kelli
http://3boysandadog.com/deals/2011/thanksgiving-craft-and-recipe-link-up/
Tonia @ TheGunnySack.com says
This is super cute! We need to spend more time thinking about what we are thankful for! Thanks for your continued support of What’s In The Gunny Sack.
Marie says
Love this idea for kids!
Marie
mylilpinkpocket.blogspot.com
Coleen McCrea Katz says
Visiting from the Hungry Hypo link party. Great idea!
~Joy-N-Jesus~ says
that is awesome! Love it!
Carrie says
What a fantastic way to teach gratitude to your little ones. Thanks for linking up to Refresh Your Nest Friday!
Good Girl Gone Green says
Great idea! 🙂
Quilted Cupcake says
What a great idea! I’m a big fan of Thanksgiving – already can’t wait for it to be here!
Please consider adding your post (and any others you like) to my weekly Thrifty Thursdays blog party. Here’s the link: http://quiltedcupcake.blogspot.com/2011/11/thrifty-thursdays-5.html
Tricia says
I need to make one of these for our family! Thanks for sharing!
http://makingitfeellikehome.blogspot.com