Have you ever tried making yogurt at home? It’s really easy to do and you don’t need a fancy yogurt machine either. All you need is a slow cooker!
Let me show you How To Make Yogurt In A Slow Cooker!
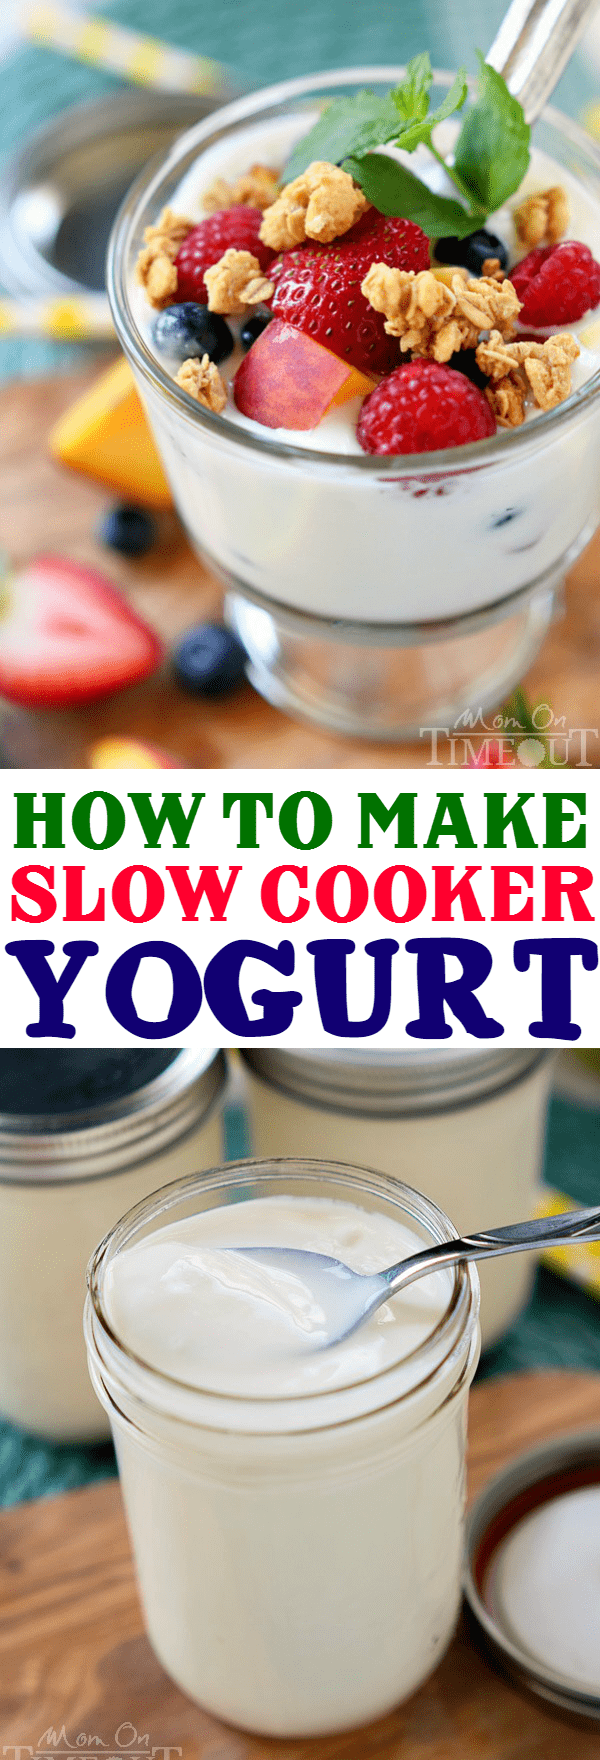
We eat a lot of yogurt in our house. Breakfast parfaits or as we call them “energy bowls” are eaten several mornings each week and are frequently brought to Saturday swim meets for a healthy snack or convenient breakfast.

Making our own yogurt is not only cost effective, it’s a great way to control what goes into the yogurt we eat. And, milk’s versatility offers almost endless options for making your own variations of cheese, yogurt or ice cream at home to fit your personal tastes and preferences. Are you ready for this? Let’s get started!
I’m going to walk you through this step by step because the first time does require a little hand holding 🙂
First thing we do is pour a half gallon of milk into a slow cooker and turn it on high. We are going to bring the temperature to between 180°F-185°F. Here’s the good news, this recipe is SUPER forgiving. I made a batch that heated up to 210°F and it still turned out perfectly. That’s why this recipe is so awesome – you really can’t mess it up. It takes my slow cooker a little over 2 hours to get to the right temperature. Somewhere between 2 and 2 1/2 hours.
I used whole organic milk because this yogurt is going to be consumed by my boys. You can use any type of milk with any amount of fat content and this recipe will still work. The more fat there is in your milk, the thicker the yogurt will be. The great thing is, no matter what type of milk you choose, all milk has 9 essential nutrients including 8 grams of high-quality protein (in every 8 ounce serving), B vitamins for energy, protein for lean muscle, vitamin A for a healthy immune system and other bone-building nutrients, including calcium and vitamin D. Milk packs quite the punch.
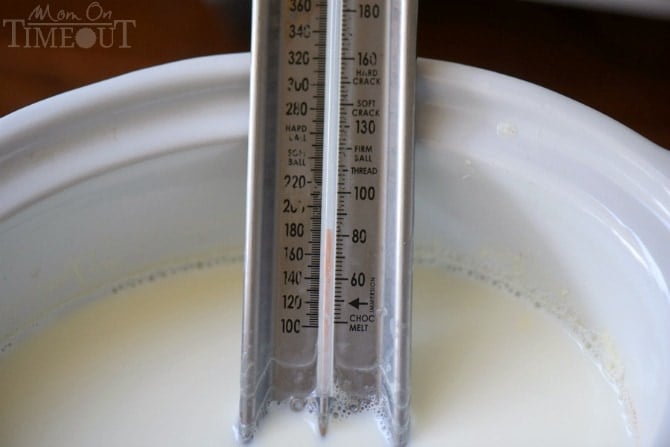
After the milk has been brought to 180°F we are going to drop the temperature to around 115°F. Anywhere between 110°F and 120°F is great. To do this, simply turn off your slow cooker and walk away.
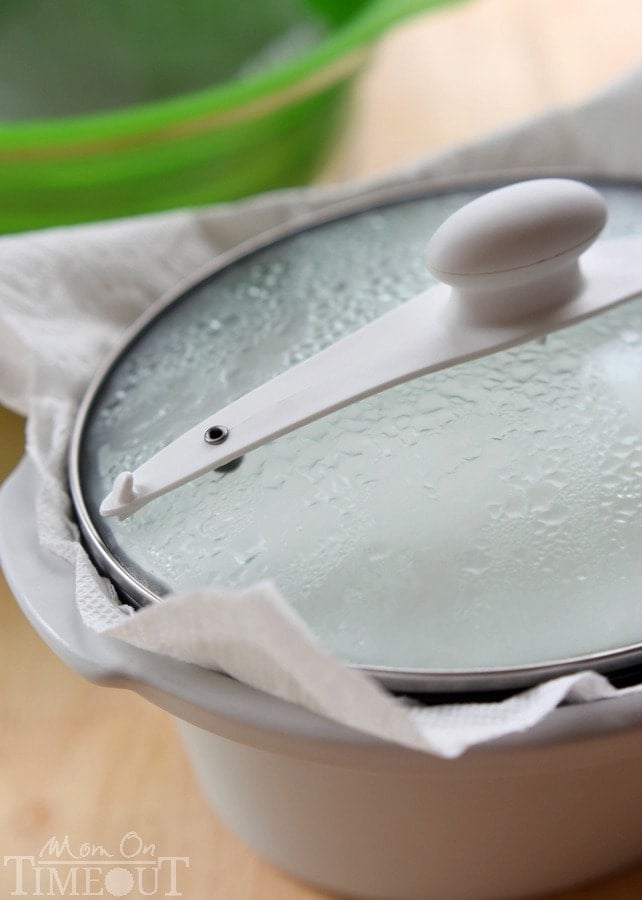
You can pop the lid a bit to let the steam escape. Also, I recommend placing a paper towel between the lid of your slow cooker and the insert to collect the steam. This way, when you pick up the lid, the water doesn’t drop into your yogurt. If your milk has developed a skin, that’s okay, carefully scoop it out and remove it.
At this time, you are going to set out one-third cup of yogurt. I used Greek but any yogurt will do. We just need the yogurt to introduce its bacteria to our milk so they can become friends and make more yogurt. Right now, we just want it to come close to room temperature so when we mix it in with the milk (next step), it doesn’t drop the temperature.
Okay. So now it’s time to mix the yogurt in with the 110°F milk. To do this, scoop out about 1 cup of the milk and mix it in every so gently with the yogurt in a small bowl. Lovingly. Gently. We want the live cultures to not be disturbed overly much. Now you are going to drizzle the yogurt and milk mixture over the top of the milk in the slow cooker. DO NOT STIR IT IN. I tried this three different ways and not stirring it into the milk worked the best.
Now comes the next step, leaving it to incubate for 8 hours overnight. Again, I tried this many different ways and my favorite way is this:
Wrap the slow cooker in a large towel and very carefully transfer the slow cooker to your oven. Make sure your rack is placed low enough that the slow cooker or at least the slow cooker insert and lid will fit. You don’t want to be knocking it around. Turn the light on in your oven. This will keep the temperature nice and warm so the milk can make that magical transformation into yogurt….tada!
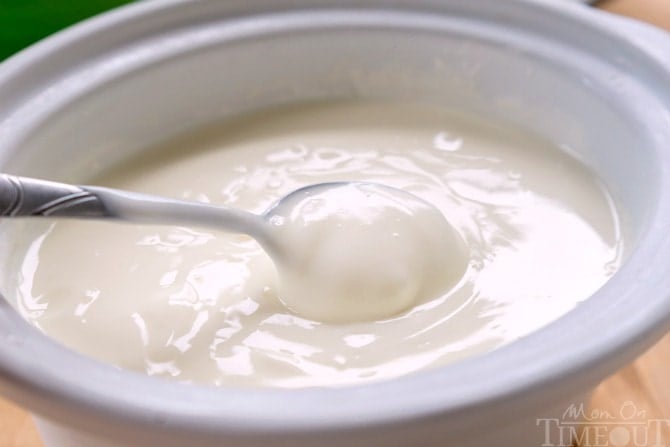
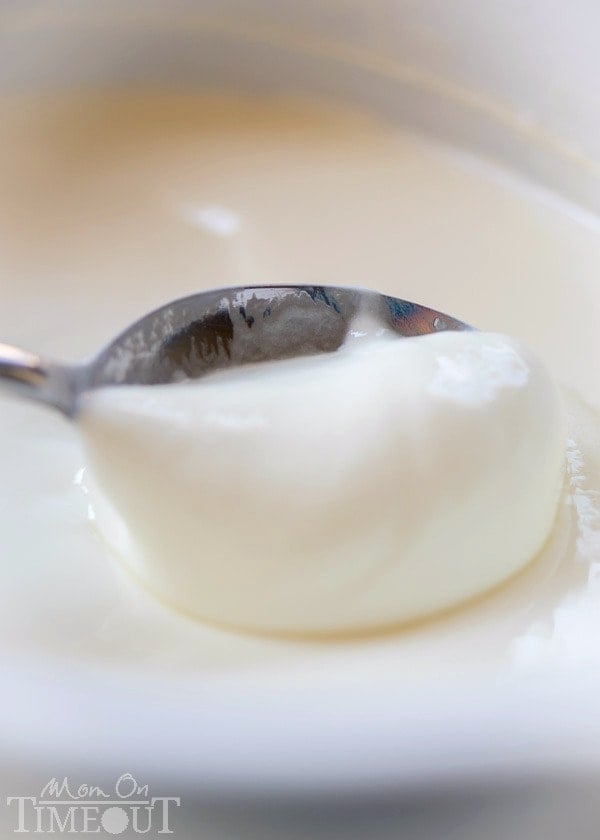
This is straight out of the oven. Now it’s time to cool it down. Refrigerate the yogurt for at least four hours. This will allow it to set up more firmly. Here’s what it looks like now:
Now we come to the final step in the game, which is totally optional. If you are happy with the consistency of your yogurt – you’re done! Transfer to airtight containers and pop in the fridge.
If you want your yogurt a bit thicker, and we do, continue on to the next step – straining.
Many people use cheesecloth to strain the whey from the yogurt – that’s the yellow liquid that causes a thinner consistency (and does a whole bunch of other stuff too). Cheesecloth sucks in my opinion. Even when I quadruple layer and then double that up, I still lose some of the yogurt, not just the whey. No bueno.
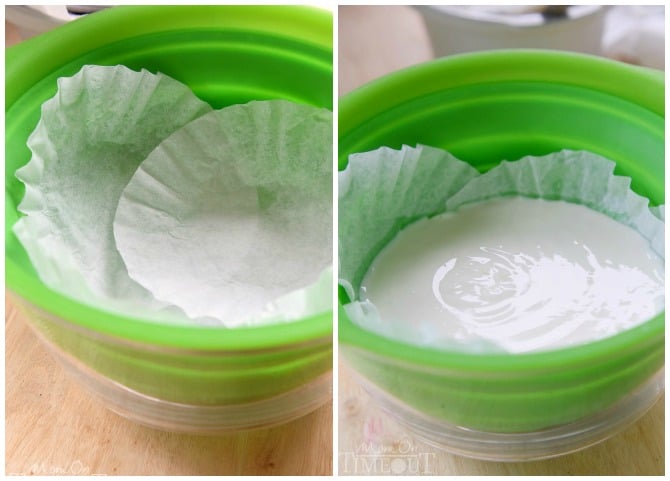
Here’s the trick – coffee filters! I don’t even have a coffee machine that uses filters but a big pack of these is like $1.49 at Target. Place a colander over a large bowl and line the colander with coffee filters. One on the bottom and then up the sides as needed. Transfer some of the yogurt to the colander and allow the whey to strain out. This takes about 30 minutes. The coffee filters only allow LIQUID to pass through – no solids, keeping all of your yogurt safe from harm. Also, it’s much easier to scrape the yogurt from a coffee filter than a cheesecloth, am I right?
Now you’re going to want to do this in batches to get the maximum amount of whey out of your yogurt. I usually divide it up into three batches or so or use multiple colanders. This is what you get out of your yogurt:
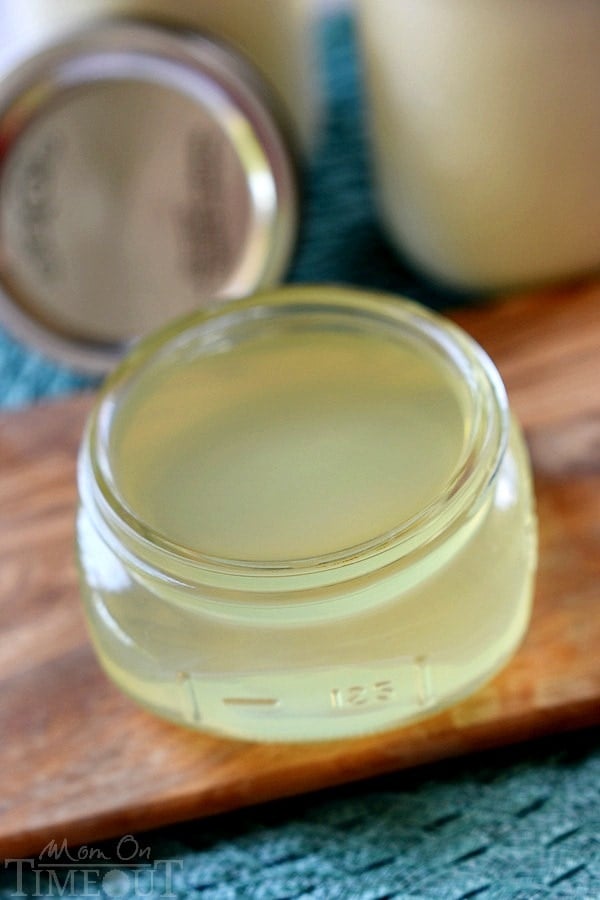
That’s the whey. I toss mine but I’m sure there is some use (???) for this stuff.
What you’re left with is a thicker, more naturally sweet yogurt that’s just ready and waiting for you to dress up as you please.
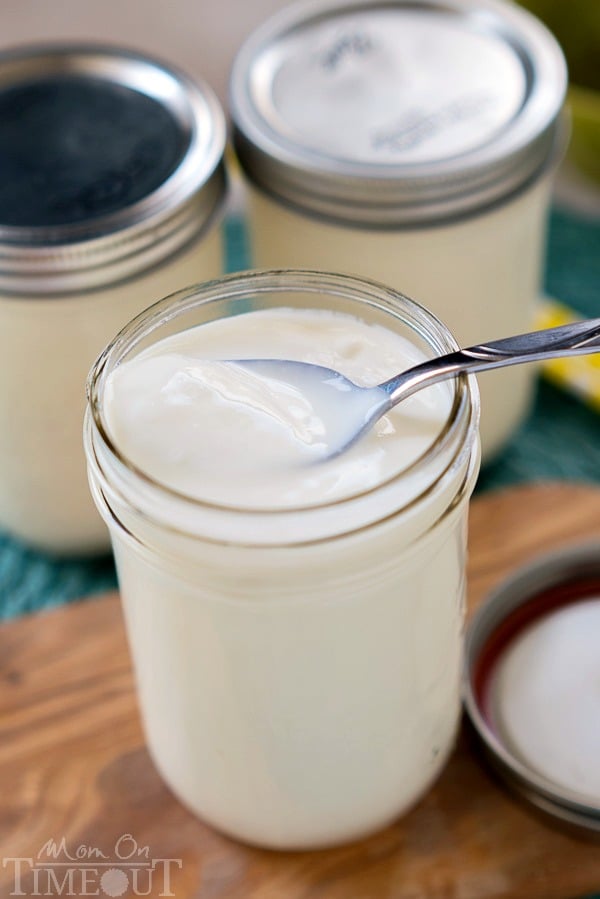
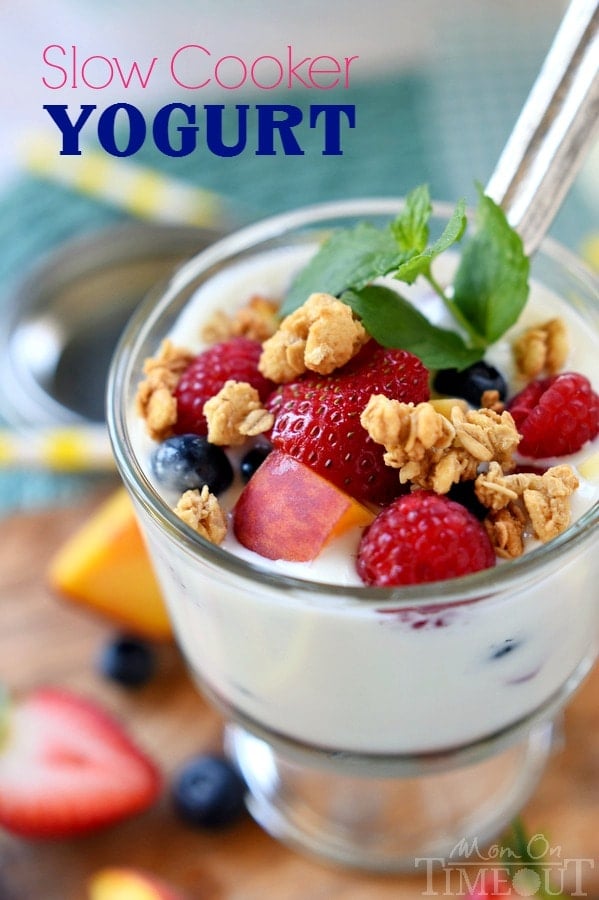
I get about 6 cups (plus or minus a cup) from a half gallon of milk. It’s a pretty good yield considering the only byproduct is that whey. I like to divide the yogurt into small mason jars in the fridge. In the morning, I add some fresh fruit, maybe some granola, and a couple of drizzles of honey to sweeten it up. My husband takes it to work like that.

So there you have it! It can seem like a lengthy process, cause it is, but the amount of actual work involved is very minimal. I also love the fact that I know what I’m giving my family since milk is a whole, naturally nutrient-rich food. I’d love for you to give this a try and remember, save some of this yogurt so you have a starter for your next batch!

How To Make Yogurt In A Slow Cooker!
Ingredients
- 1/2 gallon milk I used whole milk
- 1/3 cup yogurt room temperature (I used Greek)
Instructions
- Pour a half gallon of milk into a slow cooker and turn it on high. Bring the temperature to between 180°F-185°F. This should take somewhere between 2 and 2 1/2 hours.
- After the milk has been brought to 180°F , turn off the slow cooker and drop the temperature to around 115°F. Anywhere between 110°F and 120°F is great.
- Set out one-third cup of yogurt on the counter and let it come to room temperature.
- Mix the yogurt in with the 110°F milk. To do this, scoop out about 1 cup of the milk and mix it in every so gently with the yogurt in a small bowl. Drizzle the yogurt and milk mixture over the top of the milk in the slow cooker. DO NOT STIR IT IN.
- Wrap the slow cooker in a large towel and very carefully transfer the slow cooker to your oven. Make sure your rack is placed low enough that the slow cooker or at least the slow cooker insert and lid will fit. You don’t want to be knocking it around. Turn the light on in your oven to keep the milk warm. Leave the milk here, undisturbed, for at least 8 hours or overnight.
- Remove the yogurt from the oven and refrigerate the yogurt for at least four hours. This will allow it to set up more firmly.
- If you want your yogurt a bit thicker, and we do, continue on to the next step – straining.
- Place a colander over a large bowl and line the colander with coffee filters. One on the bottom and then up the sides as needed.
- Transfer some of the yogurt to the colander and let it strain for about 30 minutes. Do this in batches.
- Transfer yogurt into airtight containers and store in the refrigerator for up to a week.
Nutrition
More recipes to make with milk products:

Monster Cookie Dough Ice Cream

Banana Pudding Pie – from scratch!

Connect with me!
![]()


![]()
Linking up at some of these parties.
Disclosure: This post is sponsored by MilkPEP. All opinions are, as always, 100% my own. Thank you for supporting the brands that I love and that make Mom On Timeout possible!


Rolling Sky says
Wow, I love yogurt, thanks for sharing this recipe. I will try to make it.
Trish - Mom On Timeout says
Have fun!
Marisol says
I just made this recipe yesterday but I have a question, when I took the crockpot out of the oven the yogurt was stiff, it didn’t look creamy like yours in the photo, And I don’t know if I did something wrong ’cause after refrigerate it, it has little lumps. I’m wondering if I didn’t mix well the milk with the yogurt or the yogurt that I use wasn’t good enough. I’ll keep trying! Thanks for the recipe!
Trish - Mom On Timeout says
Yeah, that doesn’t sound right Marisol… It shouldn’t look like that.
Rachel says
I love making this! How can we make it sweeter? I’m trying to get my family off the store bought sweet stuff to this but we won’t switch cold turkey. We use homemade jam for now but if like to sweeten the base.
Trish - Mom On Timeout says
I’m not sure about sweetening the yogurt while it’s cooking. I always add stuff in later like fresh berries.
Bridget foley says
I have just put this in my crock pot. I have used goats milk. I really hopes it works as I am aiming to make beetroot labna as the final product
Lisa says
This is the most interesting recipe I have seen in a while. What a fantastic recipe! And the yogurt looks so luscious and creamy.
Christine says
I look forward to trying it! I am a huge yogurt fan. There is nothing like the sweet taste of fresh homemade yogurt!