Anyone can make this DIY Garden Planter Box!

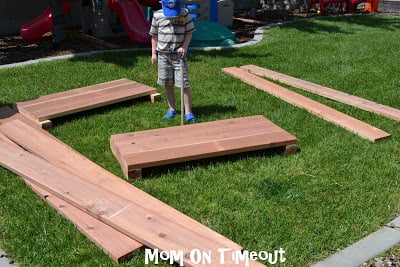
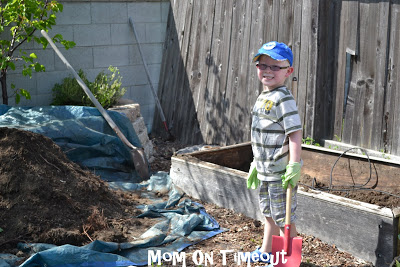
I’m so excited to share my new planter box with you! This was sooooo easy to do! Honestly, anyone can make this planter AND you can do it in just a couple of hours! Maybe less if you don’t have 5 and 3 year old helpers 😉
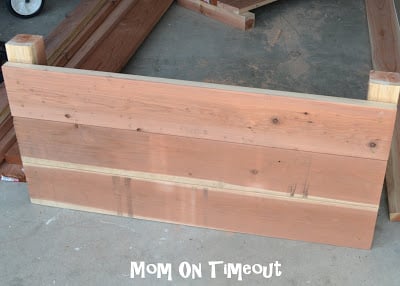
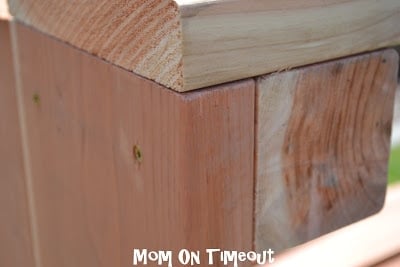
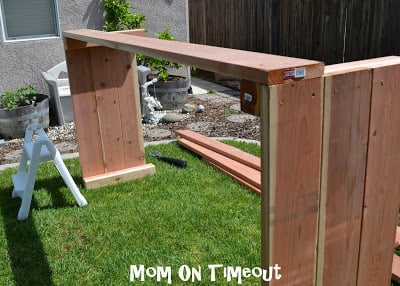
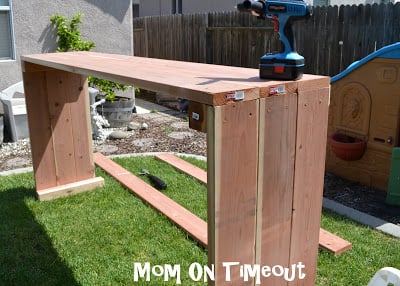
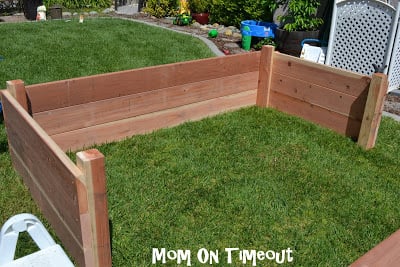
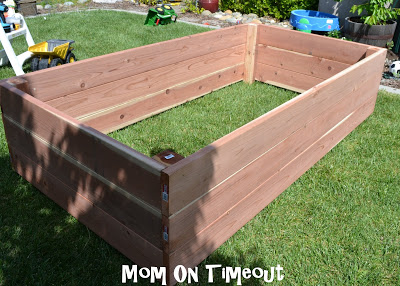
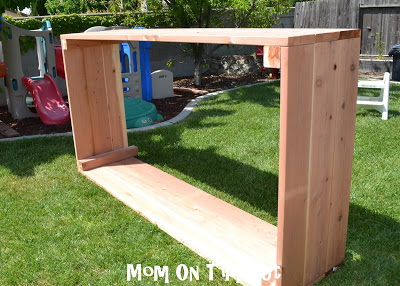
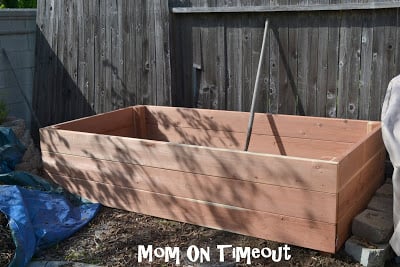
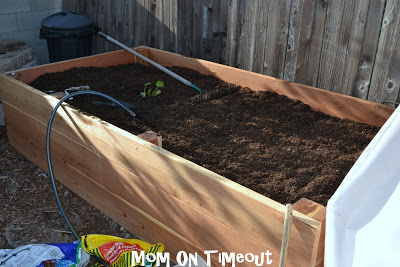
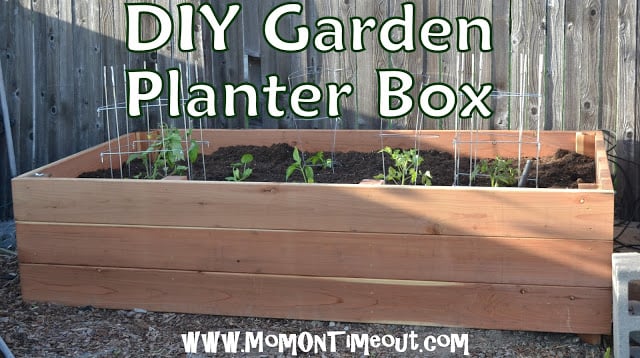
Last year we decided that we would build a new planter box this year because we were having a hard time growing veggies in our current planter boxes. They just weren’t deep enough! We have clay soil so once the roots hit the clay – well, let’s just say it isn’t pretty. A couple ideas were tossed around and we finally decided on the following design:
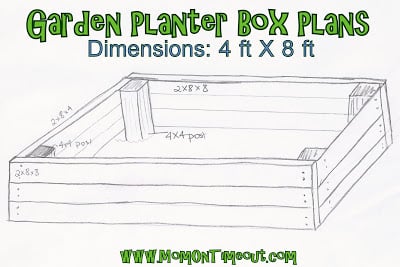
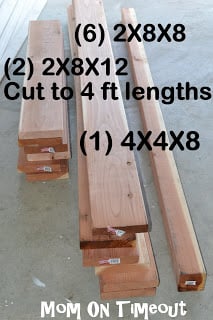

We purchased the materials at Lowes and it came to just under $170 including tax which I think is a fair price for a planter box this large. Too big for your space?? Redwood too expensive? This design can easily be modified to any size planter you desire and you can use lumber that works for your budget. For example:


Kathy Michaels says
very nice. My dad and hubby are going to build me 2 8X2 X12 boxes for my greenhouse. Then they are going to build a second box attached for the top of each that will be 1 X 8 X 12. Anxious to see the end result and will post pictures.
Kathy Michaels says
so the boxes are finished and if you want to see go to my facebook under Kathy Michaels.
Patti Hafer says
Thank you for this simple yet excellent idea. My Lowe’s cut my 4×4 in half for me for easy transport home but I was also in a cast at the time from surgery. He simply used a box saw and cut it in half. Guess I could have done the same. With RA and numerous back surgeries, your raised garden box has allowed me to regain my love of gardening and enjoying the outdoors. And…I don’t have to fight the rabbits!! Love it!!
David A. Horton says
Very nice plan. Will give it a go this weekend with the wife.
Nicole says
Hi Trish,
Can’t wait to give this a shot. Just wondering what type of wood you used? And do you know if it matters what type as far as it being healthy for the plants you are growing?
Thank you!
Melissa says
How tall is the garden bed when built?
Trish - Mom On Timeout says
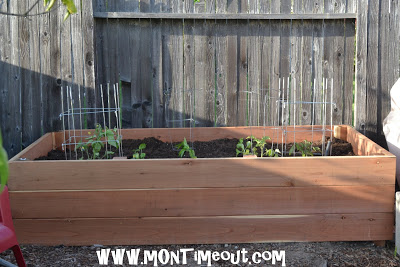
It depends on how many rows you and how wide your boards are. Mine is 2 feet tall.
Mama Ames says
My 13 year old daughter and I found your tutorial this morning, went to Lowe’s and bought everything, came home and built it in less than 2 hours! Your directions were EXCELLENT! It looks perfect and we can’t wait to get planting!
geoffcg says
Thank you for these simple instructions! I built a 3′ x 6′ version for my small space. Looking forward to spring!
Trish - Mom On Timeout says
I’m getting excited for Spring too! Thanks for stopping by!
Kylie Helm says
This tutorial was AWESOME! It looks so simple to do. This would look perfect in our backyard, I need to head to home depot as we speak! Thank you for sharing.
-Kylie
absolutelyarkansas.blogspot.com
Jenny @ The NY Melrose Family says
I love the color. You did such a great job with giving the dimensions. It makes it so simple to replicate. Thanks so much for sharing at Whimsy Wednesdays.
Natasha SerenityYou says
i so need one of these
Cant wait to see what you link up later today on Serenity Saturday
Natasha xxx
Holly says
What a great tutorial! I have been wanting to put a raised bed in our backyard, but wanted to build my own as opposed to buying one. We have lots of wild rabbits in our neighborhood and they seem to LOVE our plants. Need a way to get what I want and keep the little critters out. 🙂
Jane Craske says
This is so very fabulous! Thanks so much for atking the time to share at last week’s Pin’inspiration party. You are a feature this week C:
Paula Parrish says
Hello Trish,
Great tutorial. Thanks for sharing.
Smiles, Paula