↑
  • Dinner Recipes
  • Breakfast Recipes
  • Dessert Recipes
  • Side Dishes
  • Recipes
    • Dinners
    • Slow Cooker
    • Appetizers and Sides
    • Breakfast
    • Dessert
    • Beverages
    • Bread
    • Holiday Recipes
    • Kid-Friendly
  • Blog View
  • About
    • Disclosure/Privacy Policy
  • Facebook
  • Pinterest
  • Instagram
  • Twitter
  • Youtube
  • Blog View
  • About
  • Privacy Policy
  • Advertise/PR
  • DISNEY
  • DINNERS
  • DRINKS
  • DESSERTS

Mom On Timeout

Serving up real food for real families!

  • Home
  • Recipes
    • Slow Cooker
    • Appetizers and Sides
    • Breakfast
    • Entree
    • Dessert
    • Beverages
    • Holiday Recipes
      • Christmas Recipes
      • Thanksgiving Recipes
      • Valentine’s Day Recipes
      • St. Patrick’s Day Recipes
      • Easter Recipes
      • Halloween Recipes
    • Bread
    • Kid-Friendly
  • 5 Ingredients
  • Appetizers
  • Favorites


free email course!

5 SECRETS TO GETTING DINNER ON THE TABLE...FAST!

You are here: Home / Crafts / Wintry Pinecone Vase {Tutorial}

Wintry Pinecone Vase {Tutorial}

January 9, 2012

This winter I have had a fascination with pinecones that I can’t quite explain. I just think they are so beautiful. Anyways, I had collected quite a few during December with the intentions of doing some crafts with the kids with them. It didn’t happen. Sooo, I had these beautiful pinecones lying around and decided to do something with them. My house could certainly use a little sprucing up right now 🙂   I decided to make a pinecone vase and here’s what I did…
 
The first step was cutting the pinecones in half so that they would lay flat against the vase. I used my garden shears for most of the cutting. The idea is to cut the pinecones down the center. This was really easy on some of them and a total pain on others. On all but two pinecones, I lost one half in the process. I thought I wouldn’t be able to use those pieces but ended up gluing them on anyways 🙂

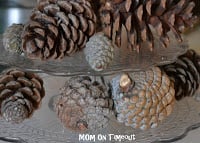
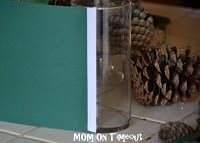
I found a vase that was collecting dust I could use. (I originally purchased this vase from the Dollar Tree.)  I didn’t want to have to worry about the glass cracking or scuffing it up or anything so I measured the vase and cut a piece of cardstock that fit around the vase. I laid out my pinecones to make sure I had enough and to see how they would look.

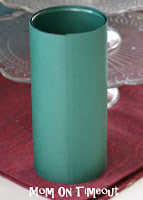
I used double-sided tape to secure the paper to the vase. Then I wrapped the paper around and secured it to the other side of the tape. I also used one more strip of tape halfway through to make sure the paper was nice and snug.

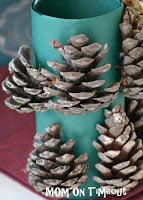
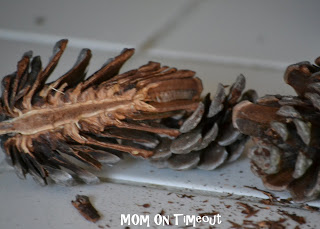
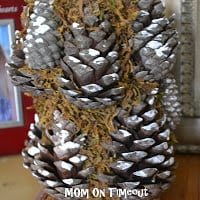
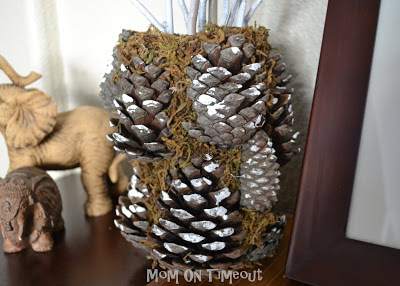
Next, I started gluing on the pinecones. I used hot glue and ran the glue down the center of the pinecone concentrating on the high spots to make sure the pinecone would adhere well to the cardstock.

After gluing on 4-5 pinecones, I started to add in the moss. I used floral moss (leftover from a previous project and also purchased at Dollar Tree)I kept working my way around the vase, gluing on pinecones and moss until the entire vase was covered.

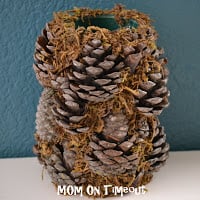
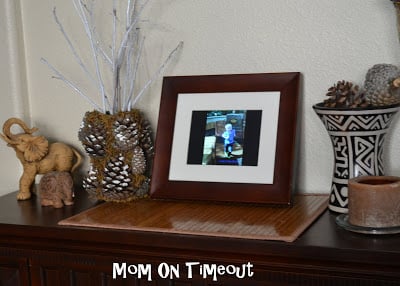
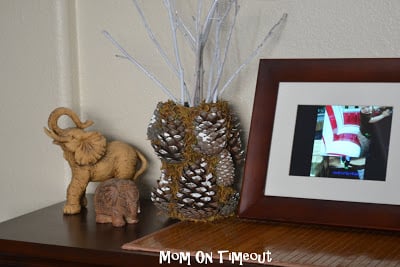
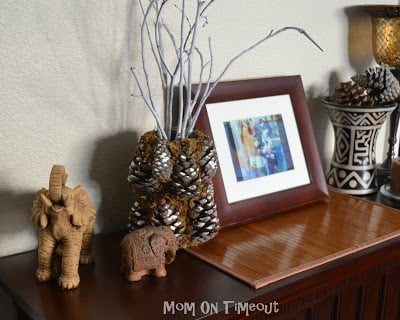
This is the end result. I am so happy with how it turned out. You know how you envision something in your mind and then it turns out even better? This was one of those times. The pictures really do not do it justice. Reece was really impressed with the outcome and told me, “You did a good job Mommy!” That’s all the praise I need 🙂  My kids love pinecones too 😉

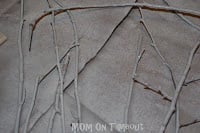
Leaving it like this would have been fine but I wanted to add a few wintry touches to the vase and I needed to put something inside. I spay painted a few twigs white. I sprinkled on some glitter while the paint was still wet to add just a little sparkle.

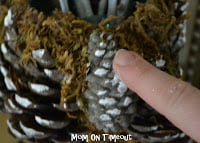
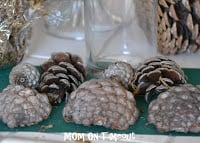
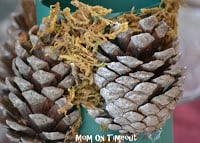
I also added some “snow” to my pinecones by dipping my finger in white acyrclic paint and applying it with my fingertips. Just a little dab here and there did the trick.

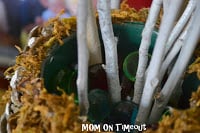
I filled the vase with some glass rocks and arranged the white twigs.
I really love how it all turned out!

I tried it on our entry table first…
 But then moved it to our “fireplace”. This is where it will stay for the rest of winter 🙂


 Linking up here and Home Stories A2Z.
free email course

5 SECRETS TO GETTING DINNER ON THE TABLE...FAST!

enjoy!

By Trish - Mom On Timeout January 9, 2012 Crafts

Previous article:
« Fried Ravioli Recipe
Next article:
Let It Snow Plaque »

Comments

  1. privatekonomi says

    January 29, 2014 at 3:37 PM

    I do not even know how I ended up here, but I thought this
    post was good. I do not know who you are but definitely
    you are going to a famous blogger if you aren’t already 😉 Cheers!

    Reply
  2. Alison @ Oopsey Daisy says

    February 29, 2012 at 7:53 PM

    I love how “earthy” and natural this is! And the snowy paint treatment was so smart!

    Reply
  3. Kristi says

    February 18, 2012 at 7:35 PM

    I love this, Trish! At the soccer fields where my son plays, my older son runs around and collects pine cones from all the trees. We have quite a collection….now I have a great way to use them! Very creative! Thanks so much for linking this up with Mop It Up Mondays at i should be mopping the floor last week. Enjoy the rest of your weekend!
    {HUGS},
    kristi

    Reply
  4. The Belly Dancer says

    January 22, 2012 at 10:12 PM

    I love it! It’s gorgeous! I collect pine cones too. I love them, they are like brown roses! I have a lot of them, have been saving them for a project, great inspiration! New follower from the creative bloggers party and hop.

    Reply
  5. WhyCuzICan says

    January 22, 2012 at 6:43 PM

    Very sculptural- love it!

    Visiting via: Homemaker on a Dime- Creative Blogger linky party,
    ~Suzanne in NW Illinois from WHYCUZICAN
    Thanks for sharing 😀

    Reply
  6. Lisa says

    January 20, 2012 at 7:08 PM

    Very creative!

    Reply
  7. Carrie says

    January 17, 2012 at 12:23 PM

    I’m really into pinecones lately. This is a new way to use them for sure! Thanks for linking up to Refresh Your Nest Friday!

    Reply
  8. Serendipity and Spice says

    January 16, 2012 at 3:21 PM

    Wow! I love bringing outdoor elements inside during the winter– it just makes things feel natural and cozy… not so cooped up. 🙂

    I’m hosting a winter link party today and would love for you to link this up!
    http://www.serendipityandspice.blogspot.com

    -Melissa

    Reply
« Older Comments

Leave a Reply Cancel reply

Your email address will not be published. Required fields are marked *

Recipe Rating


This site uses Akismet to reduce spam. Learn how your comment data is processed.

Hi, I’m Trish!

Welcome to Mom On Timeout where I’m serving up real food for real families! Dinners, desserts, and everything in between!
Read More…

categories

archives

Popular Posts

white bowl with handles filled with zuppa toscana soup and topped with cheese. Kale, sausage and bacon can be seen in the soup.
crockpot chili in a ladle held above the crockpot and the rest of the chili.
chicken-stir-fry
best-tater-tot-casserole-recipe-hamburger-green-beans

Some of my favorites…

mini cheesecakes sitting on a gray plate topped with whipped cream, raspberries and mint leaves.
cake made with cinnamon rolls on a white cake stand and topped with cream cheese frosting and mini cinnamon rolls.
one slice of lemon meringue cheesecake sitting on a white plate with the rest of the cheesecake seen in the background next to a small bottle of milk. lemon slices near the front of the plate.
Three creamsicle cookies stacked with the top cookie has a bite taken out of it.
top down view of three coconuts scones stacked on top of each other and topped with coconut icing and chocolate shavings.

Copyright ©2023, Mom On Timeout. All Rights Reserved.
Design by Pixel Me Designs
  • Facebook
  • Twitter
  • Pinterest