Last Thursday I was in a pinch to prepare something for Reece’s Christmas party at school. My sister was over and suggested we whip up some popcorn balls. Popcorn balls are a Christmas family tradition for us. My Grandma makes several batches and makes a variety of colors. They are so fun to make and fun to eat too! Easy, easy easy! They require only a few ingredients and are YUMMY!

Ingredients:
1 lb marshmallows
1/2 c butter
1 tsp vanilla
popcorn
food coloring (optional)
non stick baking spray
Directions:
Preheat oven to 200 degrees. Spray a 9×13 baking dish with non-stick spray.
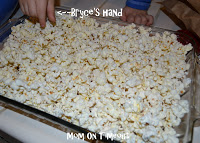
Pop enough popcorn to fill a 9×13 baking dish and have a couple of extra cups on the side to use if needed. Keep the popcorn warm in the oven.
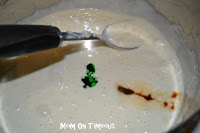
Melt the butter and marshmallows together in a large pot. Once the marshmallows are fully melted, turn off the heat and add in the vanilla and food coloring. I start with a couple of drops and then add more as necessary. It just depends on how deep you want the color to be and how much food color you want to use.
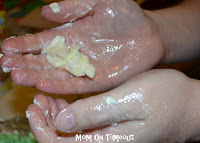
Pull the baking dish full of popcorn out of the oven. Drizzle the marshmallow and butter mixture over the popcorn – get as much out as you can because it’s sticky. Now comes the fun part. You can either spray your hands with the baking spray or cover them in butter. The marshmallow mixture is HOT so be careful. The butter or spray is to protect your hands from the heat as well as to keep the marshmallow from sticking to your hands.
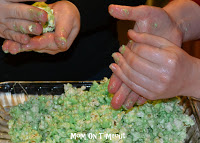
Use your hands or a wooden spoon to mix up the popcorn and marshmallow mixture so that the popcorn is evenly coated. If you need to add some more popcorn, pull from your “extra” pile. Grab a handful of popcorn and start forming it into a ball squeezing firmly to make sure the popcorn ball sticks together. The popcorn balls can be any size you choose. I made small ones for Reece’s party but we usually make fist sized popcorn balls.
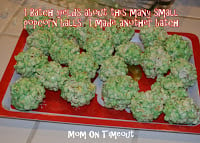
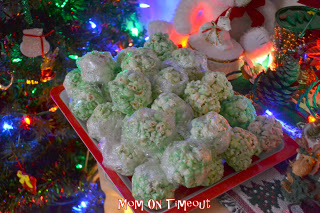
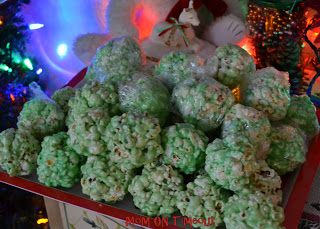
To the left you can see how many popcorn balls 1 batch yields. I ended up making two batches because I needed about 50 small popcorn balls.
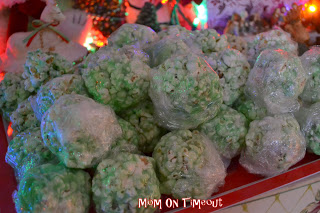
If you are taking the popcorn balls to a party you might want to consider wrapping them in plastic wrap. My mom used to wrap them in plastic wrap and tie the wrap on both ends with curling ribbon – a very nice touch! (I just didn’t have time 🙂 )
Linking up here and Home Stories A2ZTutorials and Tips


Mom to 2 Posh Lil Divas says
fun, I have never made these. Now I know how!
Thanks for sharing on the Sunday Showcase – hope to see you this week.
Bern
Anne @ Domesblissity says
My kids love popcorn. This is a great idea! I’d love for you to link up to my new “Thriving on Thursdays” linky party here in Australia every week. My blog features recipes, crafts, decorating, organising and decluttering advice and tips. I know everyone in Australia would love to read this blog post.
Thanking you,
Anne @ Domesblissity xx
Janel@hatingmartha says
Okay…why has it never occurred to me to color my popcorn balls? That is a great idea! They look so fun and yummy!
Katy Lunsford says
That sounds heavenly! Stopping by from FT!
Sarah E. says
I kept meaning to find a good recipe for these!
Stopping by from STT
Backwoods Cottage Pam says
I have an old popcorn ball recipe from a 1950’s Betty Crocker cook book that is to die for but this one looks a bit easier and just as tasty.
Chrissy says
These look really yummy!!
sue @ cakeballs, cookies and more says
I have never had a popcorn ball, they sound good though.
MrsFoxsSweets says
This is one of those things I have always wanted to try and never have! Thanks for sharing this at Mrs Foxs Sweet Party 🙂
Ground Beef Budget~Shelley says
I never would have thought of this…so easy. I will have to give this one a try.
Anne @ Quick and Easy Cheap and Healthy says
I’ve never seen a popcorn ball recipe with marshmallows! Great idea; my son would love this.
Our Delightful Home says
These look yummy! I love popcorn balls.
~Mrs. Delightful
ourdelightfulhome.blogspot.com
Michelle says
OOH I have to admit, I have never tried popcorn balls they do look interesting, might have to try this. Thanks for sharing the recipe 🙂