Find out just how easy it is to remove those pesky labels from jars! Here are two easy ways to remove jar labels!
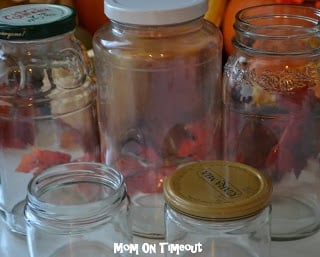
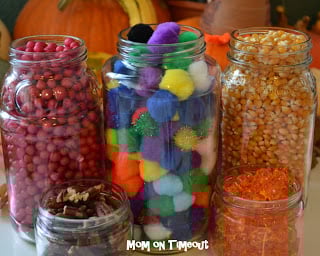
The holidays are just around the corner and to me that means more crafts. Glass jars are a great way to recycle for not only craft projects but are wonderfully useful for storage, rustic vases, and even for cleaning solutions.
Cleaning the labels and the sticky residue off of jars can be an intimidating and time-consuming process. I’m sure we’ve all tried peanut butter, vinegar, hot water, soap, dishwasher, oils, etc. The list goes on and on when you ask people how they remove their labels. I’ve tried a variety of methods and have narrowed it down to the two that I find most effective and efficient. You pick which one works for you!
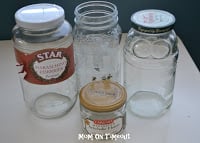
Gather up several jars at a time to be more efficient. I like to do lots of different sizes and shapes – some of the jars even have really beautiful designs on them.
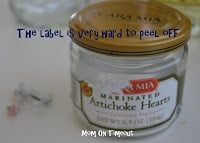
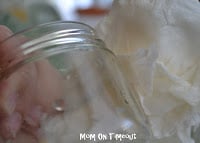
For each method, remove as much of the label as possible first. An easy way to get the adhesive to release is to fill the jar with really hot water. Be careful when handling the jar and don’t burn yourself!
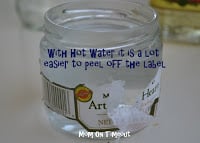
Let the jar sit for a few minutes so the adhesive can turn more to a liquid and then start gently peeling off the label.
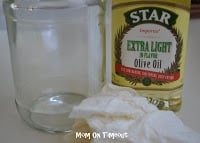 First Method: Olive Oil
Olive Oil is my favorite method because it’s eco-friendly and is super easy. Pour a couple drops of oil onto a paper towel and rub at the remaining residue from the label. Keep rubbing until all residue is gone. This should only take a minute or two. Make sure to wash your jar afterward to get the oil off. I just run mine through the dishwasher.
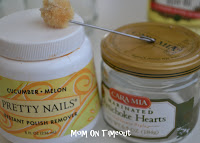
This method is actually a little faster than the olive oil but you have to deal with the fumes from the nail polish remover. (You can see here that I combat this issue with “cucumber melon” scented remover 🙂 ) Pour the polish remover onto a paper towel or use the applicator if yours came with one. Scrub away at that label and adhesive and it will just slide right off. Quick and easy! Again, make sure to wash the jar afterwards.
These two methods are fail-proof. I have never had a jar label that I couldn’t remove using one of these two methods. Next time you are about to throw out a glass jar think of how easy it is to re-use it and try one of these methods. Let me know what you think.





Vivienne @ the V Spot says
Interesting! I’ll have to give that a whirl.
Sam's Minions (aka parents- Angie and Brian) says
Dunking the jars in water, any temperature, for a period of time will remove the adhesive as well.
Delightful Order says
You’ve been featured!
http://delightfulorder.blogspot.com/2011/12/top-ten-features-from-12082011.html
Thanks for joining the Delightfully Inspiring Thursday Party!
Hope to see you again this Thurs-Sat.
DaNita
Anonymous says
“Goo Gone” removes labels and residue splendidly!
Anonymous says
Great idea, I will have to try this
Freda
Beth says
Yep, that’s how I do it. I love reusing jars and bottles. Thanks for sharing this great tip.
mary kay says
CAN ANYONE SAY ” W-D 40 ” TO REMOVE STICKY LABELS,JUST SPRAY AND LET IT SIT FOR A FEW MINS. IT’JUT GREAT. I HAVE A CAN UNDER THE KITCHEN SINK AND W-D IS ALWAYS ON MY CHRISTMAS LIST.
THIS IS THE FIRST TIME I HAVE EVER MADE COMMENT ON LINE,I AM NOT VERY SAVY ON THE COMPUTER, TRYING TO LEARN. YOU KNOW WHAT IS SAID ABOUT TEACHING AN OLD ( DOG ) IN THIS CASE AN OLD LADY
Michelle {Fun On A Dime} says
Something I have been meaning to look up. I thought Olive Oil would work, but have not had much luck with it. I think I’ve been missing the hot water trick first. Thanks!
Anonymous says
I pull the labels off as much as possible…score with a fork and let soak in hot soapy water..then i spray with cooking spray and use a staineless steel pot scratcher…works great….
Stacy Makes Cents says
Awesome! Thanks! 🙂 I never thought about using nail polish remover for removing labels.
Katy Lunsford says
Thank you so much! I love jars and have the worst time getting the sticky off. Love your bog!
Divya N says
Great tips…will try them out..thanks 🙂
OobaDooba says
“Goo Gone” works like a charm!
Carrie says
I had no idea those tricks would remove labels. Great tips!
kocouture says
Fabulous tips, thank you for sharing!!! Upcycled jars are perfect for organizing and storing all of my craft supplies! I love to spray paint my lids to match my room decor as well.