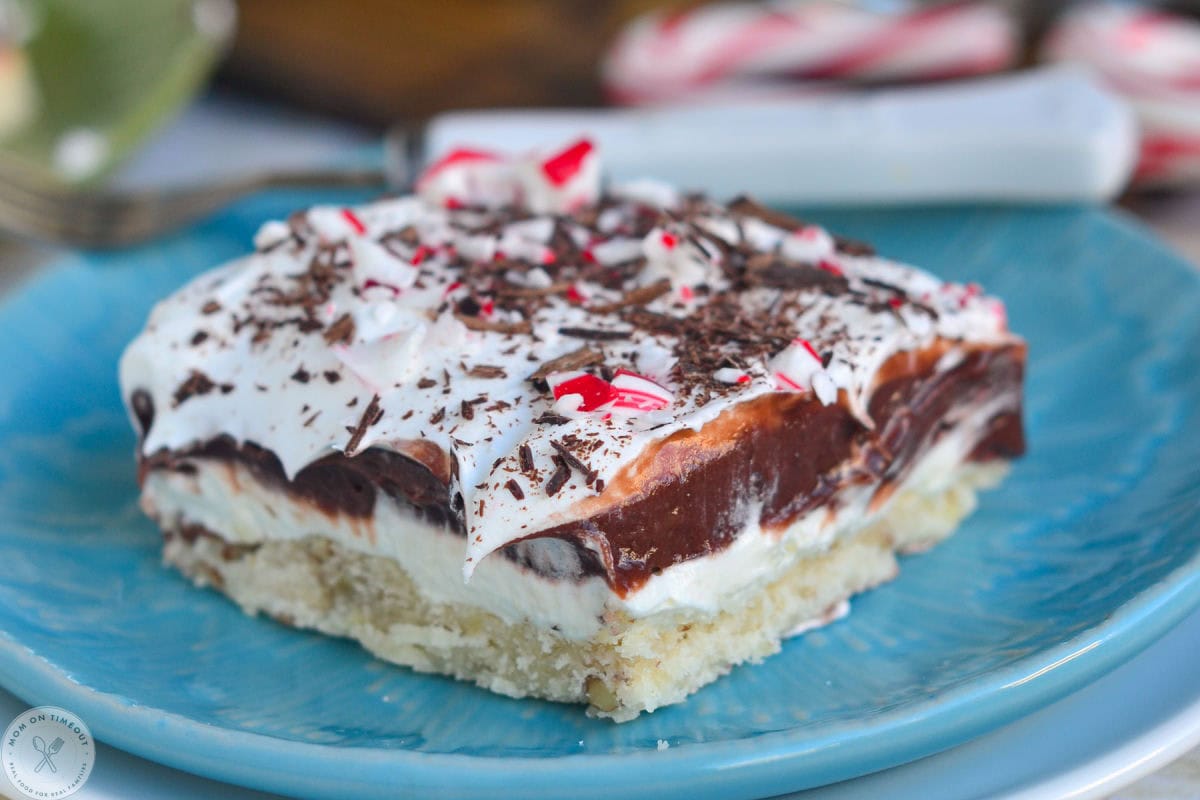
This Chocolate Peppermint 4 Layer Dessert is the festive, no-fuss treat your holiday season needs! With a buttery pecan shortbread crust, creamy peppermint cheesecake layer, rich chocolate pudding and snowy white topping, every bite tastes like pure Christmas joy. Perfect for parties, potlucks, and make-ahead entertaining!
Looking for more peppermint desserts? Make sure to try these favorites: Peppermint Snowball Cookies, Peppermint Shortbread Cookies and this festive White Chocolate Peppermint Sugar Cookie Bark!
Chocolate Peppermint Lush
The other day I was flipping through the cookbook that my Aunt Lana had given all the nieces and nephews last Christmas. I stumbled upon “Grandma’s 4 Layer Dessert” and I was instantly flooded with memories. My Grandma or Aunt Lana would make this dessert for every family get together. It took different forms with different fillings but one thing always remained the same… it was INCREDIBLE!
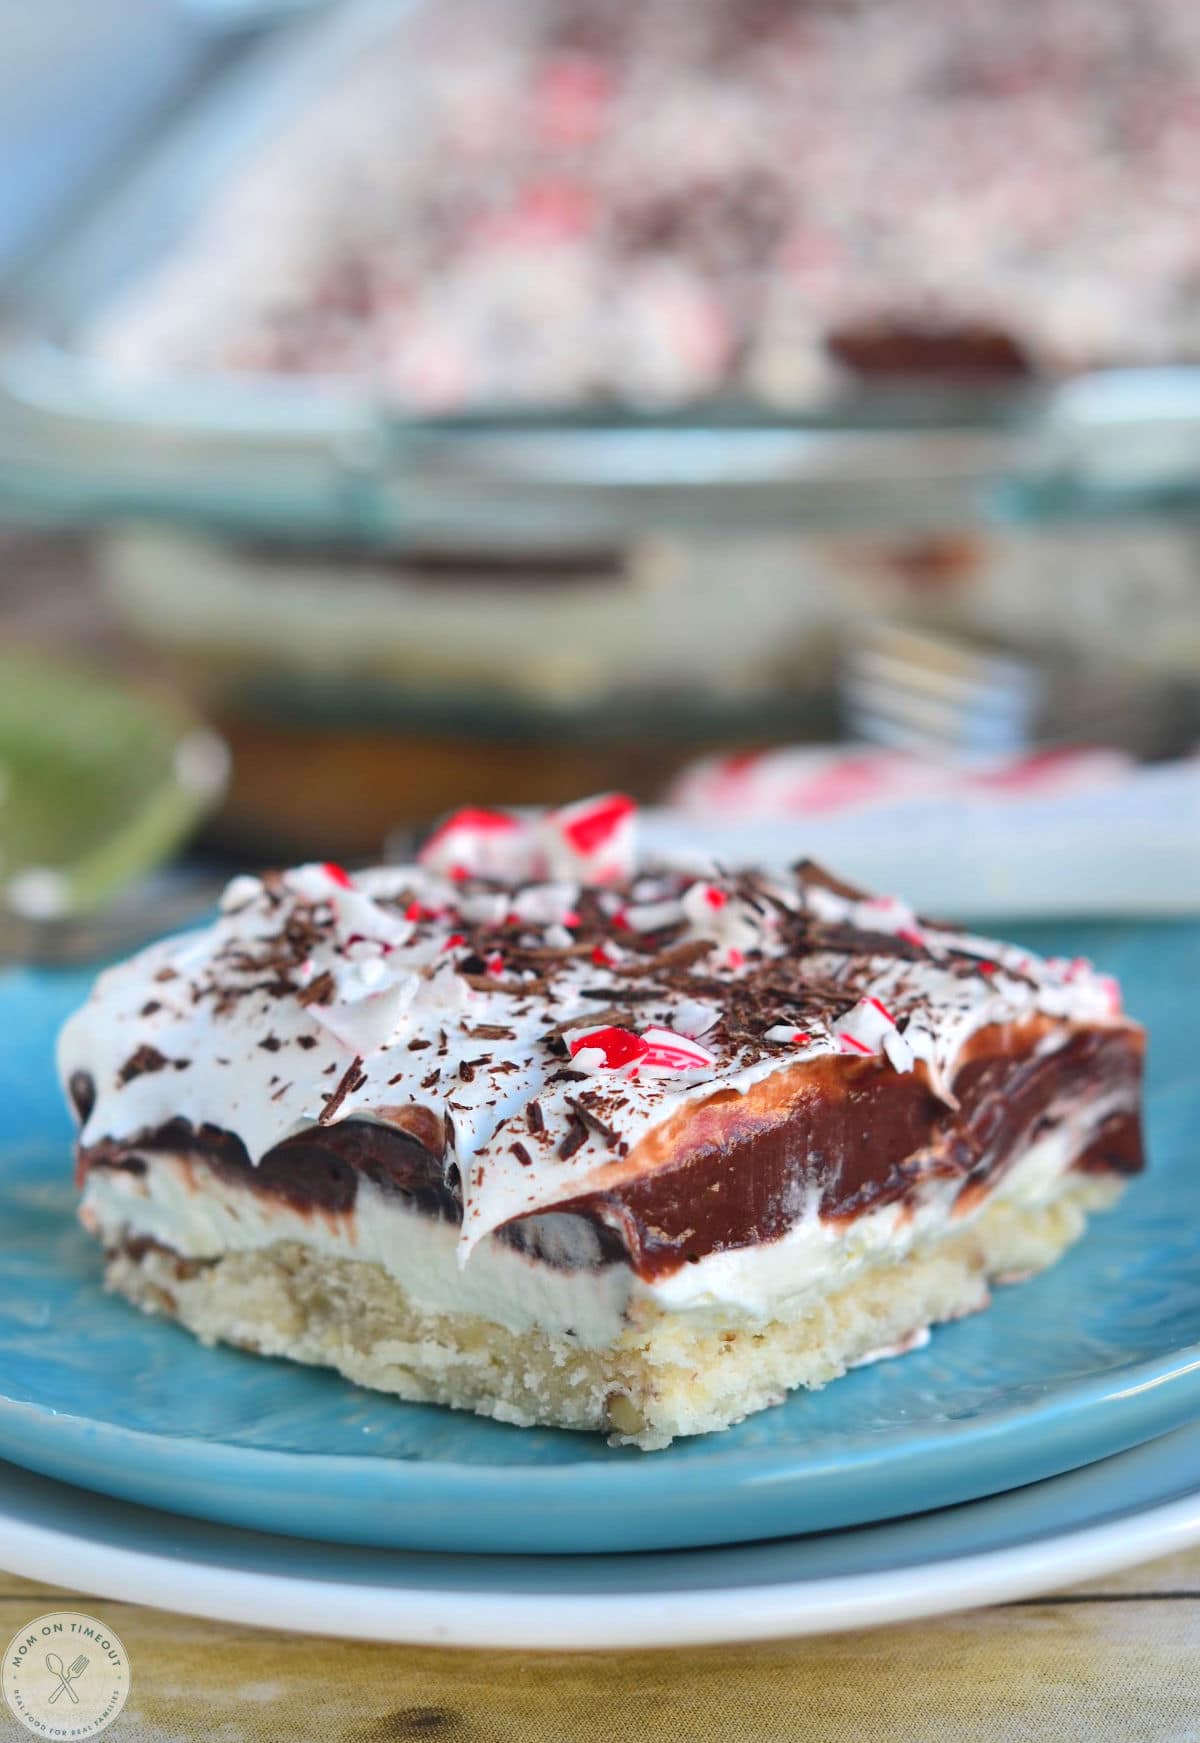
My Grandma would pull out this pan (far larger than a 9×13) and within seconds everyone, big and small, would be storming the table ready to enjoy this fabulous dessert. The crust is a basic shortbread but with the addition of pecans there is great flavor and texture. The second layer is all about creamy goodness with cream cheese and Cool Whip. The third layer is chocolate pudding and then the final layer is more Cool Whip. You can of course use real whipped cream here, you would just need to serve it within a few hours.
As I was reading through the recipe and remembering so many parties where I enjoyed this yummy dessert, I realized that I could make just a couple quick changes and it would be just perfect for Christmas!
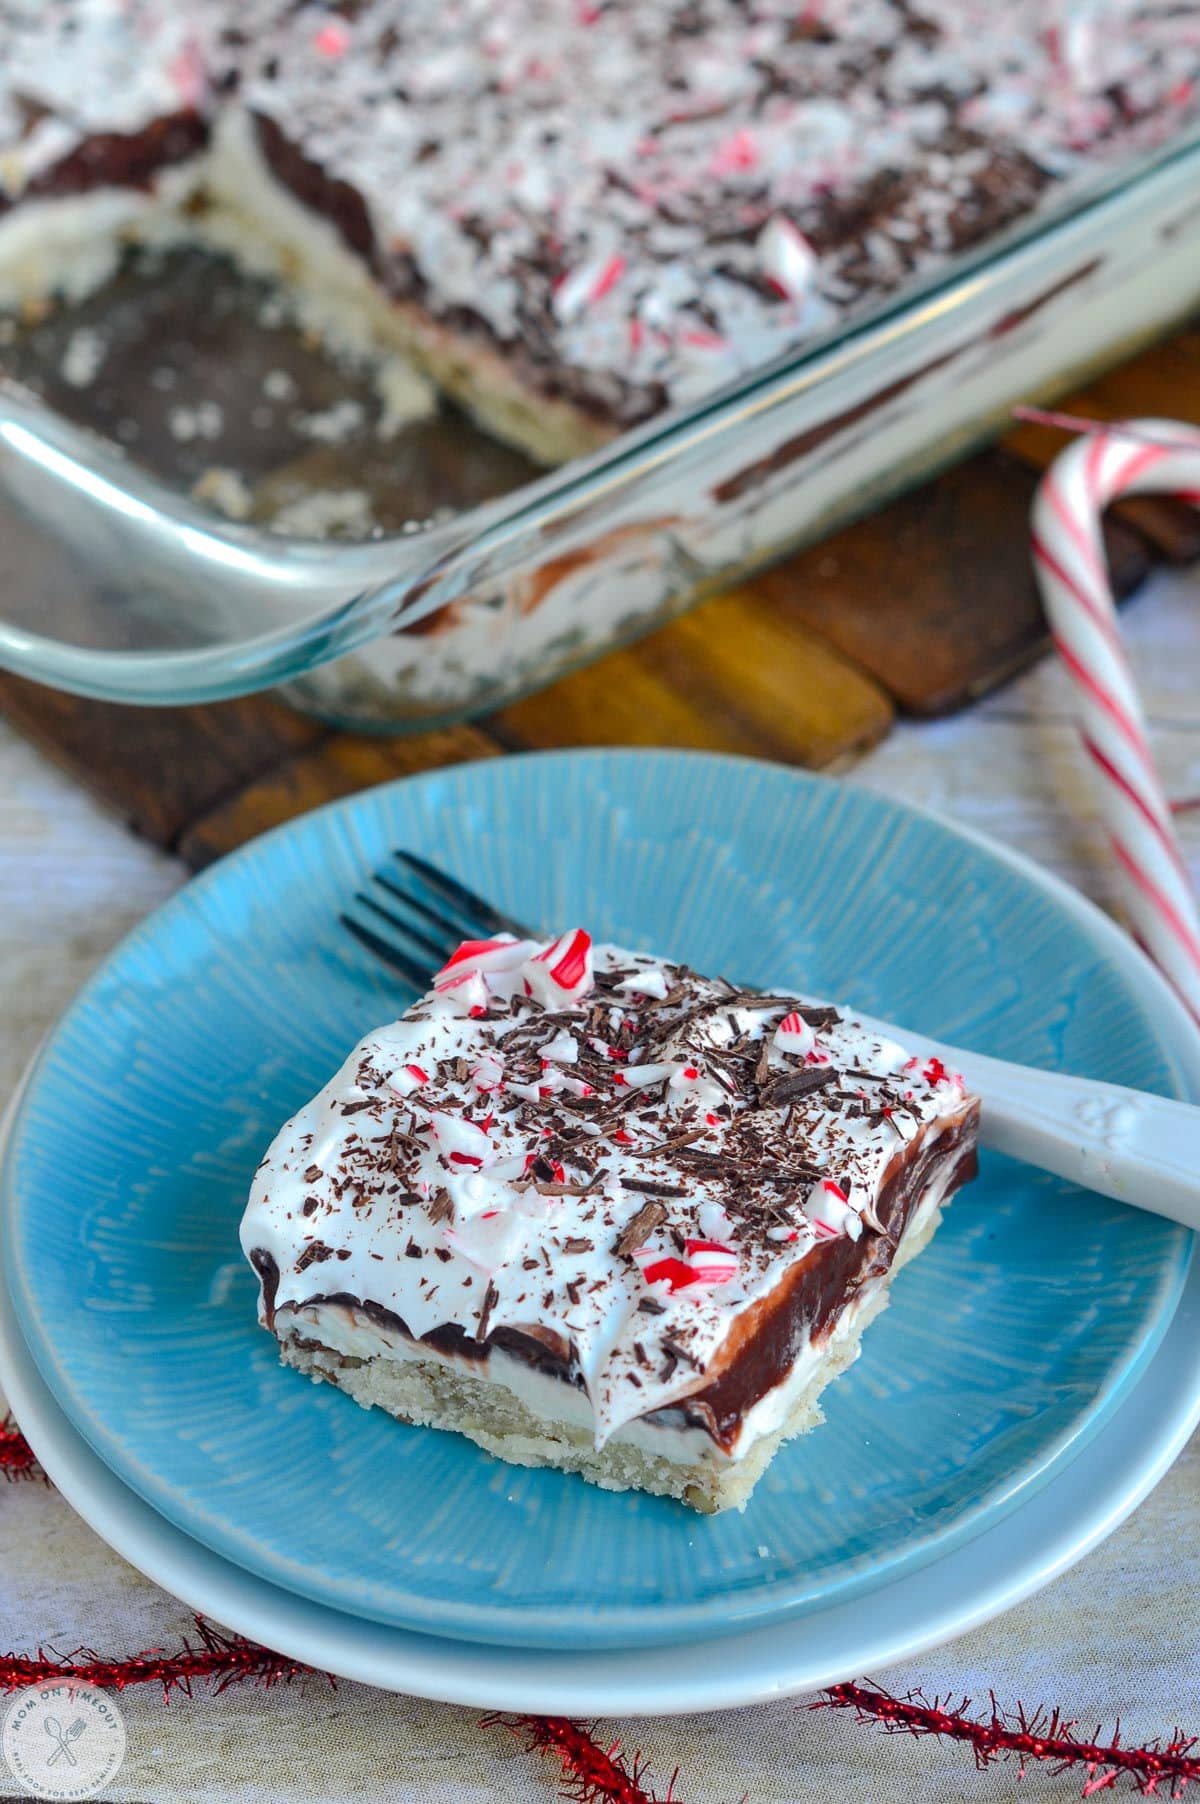
Bring on the peppermint! My Grandma’s 4 Layer Dessert all dressed up for Christmas! You’re going to love the all the yummy layers in this Chocolate Peppermint 4 Layer Dessert!
Why You’ll Love This Recipe
If you love easy holiday desserts that look impressive but take minimal effort, this Chocolate Peppermint Four Layer Dessert is for you! Each layer adds a new burst of texture and flavor, from creamy peppermint filling to smooth chocolate pudding. This dessert is a holiday favorite for a reason! Here’s what makes it such a crowd-pleaser:
- Festive Flavors: Cool peppermint and rich chocolate make the perfect holiday pairing.
- Simple Layers: Each layer comes together quickly, using easy-to-find ingredients.
- Holiday Ready: Feeds a crowd, travels well and can be made ahead – holiday magic!
A refreshing, family friendly, festive treat for Christmas parties and cozy nights in!
Ingredient Breakdown – What You’ll Need
Understanding how each ingredient functions helps you get perfect results every time:
First Layer – Shortbread Crust
- All-purpose flour: Creates structure and helps form a sturdy base.
- Crushed nuts (pecans): Add flavor, crunch, and richness to the crust.
- Sugar: Sweetens and enhances the toasty notes of the pecans.
- Melted butter: Binds everything together and bakes into a buttery, cohesive crust.
Second Layer – Peppermint Cream Cheese
- Cream cheese: Adds tangy creaminess and acts as the foundation for this layer.
- Powdered sugar: Sweetens while creating a smooth, lump-free texture.
- Cool Whip: Lightens the mixture into a fluffy, mousse-like filling.
- Peppermint extract: Brings that refreshing, holiday-perfect mint flavor.
Third Layer – Chocolate Pudding
- Instant chocolate pudding mix: Adds silky texture and deep chocolate flavor.
- Milk: Activates and sets the pudding, creating the layer that ties the whole dessert together. I prefer whole milk in this recipe.
Fourth Layer – Toppings
- Cool Whip: The final creamy layer that makes the dessert feel light and festive. Use homemade whipped cream instead if you prefer!
- Chocolate shavings: Add texture and a lovely visual contrast.
- Crushed candy canes: Bring color, crunch, and classic peppermint sparkle.
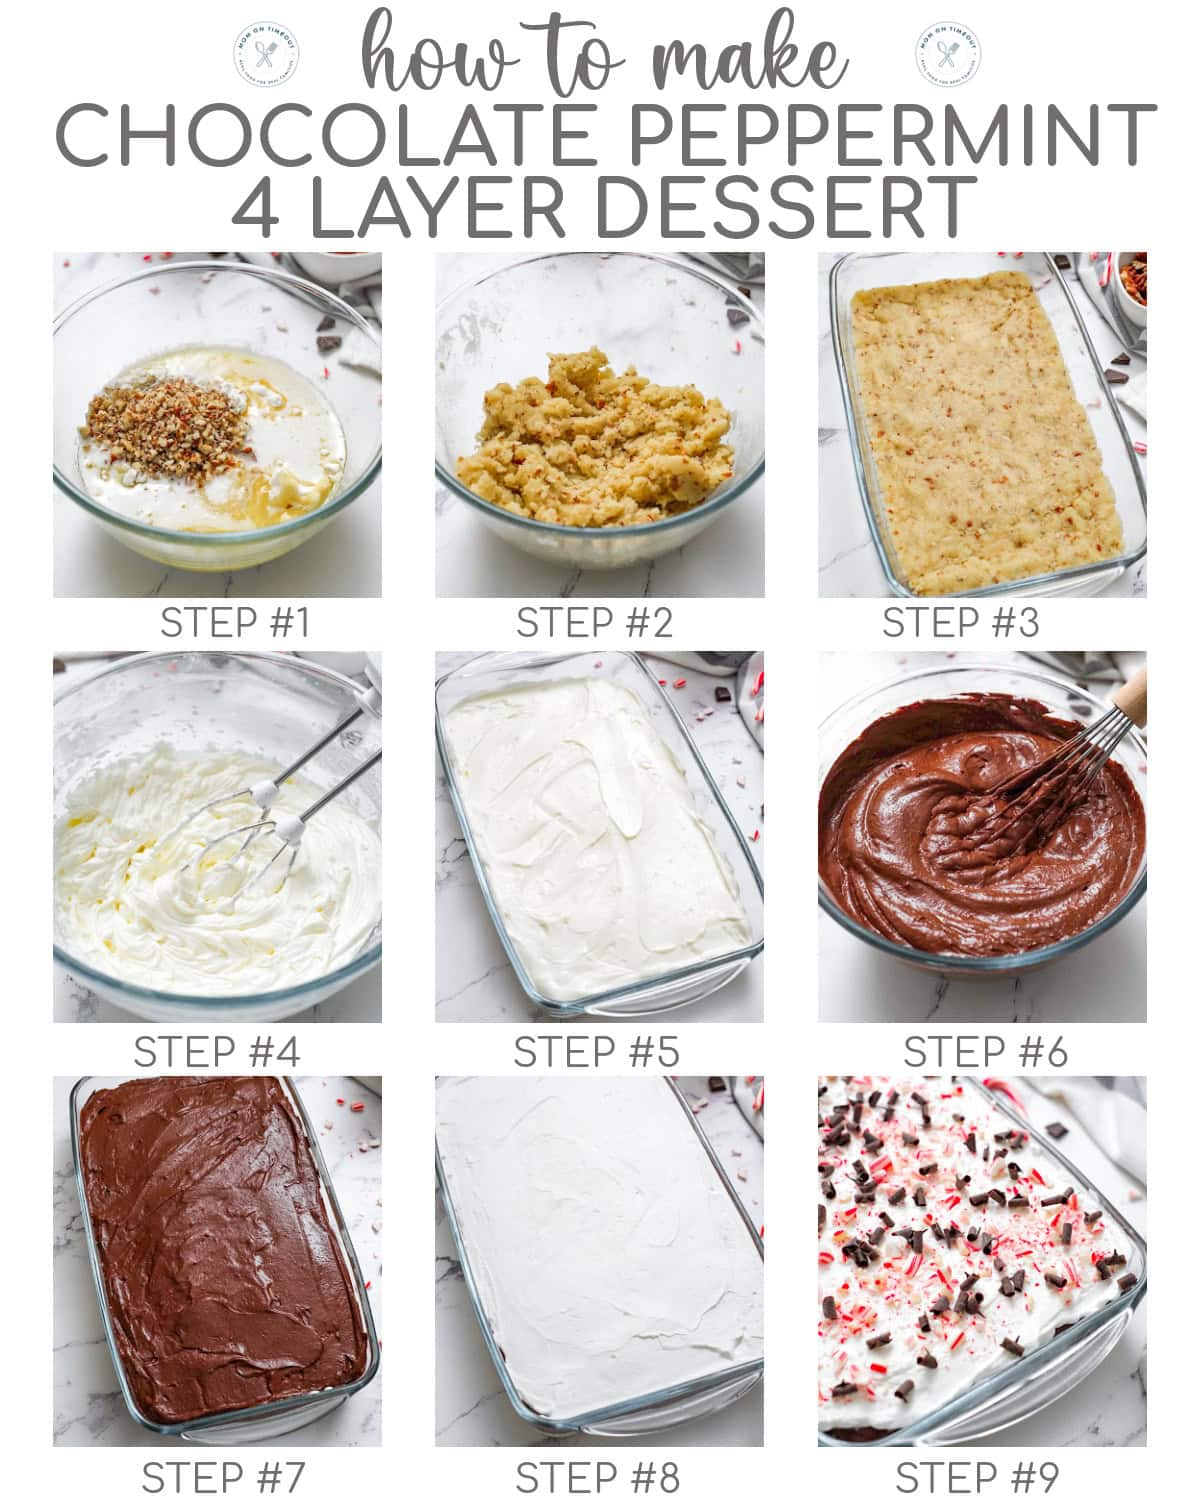
How To Make Peppermint Lush
Layers of crunchy pecan crust, fluffy peppermint cream cheese, silky chocolate pudding, and a cloud of Cool Whip come together in this irresistible holiday dessert! It’s refreshingly minty, delightfully creamy, and unbelievably easy to make. A guaranteed crowd-pleaser for all your Christmas celebrations!
Let’s take a quick look at how to make this peppermint lush recipe and as always, you can find the full printable recipe card at the end of this post.
First Layer
- Combine flour, crushed nuts, sugar and melted butter in a medium bowl.
- Mix until combined.
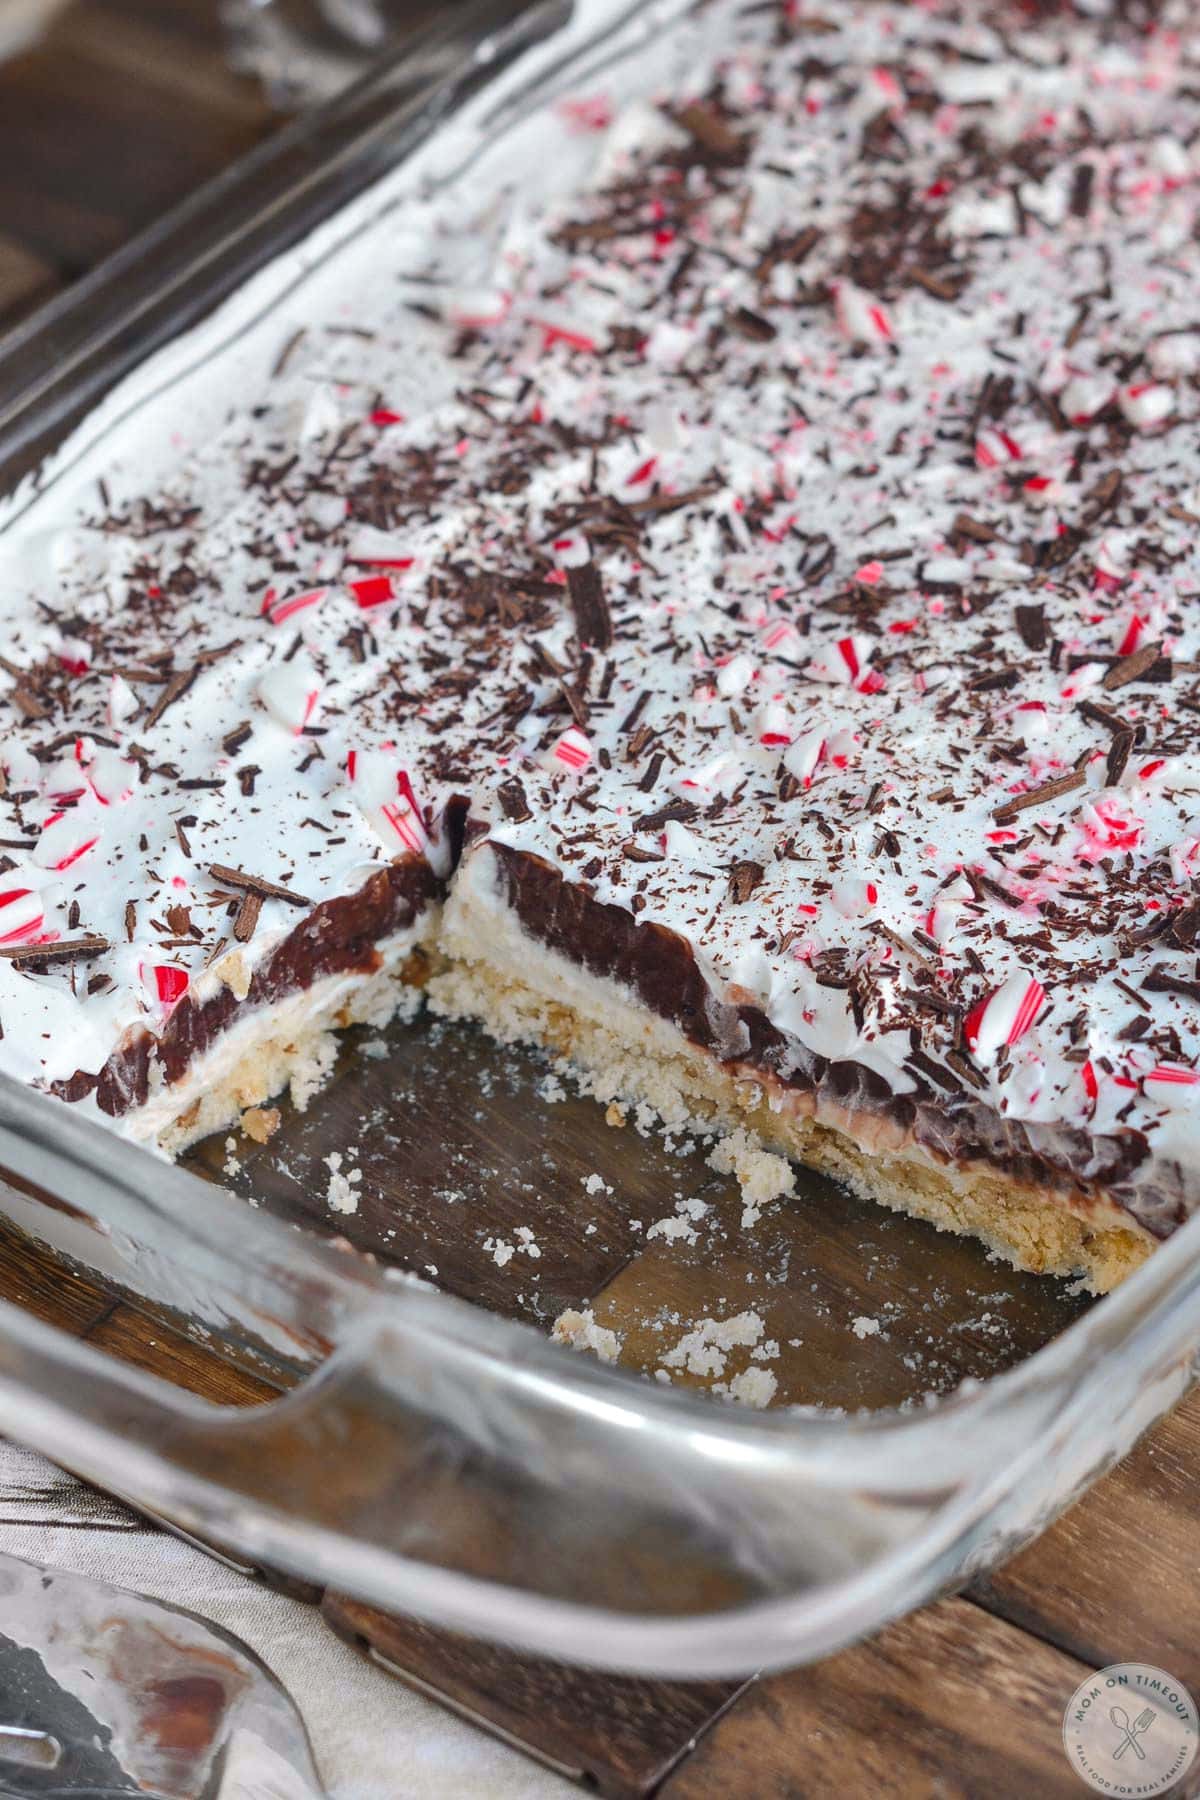
- Press crust into a 9×13 baking dish. Bake at 375°F for 10 minutes.
Second Layer
- Beat cream cheese with a mixer until light and fluffy. Beat in powdered sugar, fold in Cool Whip and peppermint extract.
- Spread mixture on cooled crust.
Third Layer
- Combine pudding mix and milk and prepare according to package instructions.
- Spread over second layer.
Fourth Layer
- Top third layer with remaining Cool Whip.
- Sprinkle on chocolate shavings and crushed candy canes. Chill for at least 2 hours.
Storage Information
Better than being pretty is the fact that this dessert is totally drool-worthy AND it can be made ahead of time! Bake off the crust, whip up the other layers and then assemble when ready. I know my Grandma would make this the morning of and pop it in the fridge and it was just perfect when we were ready to enjoy it in the evening.
- Refrigerator: Store tightly covered for up to 4 days. The flavors meld and the texture improves as it chills.
- Make ahead: Assemble up to 24 hours in advance. Add the candy cane topping just before serving to keep the crunch.
- Freezing: Not recommended. The pudding and cream cheese layers may separate once thawed.
Variations To Try
Feel free to play with flavors and textures to make this dessert your own:
- Oreo crust: Swap the pecan crust for a crushed Oreo base for even more chocolate flavor.
- Mocha twist: Add ½ teaspoon of espresso powder to the pudding layer for a rich mocha vibe.
- Extra peppermint: Stir chopped peppermint bark into the cream cheese layer for added texture.
- Dark chocolate pudding: Use dark chocolate pudding mix for deeper, more intense flavor.
Can I use homemade whipped cream instead of Cool Whip?
Yes, but keep in mind it won’t hold its structure as long. If using homemade whipped cream, stabilize it with a little powdered sugar or gelatin.
Can I make this without nuts?
Absolutely. Simply omit the pecans in the crust or replace them with extra flour or crushed cookies.
How long does the dessert need to chill?
At least 2 hours is ideal to help the layers set and the flavors come together.
Trish’s Tips
- Make sure the shortbread crust is fully cooled before adding the cream cheese layer to keep everything neat and clean.
- Beat the cream cheese well to prevents lumps and keep the filling smooth.
- Add the candy canes right before serving for the best crunch and color.
- Use a sharp knife dipped in hot water to cut clean slices.
- Let it chill thoroughly for the prettiest layers and best flavor.
More Peppermint Desserts
- Peppermint Cake
- Peppermint Mocha Fudge
- Crockpot Peppermint White Hot Chocolate
- Peppermint Cookies
- Peppermint Fudge

Chocolate Peppermint 4 Layer Dessert
Ingredients
First Layer
- 1 cup all-purpose flour
- ½ cup crushed nuts I like pecans
- ¼ cup granulated sugar
- ½ cup salted butter melted
Second Layer
- 8 ounces cream cheese softened (full-fat brick style)
- 1 cup powdered sugar
- 1 cup Cool Whip from 8 oz container
- 1 teaspoon peppermint extract
Third Layer
- 6.8 ounces chocolate instant pudding 2 packages
- 3 cups milk very cold, whole milk preferred
Fourth Layer
- ⅓ cup Cool Whip Remaining Cool Whip from 8 oz container
- ¼ cup chocolate shavings
- ¼ cup crushed candy canes
Instructions
First Layer
- Preheat oven to 375°F.
- Combine flour, crushed nuts, sugar and melted butter in a medium bowl. Mix until combined. Press crust into a 9×13 baking dish.1 cup all-purpose flour, ½ cup crushed nuts, ¼ cup granulated sugar, ½ cup salted butter
- Bake for 10 minutes. Remove and set aside to cool.
Second Layer
- Beat cream cheese with a mixer until light and fluffy. Beat in powdered sugar until combined and then fold in Cool Whip.8 ounces cream cheese, 1 cup powdered sugar, 1 cup Cool Whip
- Mix in peppermint extract. Spread mixture on cooled crust.1 teaspoon peppermint extract
Third Layer
- Combine pudding mix and milk and prepare according to package instructions.6.8 ounces chocolate instant pudding, 3 cups milk
- Spread over second layer.
Fourth Layer
- Top third layer with remaining Cool Whip.⅓ cup Cool Whip
- Sprinkle on chocolate shavings and crushed candy canes.¼ cup chocolate shavings, ¼ cup crushed candy canes
- Chill for at least 2 hours. Keep refrigerated until ready to serve.
Video
Notes
- Refrigerator: Store tightly covered for up to 4 days. The flavors meld and the texture improves as it chills.
- Make ahead: Assemble up to 24 hours in advance. Add the candy cane topping just before serving to keep the crunch.
- Freezing: Not recommended. The pudding and cream cheese layers may separate once thawed.
Tools and Equipment (affiliate links): Glass Mixing Bowls | Whisk | Electric Mixer (Hand Mixer or Stand Mixer)
Please see post above for more information, step-by-step process photos, recipe tips and frequently asked questions.
Nutrition
Originally published December 11, 2013.


Kathy says
Awesome!!!!!
Nellie Wall says
Just wondering info this dessert can be frozen?
Nellie
Kim says
This was my Grandma’s go to dessert for every holiday too! Only we called it Sundae Pie 🙂
Maryw says
I wonder how a chocolate pastry cream would work instead of box pudding….
Vicky says
I love all of these desserts and their re-incarnations from lemon lush, chocolate, butterscotch, etc. Making this for Christmas Eve.
Karen Meredith says
Trish
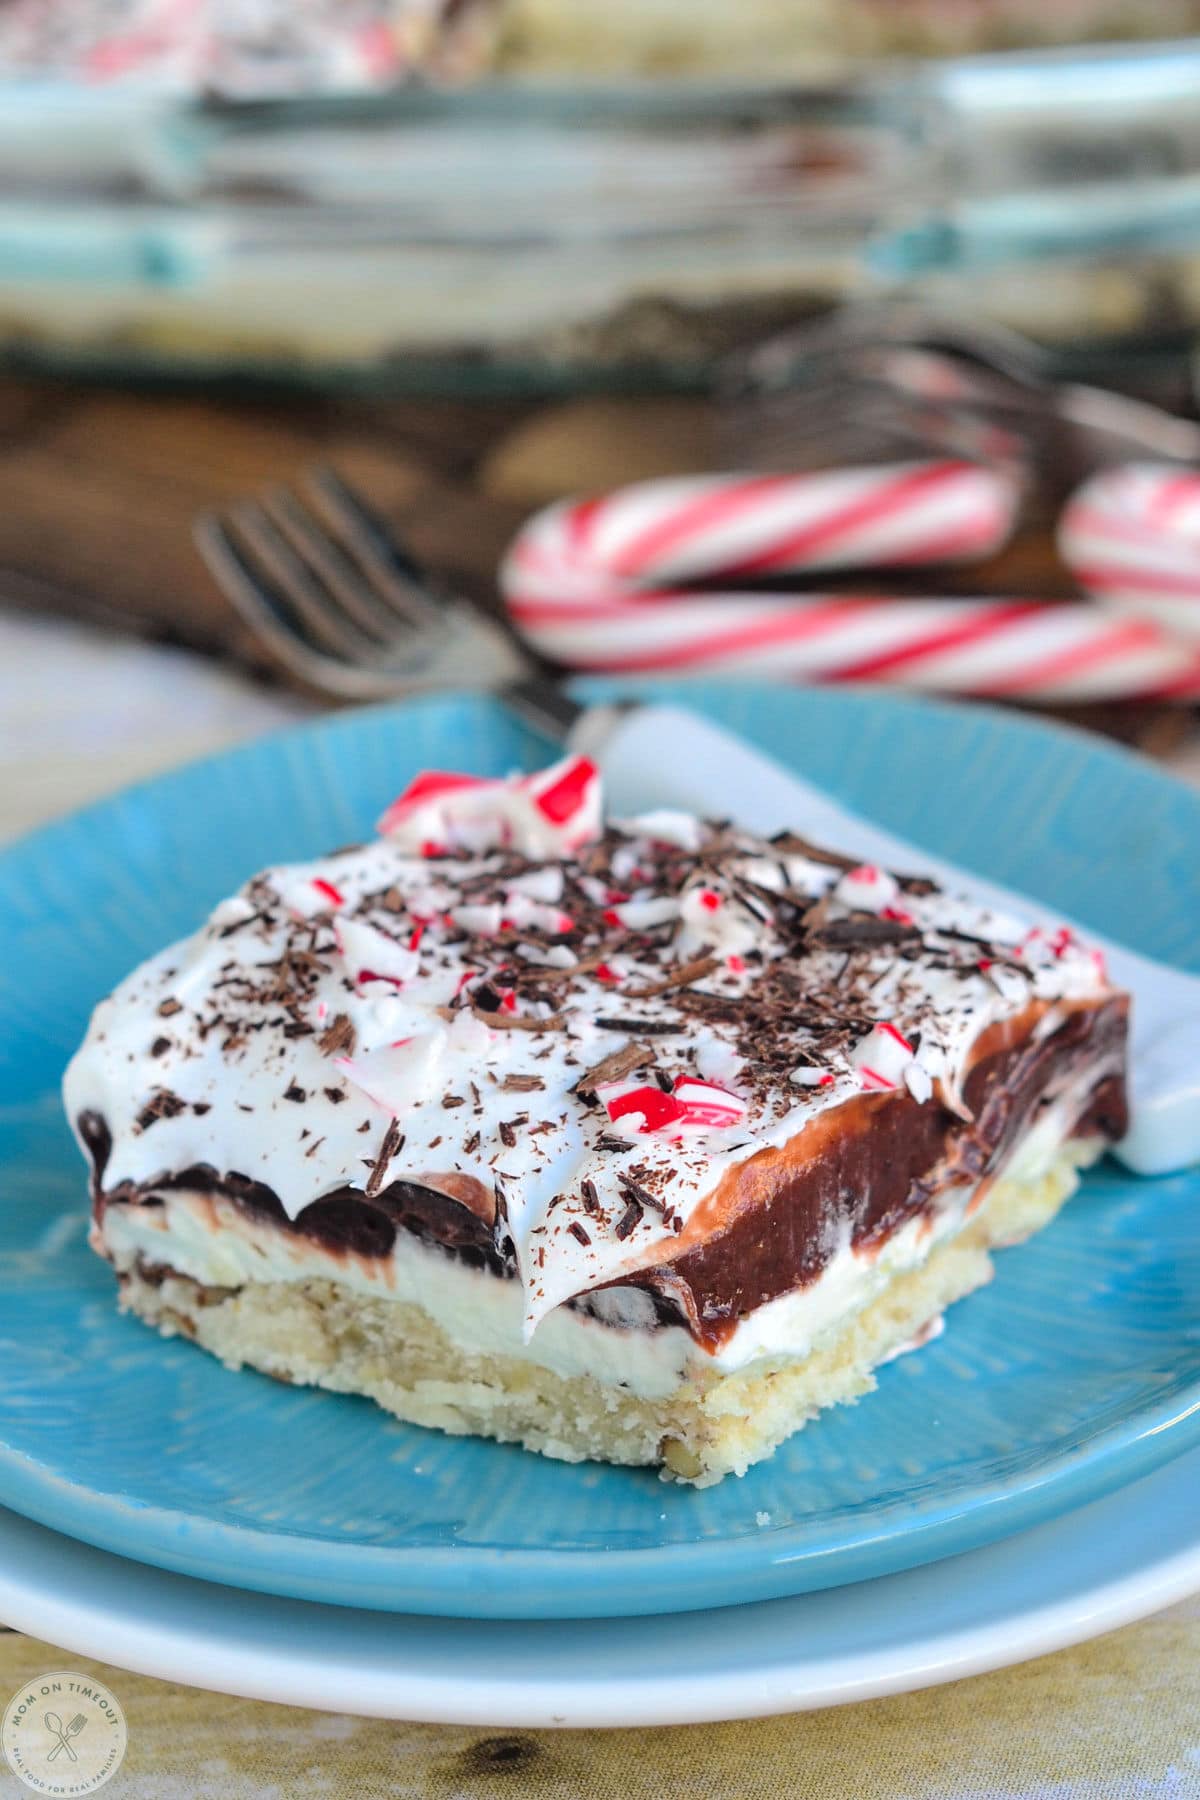
I’m concerned at how this cuts up into bars. I am making this for my Hawaii Club Party but it looks like it might be slushy. Is this really cut into bars as shown or is this a scoop out dessert? It looks wonderful.
Thanks.
Karen Meredith says
Trish – I’m concerned how this cuts into bars. I want to make it for my Hawaii Club Christmas party but I don’t want slushy. Is this going to cut up nicely or is this a scoop out recipe? Looks wonderful.
Amy Huntley@theidearoom.net says
I have to try this recipe! It is not only beautiful but looks tasty also!
Trish - Mom On Timeout says
Thanks Amy!