
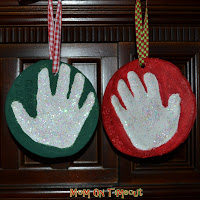
 So we made some more, and then ended up making a fourth batch so we could make these hand print ornaments. The kids love painting them (even the burned ones) so it wasn’t a complete loss. I’ll give you a brief rundown of how to do it and if you have any questions you can refer to my original salt dough tutorial here.
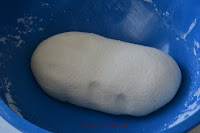 Make your dough using 1 c flour, 1/2 c salt, and about 1/2 c of warm water. (I usually double this.) Combine the flour and salt and then slowlly add in enough water to form the dough. If you are wanting to make hand prints out of your salt dough – you will add more water because you need a looser dough. You want to be able to easily press your hand into the dough so make sure it is nice and soft. (You can also add food color to the dough if you want it all the same color.) Knead the dough for 10 minutes and then let rest for another 40 minutes.
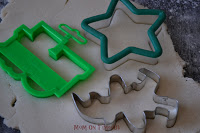
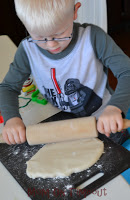 Roll out the dough until it’s 1/4 inch thick. My third batch this year I actually split the dough and rolled it out on two cutting boards so each of my boys could do what they wanted with “their” dough. Cut out the shapes using cookie cutters or even a knife will do. For the hand prints I used the top to a pitcher – it just happened to be the right size and worked great!
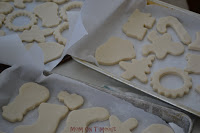
If are making ornaments be sure to poke a hole where you will be hanging the ornament from. Make sure it goes all the way through and that any extra dough is removed. Place the ornaments on a parchment-lined baking tray and bake for 4-6 hours (or until hard) at 200 degrees. You can also air dry but plan on several extra days for that.
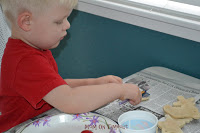
Once the ornaments are hard and dry it’s time to decorate! Paints, glue, glitter, ribbon – you name it! I just let the kids go crazy and do whatever they want (plus I had lots of extras!) Let the paint and glue dry.
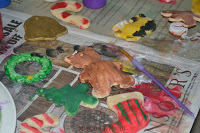
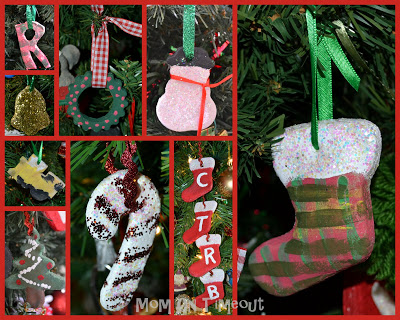
I used a polyurethane spray on the ornaments to seal them so that they will keep beautifully but this step is optional. Hang up your fabulous creations with a pretty ribbon and enjoy! I just love this project because it’s super affordable and you can make it using whatever you have on hand. There’s no need to run out and buy a whole bunch of supplies. Here are some of our creations…


Kelly says
Just made the dough- it was so extremely sticky that I couldnt knead it at all. Ended up adding almost a whole extra cup of flour, and its still really sticky. What gives?
Trish - Mom On Timeout says
I’m not sure 🙁 I’ve never had that happen to me I’ve made this dough many, many times. I can only suggest that you double-check the measurements and add more flour and salt. Good luck!
Lindsay says
These are too adorable so I decided to try them with my little one, but I keep having an issue with them puffing up while baking. 🙁 Any clue what I could be doing wrong?
Trish - Mom On Timeout says
You could try a lower temperature or just letting them air dry. If you air dry them, put them in the warmest place in your house so they dry faster. Good luck!
Ginger@gingersnapcrafts.com says
My kids would LOVE this! 🙂
JANET says
I did this last year with the kids…
http://janetsmith0718.blogspot.com/2011/12/craft-time.html
I can’t wait to do it again this year and compare the two!
Trish - Mom On Timeout says
They are just too fun!
Jackie says
I’m going to make these with my daughter! What kind of paint did you use?
Katiria says
You’re my new favorite site! I love these so much I’m going to try them this weekend. I looked around your site and I love your style. So glad I found you!
Sara says
So cute! How did you get the glitter to stick?
Trish - Mom On Timeout says
I diluted glue with a little bit of water and gave the kids paint brushes to “paint” on the glue. Add your glitter and let dry. I also sprayed a coat of polyurethane so I wouldn’t have glitter falling off 🙂
Dee says
We make these every year and it is a great tradition. Our tree is filled with homemade ornaments. I also label them so my boys don’t try to eat them because they think they are cookies. LOL
Dee, The CSI Project
Holly Lefevre says
Making ornaments with my kids is one of my favorite holiday traditions. These are so cute! What a fun time.
Trish - Mom On Timeout says
I just love it! Thanks for stopping by Holly!
Bonnie and Trish @ Uncommon says
These are so sweet and special Trish!! You have created such special family ornaments! 😉
Trish - Mom On Timeout says
Thanks ladies!
Jen says
Love this idea! Especially the stocking initial chain! Although mine will be more of like a tinsel on our tree as we have 6 kids. 🙂 I am definitely going to make these with my kids this weekend and let them give them as Christmas presents. I am going to make them as well for my customers! Thank you so much for the ideas!
Trish - Mom On Timeout says
Six kids! Wow! Yep – it will be like a tinsel 😉
April says
Hey! How heavy will the ornaments be once they dry???
Andrea @ This Pug Life says
I have been debating buying clay or doing salt dough for paw print ornaments. Your salt dough looks nice and smooth, which is what I was concerned with. I think I will give it a try. 🙂
Dixie n Dottie says
These are adorable and look like so much fun! Would love if you’d join our Countdown to Christmas link party! Hope to see you there! Have a great week! 🙂
http://dixie-n-dottie.blogspot.com/2012_11_27_archive.html
Katrina says
Hi what a lovely idea this is I’m going to try it today! Just one quick question will this go mouldy? I’m new to this homemaking I usually cheat and buy everything but my boys are at the age where they want to be more creative and environmentally friendly 🙂 xxx
Trish - Mom On Timeout says
Nope! Mine haven’t but you can spray them with polyurethane to keep this nice and protected. Have fun!