
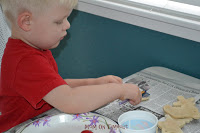
 So we made some more, and then ended up making a fourth batch so we could make these hand print ornaments. The kids love painting them (even the burned ones) so it wasn’t a complete loss. I’ll give you a brief rundown of how to do it and if you have any questions you can refer to my original salt dough tutorial here.
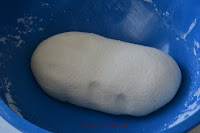 Make your dough using 1 c flour, 1/2 c salt, and about 1/2 c of warm water. (I usually double this.) Combine the flour and salt and then slowlly add in enough water to form the dough. If you are wanting to make hand prints out of your salt dough – you will add more water because you need a looser dough. You want to be able to easily press your hand into the dough so make sure it is nice and soft. (You can also add food color to the dough if you want it all the same color.) Knead the dough for 10 minutes and then let rest for another 40 minutes.
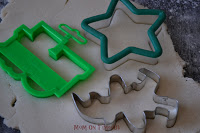
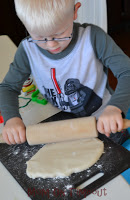 Roll out the dough until it’s 1/4 inch thick. My third batch this year I actually split the dough and rolled it out on two cutting boards so each of my boys could do what they wanted with “their” dough. Cut out the shapes using cookie cutters or even a knife will do. For the hand prints I used the top to a pitcher – it just happened to be the right size and worked great!
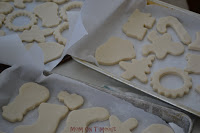
If are making ornaments be sure to poke a hole where you will be hanging the ornament from. Make sure it goes all the way through and that any extra dough is removed. Place the ornaments on a parchment-lined baking tray and bake for 4-6 hours (or until hard) at 200 degrees. You can also air dry but plan on several extra days for that.
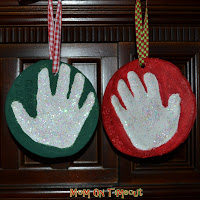
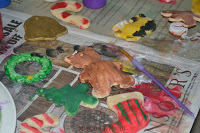
Once the ornaments are hard and dry it’s time to decorate! Paints, glue, glitter, ribbon – you name it! I just let the kids go crazy and do whatever they want (plus I had lots of extras!) Let the paint and glue dry.
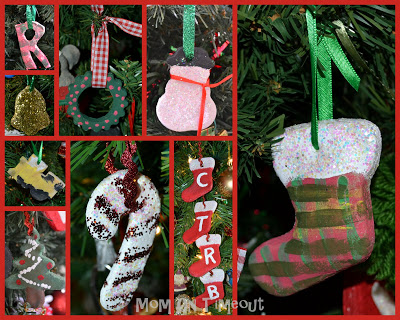
I used a polyurethane spray on the ornaments to seal them so that they will keep beautifully but this step is optional. Hang up your fabulous creations with a pretty ribbon and enjoy! I just love this project because it’s super affordable and you can make it using whatever you have on hand. There’s no need to run out and buy a whole bunch of supplies. Here are some of our creations…


Melanie @ bear rabbit bear says
I’ve been wanting to do these..they turned out great. Thanks for linking to Things I’ve Done Thursday!
Melanie
bearrabbitbear.blogspot.com
Jenna says
wow thanks for sharing! I have to do this! 🙂
itsjustcalledspicy.blogspot.com
adventuresindinner says
Oh my goodness! We literally made some of these last night 🙂 I’ll be using your painting tips this evening.
Thank-you so much for joining up to our Pin’Inspiration Thursday Party. Your creativity is very much appreciated.
Happy follower, would love if you popped by and grabbed a button 🙂
WhyCuzICan says
Looks like you had a great time, even if you still used some burnt ornaments– sweet story!
Visiting from Crafty, Scrappy, Happy linky party,
Smiles and thanks for sharing,
~Suzanne in NW IL
Alida says
Love the ornaments…even though my kids are grown I may give this a try!
Marilyn says
SOOO adorable. I LOVE it..So creative and cute..Very fitting for the season. I LOVE the details.. I would LOVE for you to Please stop in and share/link via my Pin Inspirational Party happening today : )) THANK YOU.. Wishing you an amazing rest of the week.. ~ Marilyn http://theartsygirlconnection.blogspot.com/2011/12/hello-artsy-friends-stopping-in-today.html
Marilyn says
This comment has been removed by the author.
Trish@MomOnTimeout says
@Lowri Thanks Lowri! They really are so much fun with the kids!
Emily says
so fun! I’d like to invite you to come over and join my special ornament link party… open the rest of this month.. I also have a FAB ornament giveaway you can enter. Hope you can check it out!
http://nap-timecreations.blogspot.com/2011/12/ornamentsparty-giveaway.html
Lowri says
These are lovely – such a fun idea to mkae with the kids – I love them!
Visiting from Carolyn’s Homework
Lowri
http://papervinenz.blogspot.com/
Kindra-At Home With K says
I love saltdough ornaments. Fun to make with the kiddos that’s for sure! I especially love your handprint ornaments. Such a great idea!
I have a weekly linky party called Terrific Under Ten Tuesdays. It’s for projects made for $10 or less. I would love to have you link up!
Oh, I’m your newest follower!
Lindsey @makeandtakes says
This looks like a lot of fun to do with the kids. I love those handprint ornaments–what a fun way to remember tiny little hands. 🙂
Would love for you to submit this post (and any others) to the Make and Takes spotlight page–http://www.makeandtakes.com/spotlight
Trish@MomOnTimeout says
@Sierra @ H is for Homeschooling Thanks Sierra! Just make sure you plan around the drying/baking time and have fun!
Sierra @ H is for Homeschooling says
We plan on doing this over the weekend. I love the idea of the stockings with initials! Hadn’t seen that one before.
Designed by Dawn Nicole says
Those came out SO cute! I keep seeing dough recipes on Pinterest and seeing yours make me think I really need to do this with my kids this week!