
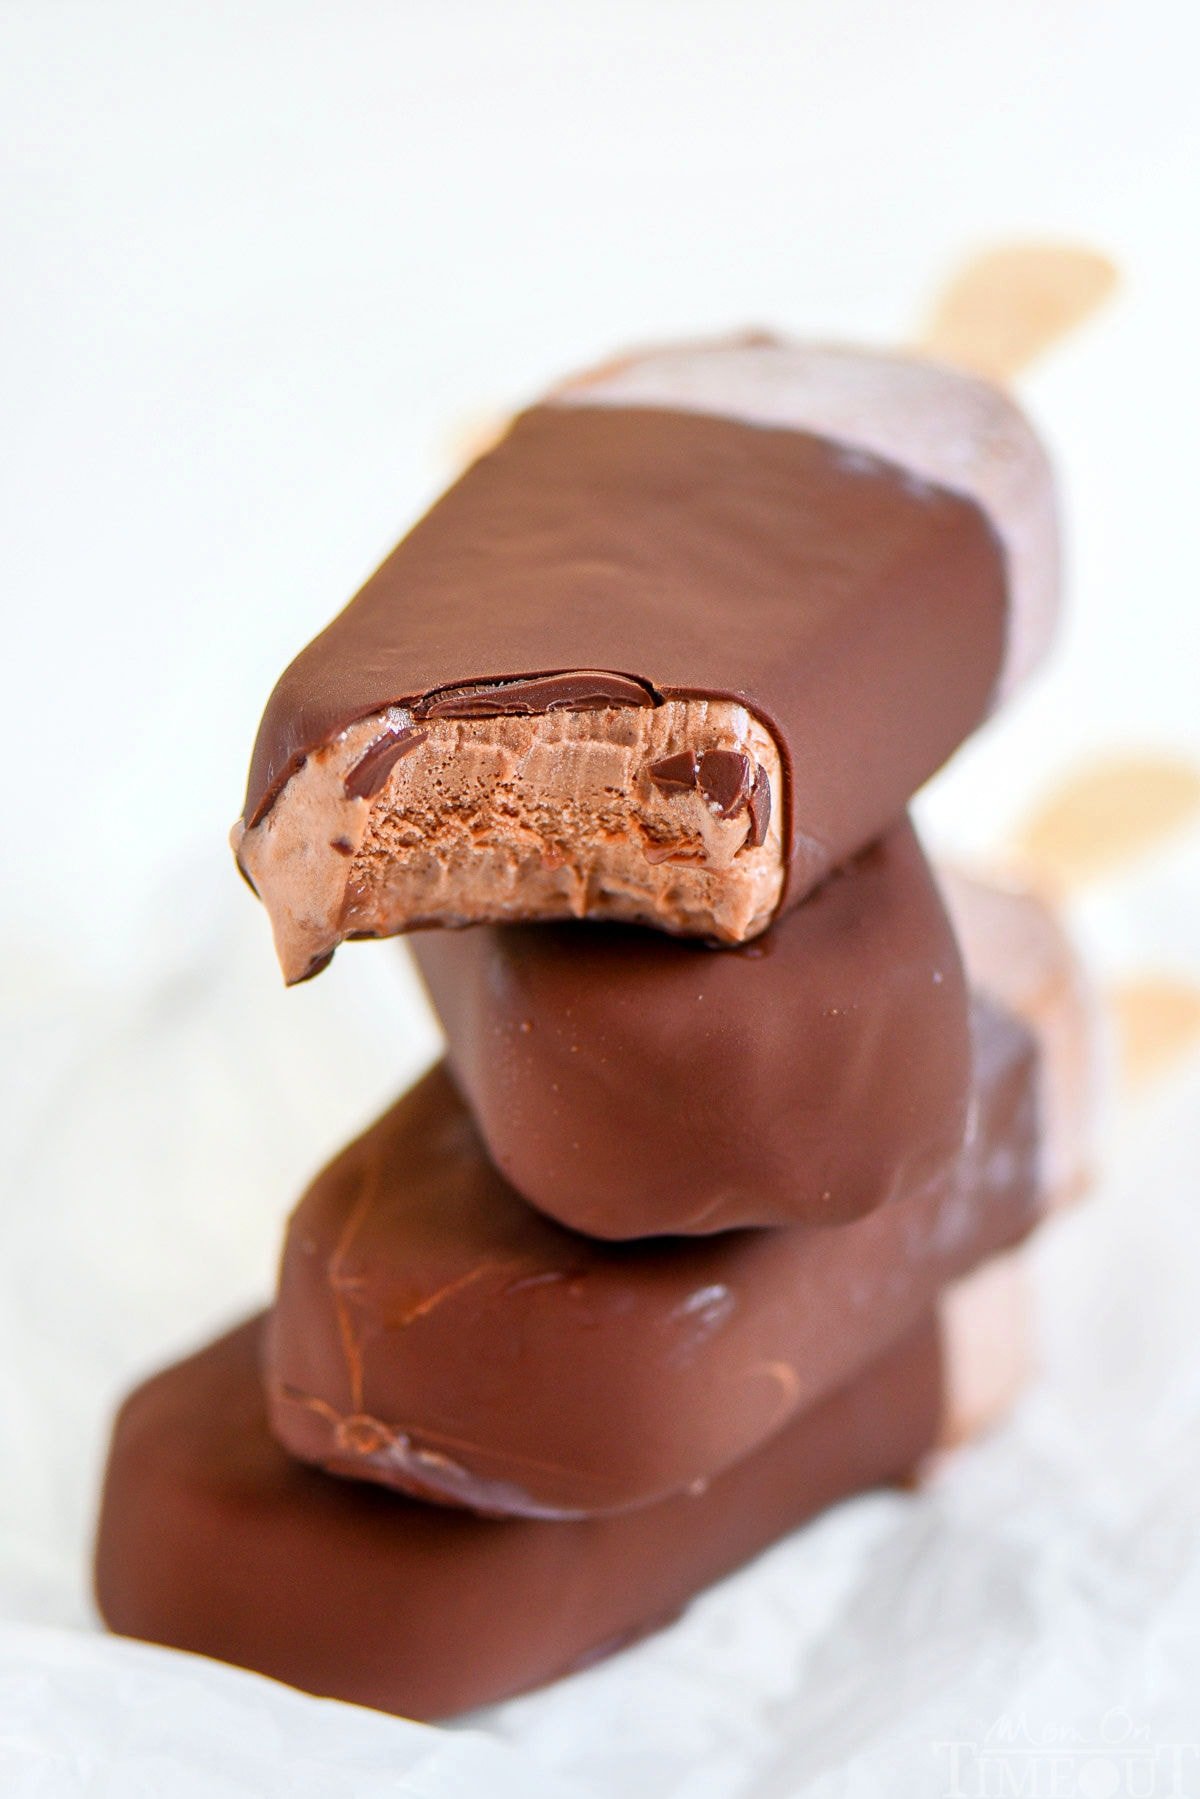
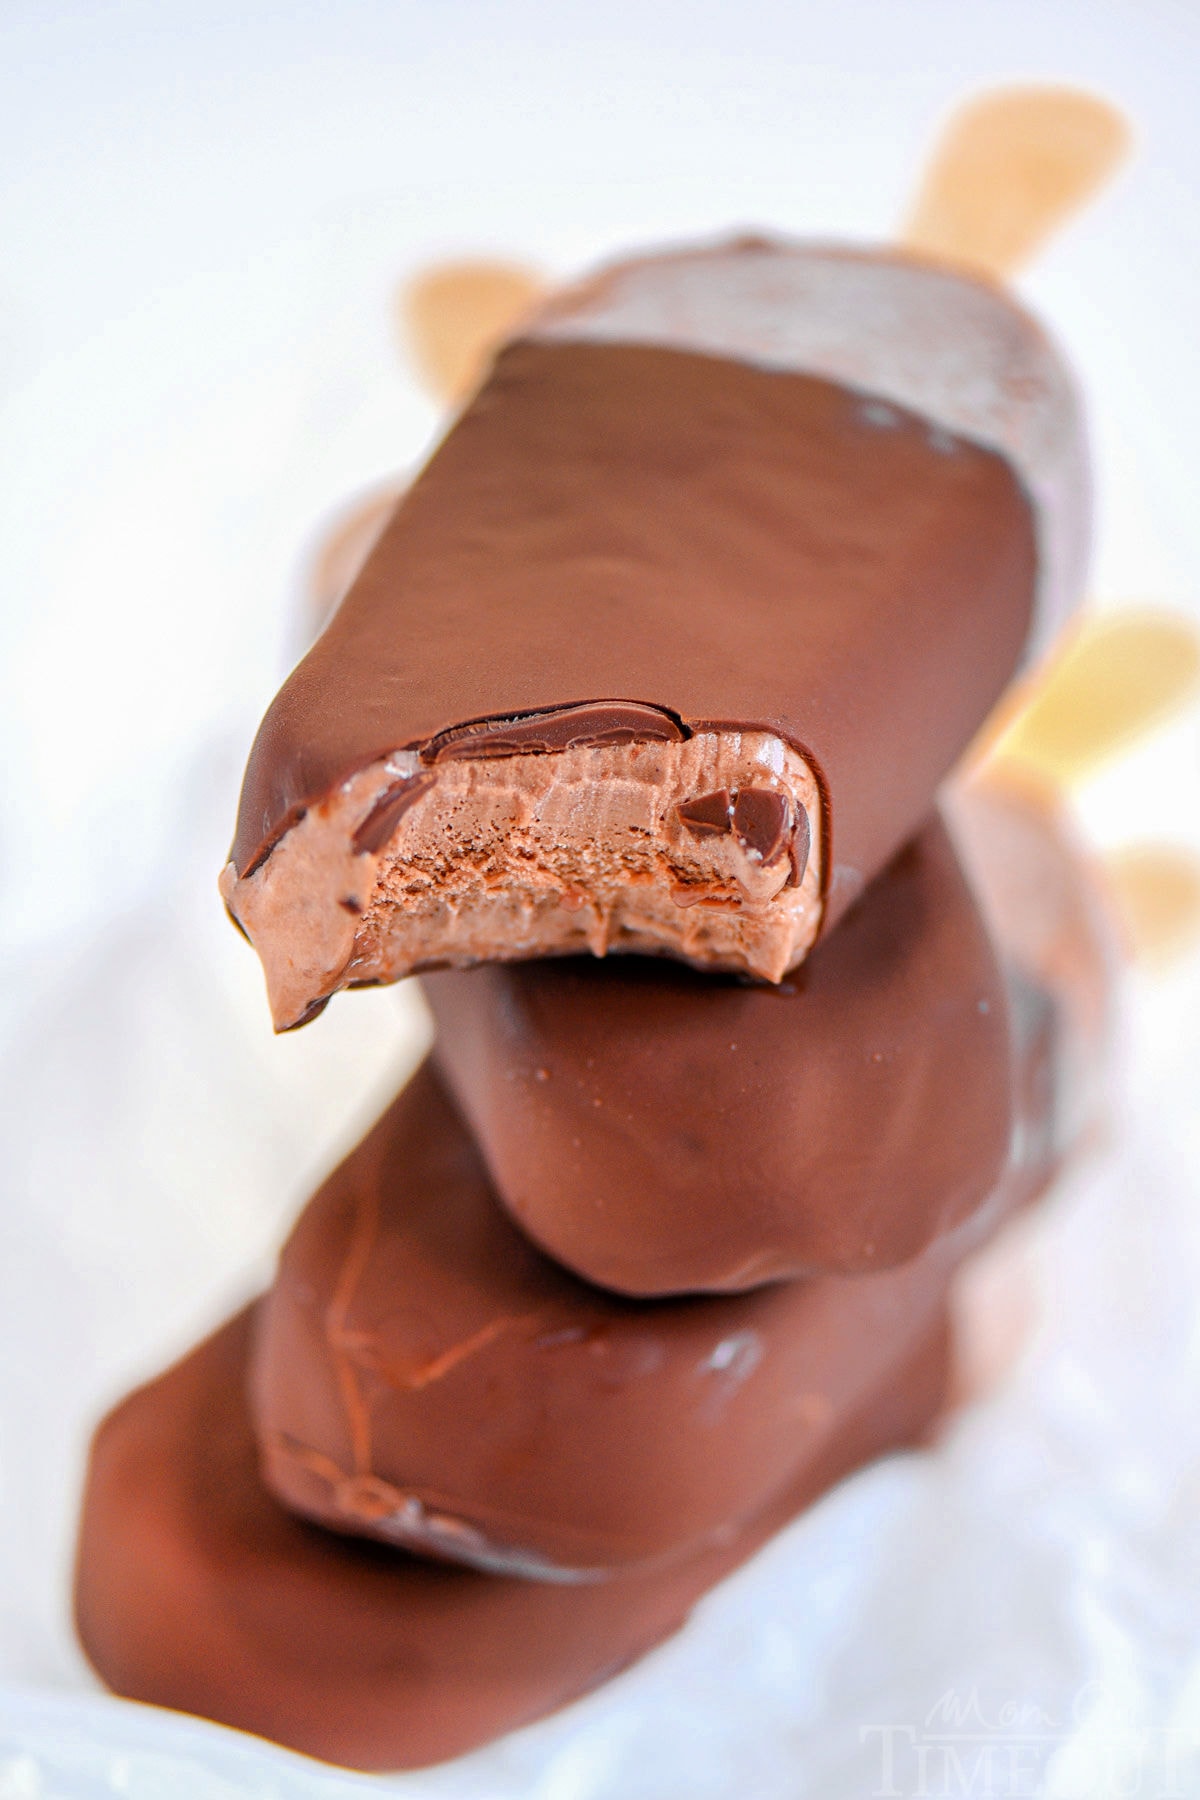
This easy homemade Chocolate Magic Shell recipe is pure dessert magic! Just two ingredients and a few minutes is all it takes to create a rich, crackly shell that hardens instantly over your favorite frozen treats. Perfect for sundaes, cones and those extra-special dessert nights!
Love all things chocolate? Make sure to try my Chocolate Cheesecake, Chocolate Cupcakes and this amazing Chocolate Mousse!
Magic Shell Recipe
If you’ve never made your own chocolate magic shell before, you’re in for a real treat! This easy two-ingredient recipe creates a rich, glossy chocolate shell that hardens in seconds when poured over any frozen treat. It’s quick, fun and totally transforms a popsicle or simple scoop of ice cream into something extra special.
Made with just chocolate chips and coconut oil, this homemade magic shell comes together in minutes and stores beautifully for months. Whether you’re topping sundaes, dipping cones, or swirling into frozen treats, this is one recipe you’ll want to have on hand all summer long!
Why You’ll Love This Recipe
So let’s talk about what I love about this Dark Chocolate Magic Shell…
- Only 2 Ingredients – Simple pantry staples are all you need! Chocolate chips (use the best quality you can find!) and coconut oil.
- Ready in Minutes – Melt, stir and you’re done. This chocolate magic shell is ready before the ice cream is even scoop-able!
- Stores for Months – Keep this easy recipe on hand for whenever ice cream cravings strike!
What You’ll Need
Chocolate Chips: Provides the deep, rich chocolate flavor and structure for the magic shell. You can swap in semisweet or even milk chocolate if preferred, but bittersweet gives it that indulgent, chocolate-y flavor without being overly sweet.
Coconut Oil: This is the secret to the “magic” shell! Coconut oil melts when warm and solidifies quickly when cold, which is what creates that signature shell over frozen treats. Refined coconut oil will have little to no coconut flavor, while unrefined will add a slight coconut note. Both are delicious options!
How To Make Chocolate Magic Shell
Bring the ice cream shop experience home with this easy Chocolate Magic Shell! With just chocolate chips and coconut oil, you’ll have a smooth, pourable topping that instantly hardens into a delicious shell.
As always, you can find the full printable recipe with complete instructions in the recipe card at the end of this post.
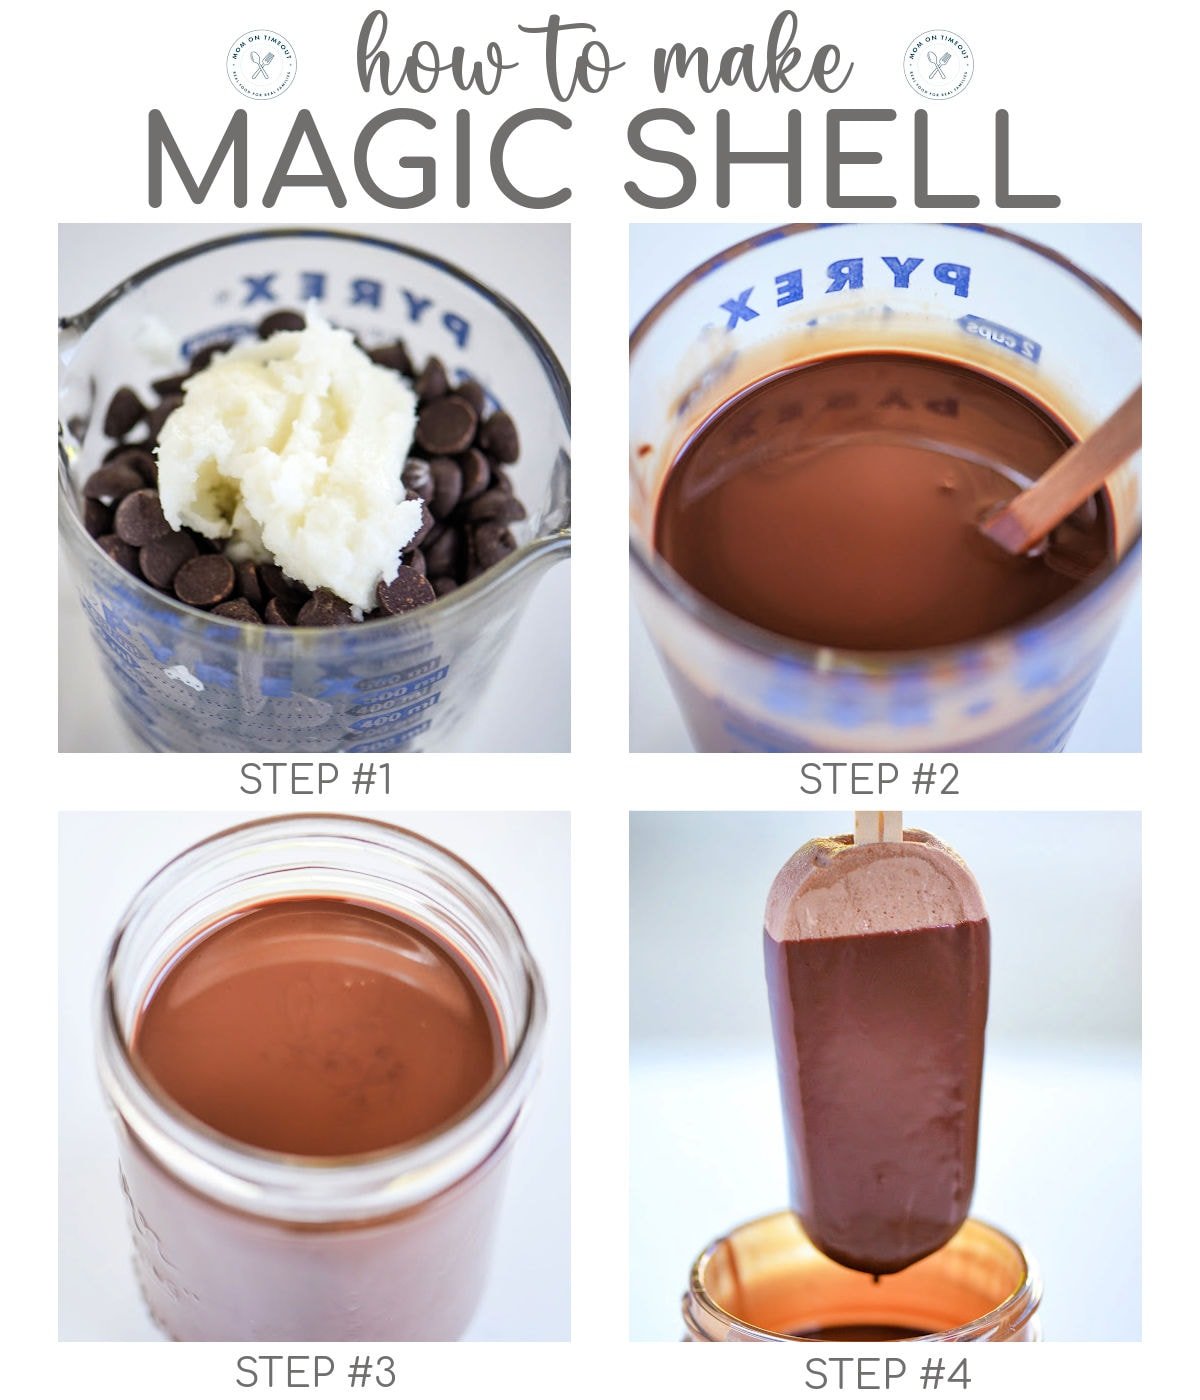
- Combine chocolate chips and coconut oil in a microwave-safe container.
- Microwave on high for 30 seconds, then stir. Heat again for another 30 seconds, stir, and continue in 15-second intervals until smooth.
- Let cool to room temperature.
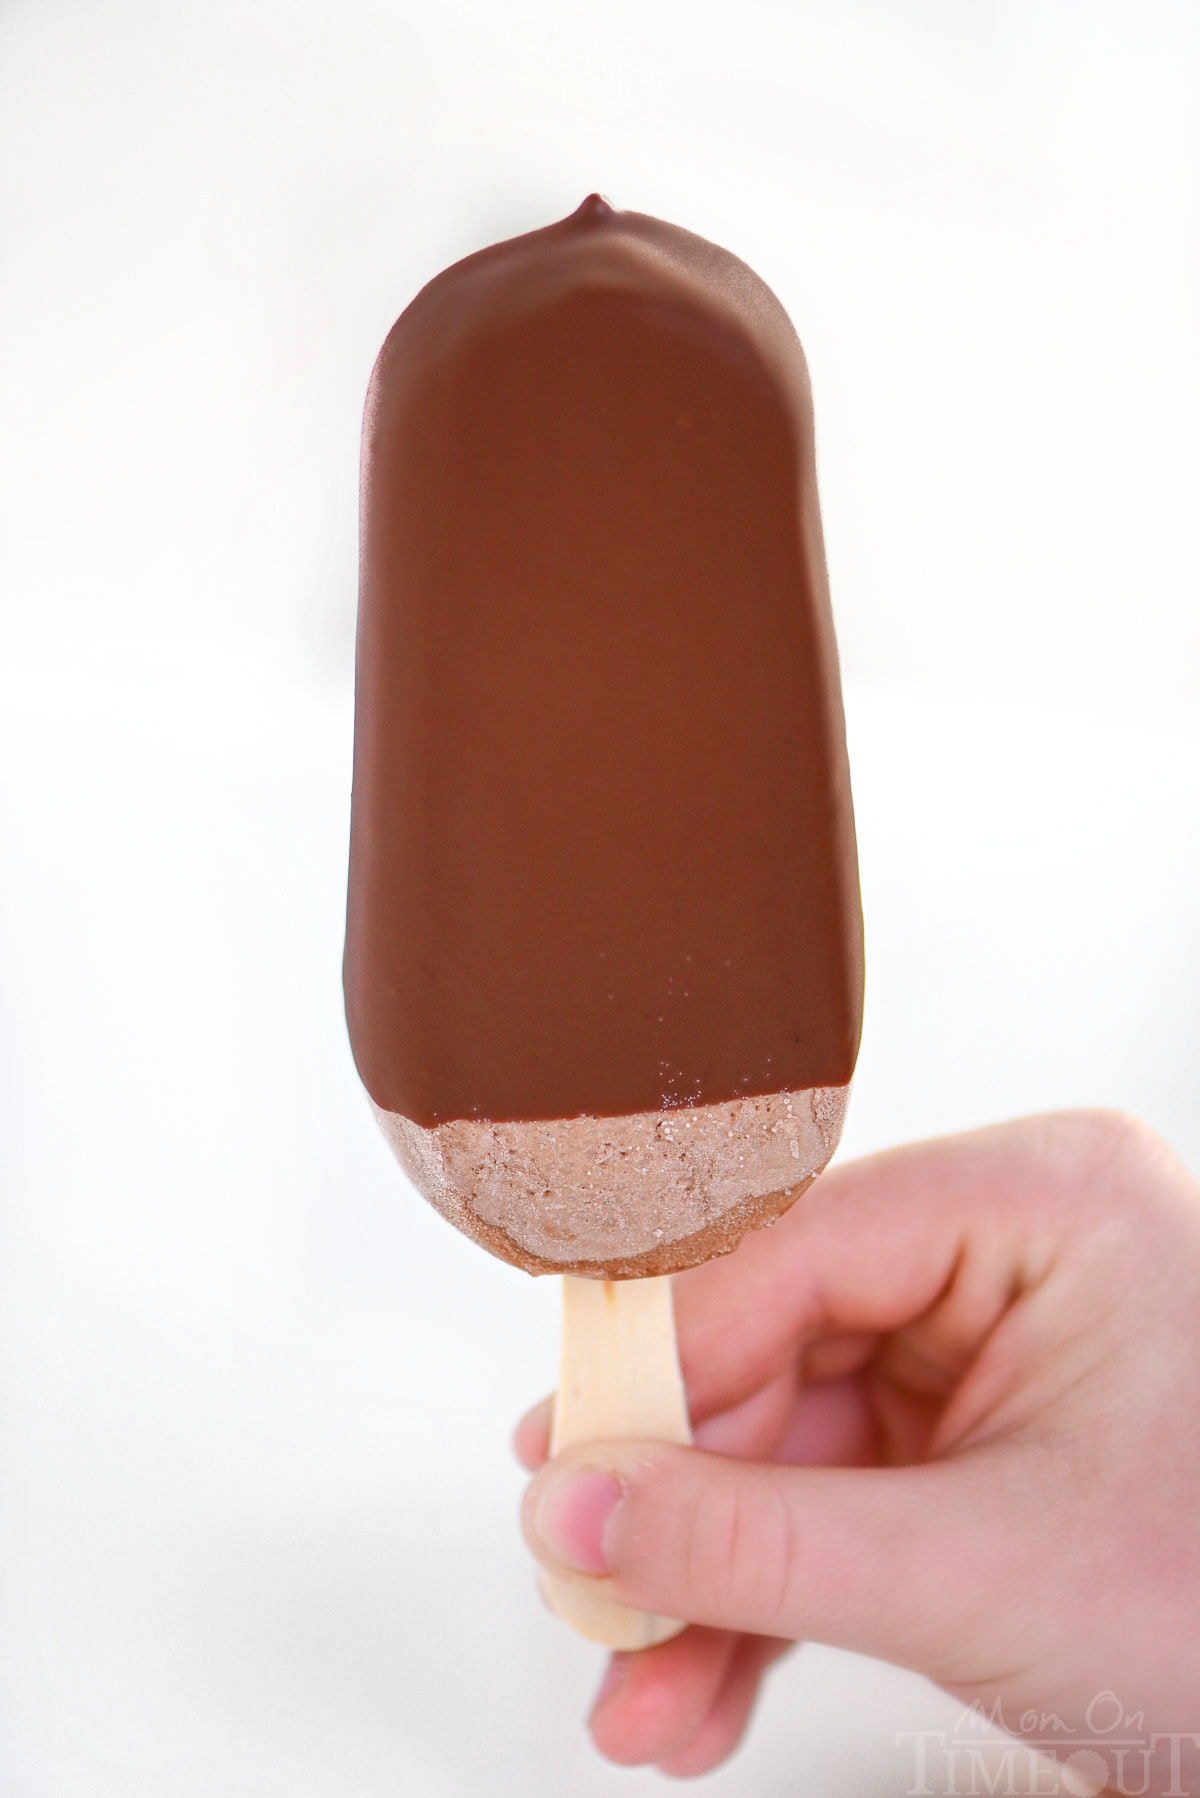
- Dip or spoon over ice cream and watch the magic happen!
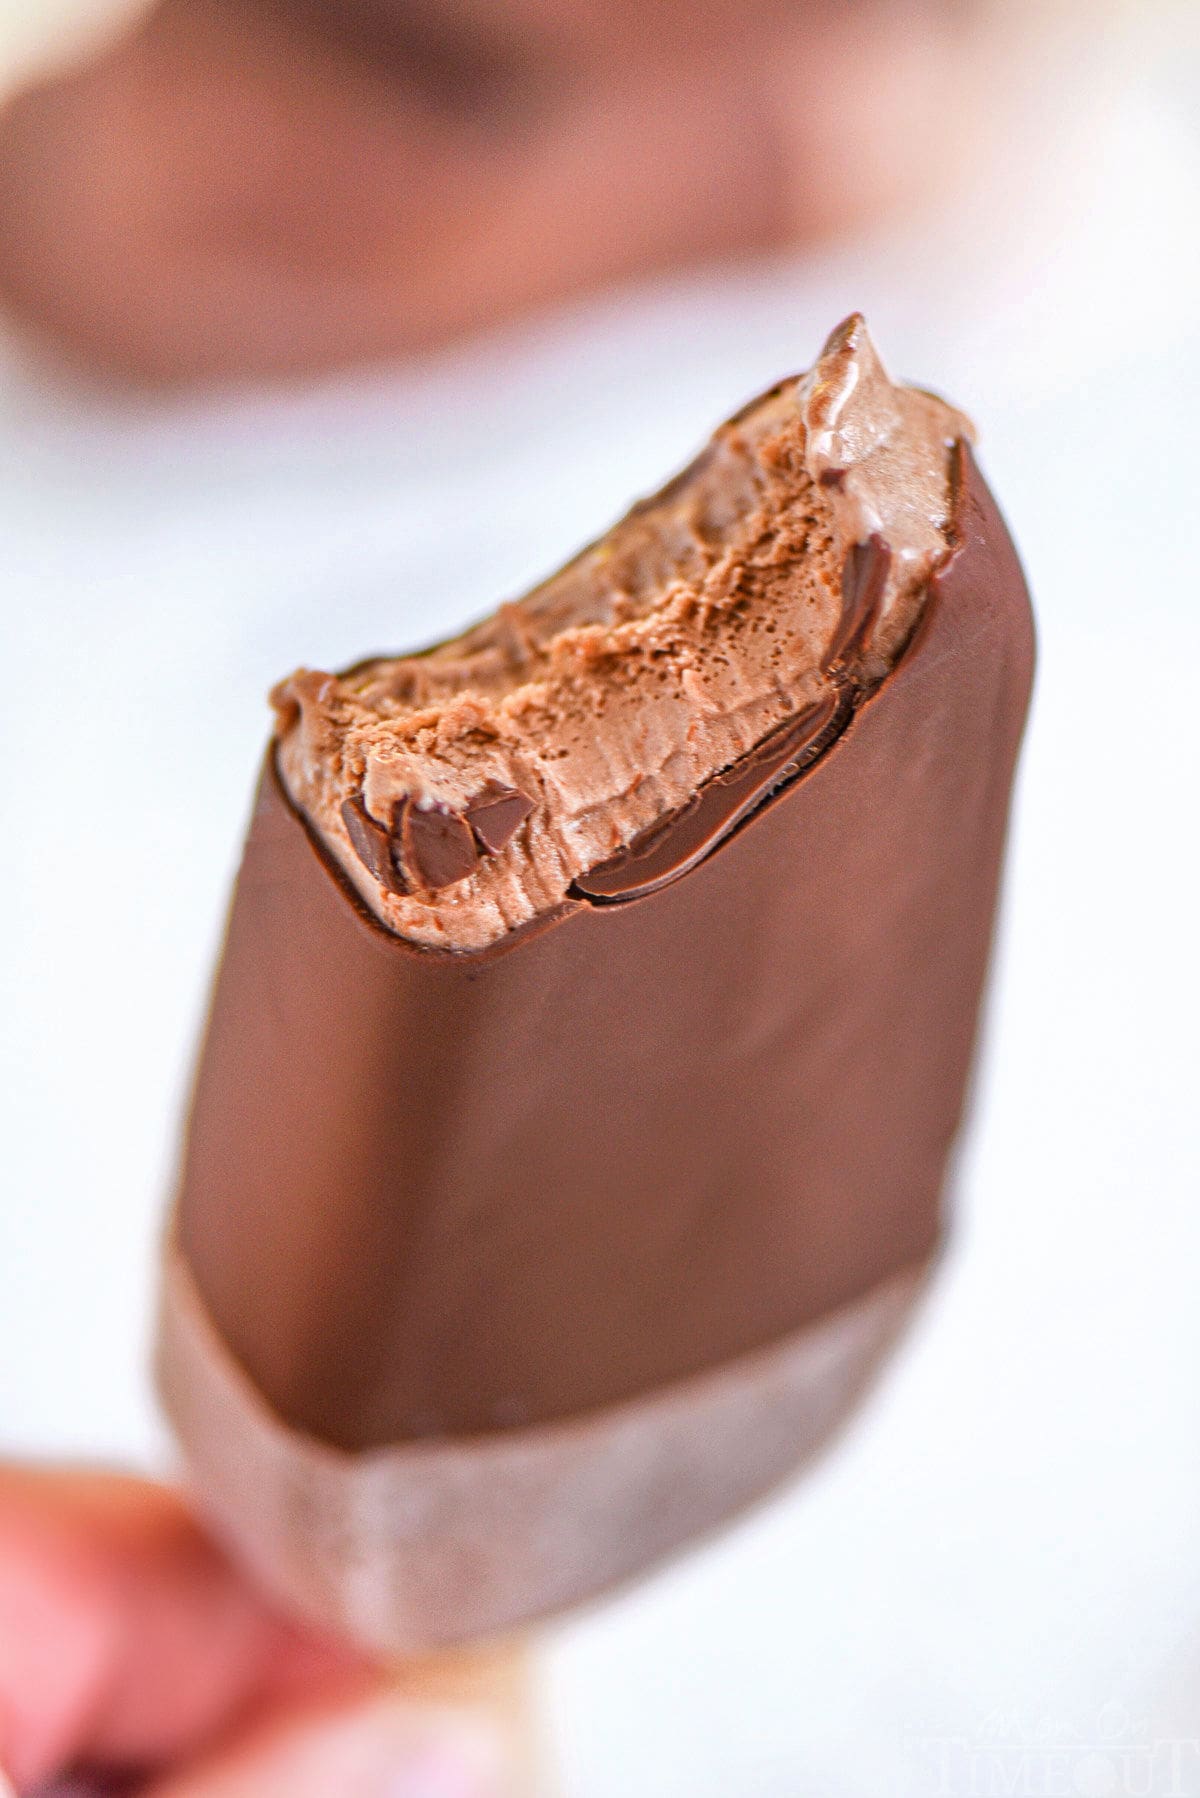
Once dipped or spooned or poured, the magic shell sets up within seconds. The chocolate will go from super shiny to matte and that’s how you know it’s perfectly set up and ready to bite into.
After microwaving do not, I repeat DO NOT REFRIGERATE. This magic shell concoction is shelf stable. I pour everything into a glass canning jar, put on a lid and pop it in the pantry.
Storage Information
This recipe stores beautifully and stays pourable at room temperature.
- Room Temperature: Store in an airtight container for up to 6 months. A canning jar works perfectly as you get a nice tight seal.
- Reheating: If the shell happens to thicken or solidify in storage, just warm gently in the microwave in 10 to 15 second bursts, stirring in between.
- Do Not Refrigerate or Freeze – This will cause it to harden and make it difficult to use.
Variations To Try
- White Chocolate Magic Shell – Use white chocolate chips in place of bittersweet.
- Peanut Butter Magic Shell – Stir in 2 tablespoons of peanut butter for a nutty twist.
- Mint Chocolate – Add ¼ teaspoon of peppermint extract – or any other extract flavor – after melting.
Can I use another type of oil?
Coconut oil works best because it solidifies quickly when chilled. Other oils like vegetable or canola won’t give the same crackly texture and “bite” that coconut oil does.
Does it taste like coconut?
Refined coconut oil has a neutral flavor, so it won’t affect the taste. If using unrefined coconut oil, you may notice a mild coconut flavor.
Can I use a double boiler instead of a microwave?
Absolutely! Just melt the chocolate and oil over low heat until smooth.
Trish’s Tips
- Use a container with a spout for easy pouring over ice cream.
- Use a tall, cylindrical container for dipping.
- Let the magic shell cool to room temperature before using. If it’s too warm and it will melt your ice cream!
- Add a sprinkle of chopped nuts or crushed cookies immediately after pouring for extra texture and flavor.
More Ice Cream & Toppings We Love

Chocolate Magic Shell
Ingredients
- 1 ½ cups bittersweet chocolate chips 9 oz
- ¾ cup coconut oil unrefined or refined
Instructions
- Combine chocolate chips and coconut oil in a microwave safe container.1 ½ cups bittersweet chocolate chips, ¾ cup coconut oil
- Heat on high heat for 30 seconds, stir.
- Heat on high heat for an additional 30 seconds, stir.
- Heat on high in 15 second intervals until mixture is completely smooth.
- Let cool to room temperature.
- Store in an airtight container at room temperature until ready to use. Spoon magic shell over any frozen treat. Let sit for 10 to 15 seconds until the shell hardens.
- Store for up to 6 months.
Notes
- Room Temperature: Store in an airtight container for up to 6 months. A canning jar works perfectly as you get a nice tight seal.
- Reheating: If the shell happens to thicken or solidify in storage, just warm gently in the microwave in 10 to 15 second bursts, stirring in between.
- Do Not Refrigerate or Freeze – This will cause it to harden and make it difficult to use.
Tools and Equipment (affiliate links): Glass Mixing Bowls | Whisk
Please see post above for more information, step-by-step process photos, recipe tips and frequently asked questions.
Nutrition
Originally published May 31, 2016.


