↑
  • Dinner Recipes
  • Breakfast Recipes
  • Dessert Recipes
  • Side Dishes
  • Recipes
    • Dinners
    • Slow Cooker
    • Appetizers and Sides
    • Breakfast
    • Dessert
    • Beverages
    • Bread
    • Holiday Recipes
    • Kid-Friendly
  • Blog View
  • About
    • Disclosure/Privacy Policy
  • Facebook
  • Pinterest
  • Instagram
  • Twitter
  • Youtube
  • Blog View
  • About
  • Privacy Policy
  • Advertise/PR
  • DISNEY
  • DINNERS
  • DRINKS
  • DESSERTS

Mom On Timeout

Serving up real food for real families!

  • Home
  • Recipes
    • Slow Cooker
    • Appetizers and Sides
    • Breakfast
    • Entree
    • Dessert
    • Beverages
    • Holiday Recipes
      • Christmas Recipes
      • Thanksgiving Recipes
      • Valentine’s Day Recipes
      • St. Patrick’s Day Recipes
      • Easter Recipes
      • Halloween Recipes
    • Bread
    • Kid-Friendly
  • 5 Ingredients
  • Appetizers
  • Favorites


You are here: Home / Crafts / Stained Glass Cross Craft

Stained Glass Cross Craft

March 29, 2012

  • 509

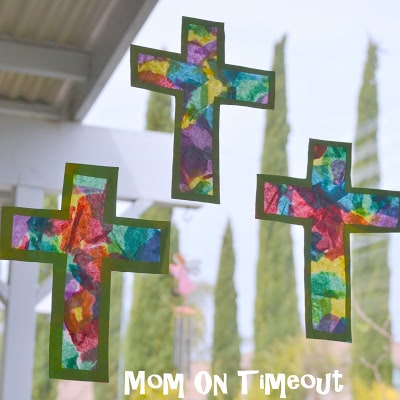
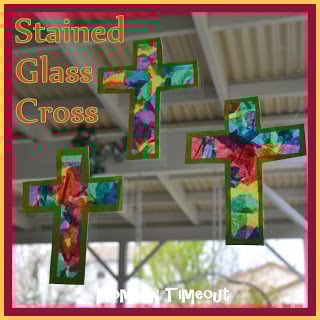
This Stained Glass Cross craft is perfect for kids of all ages and ideal for an Easter craft.

Stained Glass Cross Craft | MomOnTimeout.com #Easter #craft #cross

I love craft projects that I can do with both of my boys. Stained Glass Crosses is a craft project that all ages can help with and the results are spectacular! I think this is a great project to do for Easter and the crosses look beautiful on our sliding glass door.
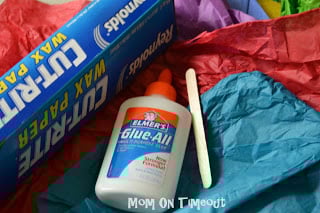
Materials Needed:

free email course

5 SECRETS TO GETTING DINNER ON THE TABLE...FAST!

  • tissue paper – variety of colorswax paper
  • white glue
  • popsicle stick
  • craft knife
  • scissors
  • cross template (or just draw your own)
  • helpers

Directions:

Find a helper to tear tissue paper into small pieces. Roll out a piece of wax paper that is double the width of the template.

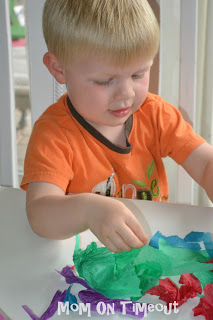
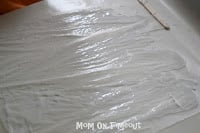
Spread glue onto half of the wax paper using a popsicle stick.

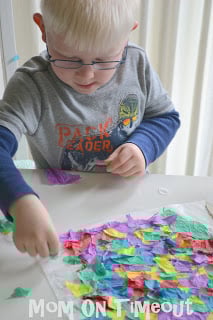
Piece by piece add the tissue paper until all the glue is covered.

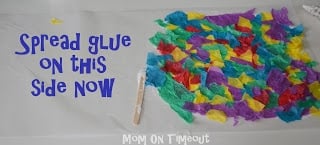
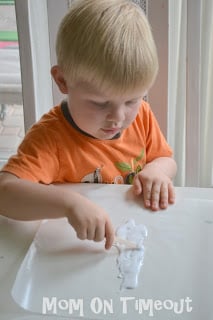
Spread glue onto the other half of the wax paper and fold over on top of the tissue.

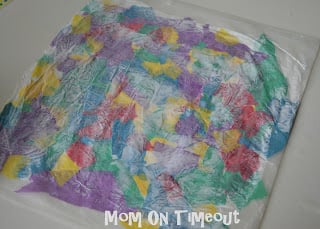
Smooth the paper and let dry. I like to put something heavy on top so it dries nice and flat.

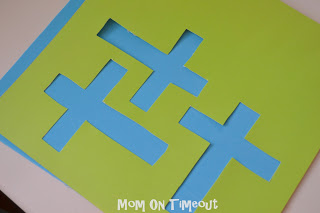
Print out the template and cut out the crosses. I used a craft knife.

Run a thin line of glue around the perimeter of the crosses on the back of the paper.

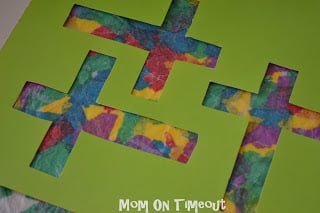
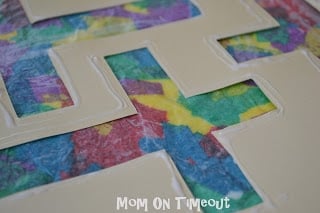
Turn the paper over and glue it to the wax paper. Let dry.

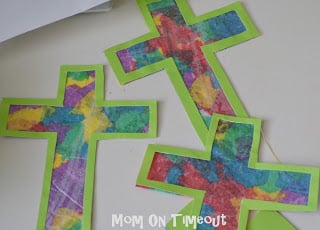
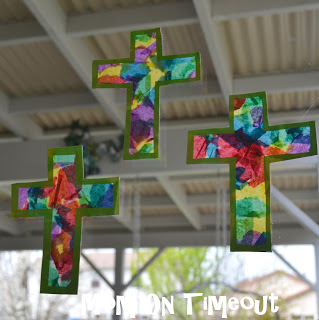
Cut out around the crosses and tape to a well-lit window and enjoy!

Here is some more Easter inspiration!

20-non-candy-easter-egg-stuffers

20+ Non-Candy Easter Egg Stuffers

Coin-Covered-Cross

Coin-Covered Cross

Easter Printables

5 Easter Printables

Mom On Timeout Signature

Connect with me!


Linking up here, Home Stories A2Z, Savvy Southern Style, and My Repurposed Life.

  • 509

By Trish - Mom On Timeout March 29, 2012 Crafts, Easter, Easter Crafts, Holiday Crafts, Kids

Previous article:
« 20+ Non-Candy Easter Egg Stuffer Ideas
Next article:
Reese’s Brownie Mini Trifles »

Comments

  1. Eileen Crocker says

    March 16, 2016 at 9:36 AM

    I do crafts at an Assisted Living facility and we are doing these today. Thank You for the great Idea.

    Reply
    • Trish - Mom On Timeout says

      March 16, 2016 at 10:02 AM

      Oh how wonderful! Have a lovely time!

      Reply
  2. Nicole Auld says

    April 15, 2014 at 1:10 AM

    Thank you for sharing. We will be doing these as a family!

    In England,
    Nicole Auld

    Reply
    • Trish - Mom On Timeout says

      April 23, 2014 at 2:46 PM

      So glad to hear that Nicole! Thank you!

      Reply
  3. Rachel says

    April 11, 2014 at 11:23 AM

    Awesome idea, love it! Will share with the children ministry at my church. But what a great idea, Thanks for sharing. 🙂

    Reply
    • Trish - Mom On Timeout says

      April 11, 2014 at 7:43 PM

      Yay! So glad you enjoyed the post Rachel!

      Reply
  4. Carlena says

    April 9, 2014 at 7:43 AM

    Thank you so much for this Easter craft! Love it!

    Reply
  5. Heather says

    March 26, 2013 at 2:26 PM

    Absolutely love these, thanks! Trying them out before I have my art class at our homeschool group do them and had a couple questions. I think with the first one I used too much glue cause it was very flimsy, lol. How long do they take to dry (at the stage before they get glued to the crosses)? Are you using construction paper for the cross templates or a more heavy duty paper? Thanks! 🙂

    Reply
  6. amma says

    March 18, 2013 at 10:07 AM

    Thanks for this creative idea! I did this with my son today.

    Reply
    • Trish - Mom On Timeout says

      March 20, 2013 at 9:20 AM

      That’s wonderful Amma! Thank you so much for stopping by!

      Reply
  7. Roberta J. Smith says

    March 16, 2013 at 3:56 PM

    Thank you so much, Trish, this has so many uses for so many different occasions and holidays. And for so many ages. Bryce did a beautiful job on his rainbow!!!

    Reply
    • Trish - Mom On Timeout says

      March 16, 2013 at 7:58 PM

      Thank you Roberta! Hope you’re having a lovely weekend!

      Reply
  8. lisa says

    March 15, 2013 at 5:14 PM

    Great idea! I was looking for something to do with seniors and this is a perfect Easter project. Thanks

    Reply
    • Trish - Mom On Timeout says

      March 16, 2013 at 7:57 PM

      Wonderful! Thanks so much for stopping by!

      Reply
  9. Yolanda Crisostomo says

    February 2, 2013 at 11:30 PM

    I Love these! I really want to do this with my grandson! I’m pretty sure I have all the materials too! Thank you :))))

    Reply
    • Trish - Mom On Timeout says

      February 4, 2013 at 7:49 AM

      Perfect! Thanks for stopping by Yolanda!

      Reply
  10. portland homes for sale says

    August 16, 2012 at 5:10 AM

    His dessert looks so delicious! Thanks for sharing! for coming to our “Strut Your Stuff Saturday.” We hope you’ll be back soon! -The Sisters

    Reply
  11. Anonymous says

    April 21, 2012 at 11:27 PM

    Made these with my 5 year old granddaughter, her Mom, and her Nanny…we had lots of fun and they came out wonderfully…all 4 different. Gave one to her 84 year old grand aunt and it is hanging on her window in the nursing home…truly brightens up the room. Thank you so much for the idea and instructions. God bless, Sally

    Reply
« Older Comments

Leave a Reply Cancel reply

Your email address will not be published. Required fields are marked *

Recipe Rating


This site uses Akismet to reduce spam. Learn how your comment data is processed.

Hi, I’m Trish!

Welcome to Mom On Timeout where I’m serving up real food for real families! Dinners, desserts, and everything in between!
Read More…

categories

archives

Popular Posts

white bowl with handles filled with zuppa toscana soup and topped with cheese. Kale, sausage and bacon can be seen in the soup.
crockpot chili in a ladle held above the crockpot and the rest of the chili.
chicken-stir-fry
best-tater-tot-casserole-recipe-hamburger-green-beans

Some of my favorites…

Strawberry Cake Roll with one slice cut off at the end sitting on wood board topped with powdered sugar and fresh strawberries.
Slice of hummingbird cake recipe on a white round plate sitting in front of cake stand with rest of cake on it.
Top down look at croissant french toast bake in baking dish made with blueberries and topped with a dusting of powdered sugar.
Top down view of recipe for cream cheese mints on parchment paper flattened with the tines of a fork. Four pastel colors are shown: pink, blue, green and yellow in a symmetrical grid layout.
Close up of Strawberry danish with cream cheese topped with a glaze and fresh strawberries.

Copyright ©2025, Mom On Timeout. All Rights Reserved.
Design by Pixel Me Designs
  • Facebook
  • Twitter
  • Pinterest