↑
  • Dinner Recipes
  • Breakfast Recipes
  • Dessert Recipes
  • Side Dishes
  • Recipes
    • Dinners
    • Slow Cooker
    • Appetizers and Sides
    • Breakfast
    • Dessert
    • Beverages
    • Bread
    • Holiday Recipes
    • Kid-Friendly
  • Blog View
  • About
    • Disclosure/Privacy Policy
  • Facebook
  • Pinterest
  • Instagram
  • Twitter
  • Youtube
  • Blog View
  • About
  • Privacy Policy
  • Advertise/PR
  • DISNEY
  • DINNERS
  • DRINKS
  • DESSERTS

Mom On Timeout

Serving up real food for real families!

  • Home
  • Recipes
    • Slow Cooker
    • Appetizers and Sides
    • Breakfast
    • Entree
    • Dessert
    • Beverages
    • Holiday Recipes
      • Christmas Recipes
      • Thanksgiving Recipes
      • Valentine’s Day Recipes
      • St. Patrick’s Day Recipes
      • Easter Recipes
      • Halloween Recipes
    • Bread
    • Kid-Friendly
  • 5 Ingredients
  • Appetizers
  • Favorites


You are here: Home / Crafts / Bright and Beautiful Butterfly Craft

Bright and Beautiful Butterfly Craft

August 23, 2011

  • 23

This butterfly craft is a super fun and easy craft for kids that uses materials you probably already have on hand!

Easy butterfly craft for kids collage with three butterflies made with foam and popsicle sticks

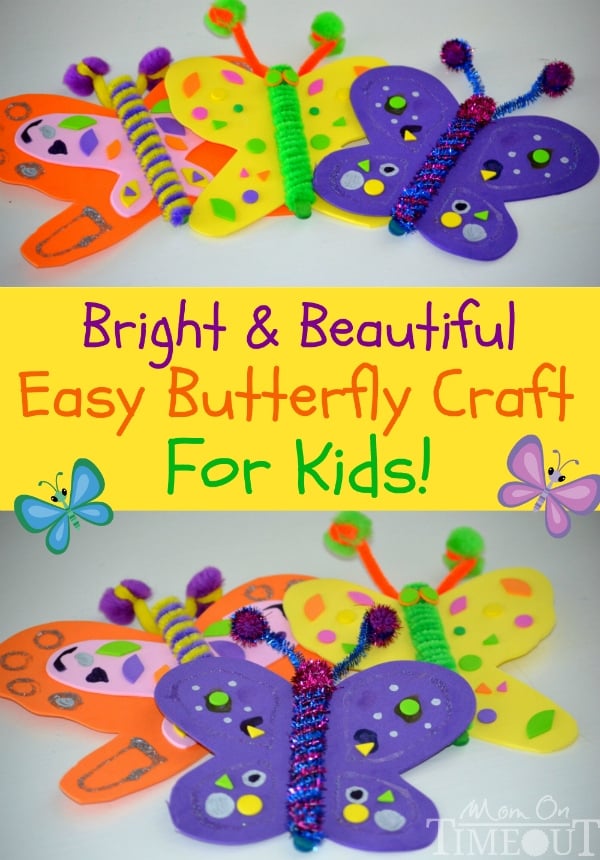
Today I am going to show you how to make these fun and brightly colored butterflies with your kids. This is a really easy craft and you probably have all these supplies on hand.

I must warn you that it is quite addicting because just as you are finishing the first one, another idea will pop into your head and because they are so quick and easy, you think “why not?”. Then comes the third, the fourth and so on!
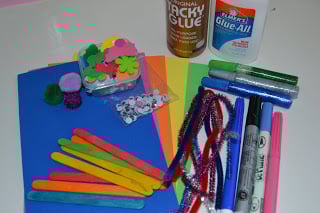
materials needed to make butterfly craft for kids including Foam Sheets Glue Popsicle Sticks Pipe Cleaners Pom-Poms Pens Glitter Glue Foam Stickers Googly Eyes

Supplies Needed:

free email course

5 SECRETS TO GETTING DINNER ON THE TABLE...FAST!

Foam Sheets
Glue
Popsicle Sticks
Pipe Cleaners
Pom-Poms
Optional:
Pens
Glitter Glue
Foam Stickers
Googly Eyes

Instructions:

pipe cleaners wrapped around popsicle stick

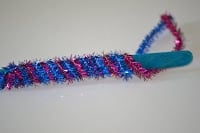
Wrap two pipe cleaners around craft stick (your choice of color). This creates the body of the butterfly. You can wrap the pipe cleaners one at a time, or choose different colored pipe cleaners and wrap them at the same time. This creates a really cool striped effect.

purple butterfly cut out of foam sheet

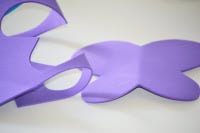
Fold a piece of colored foam in half and draw the butterfly wings. Cut out the wings and unfold. Butterflies come in all shapes and sizes so be creative.

body being glued to the foam wings

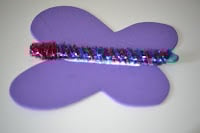
Run a line of glue down the center of the butterfly wings and press the body onto the glue. Depending on your glue and drying time, you may want to place something  heavy (like a book) on top of the body while it’s drying. This will make sure the two pieces are glued together securely.

Easy butterfly craft for kids collage with three butterflies made with foam and popsicle sticks

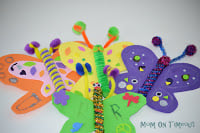
Now it’s time to decorate! This is really up to you and what supplies you have on hand. Take a look at my examples to give you some ideas. It can be as simple as using pens or as complex as gluing pom-poms over the entire body 🙂


pipe cleaner antennae for buttefly

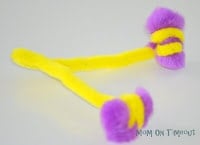
After you are finished decorating it’s time to make the antennae. Using a pipe cleaner and two pom poms, wrap the end of the pipe cleaner around the center of the pom pom tightly.

Fold the pipe cleaner at the length you want your antennae to be and repeat with a second pom pom. You probably will not need the full length of the pipe cleaner, so cut off what you will not be using before wrapping the second pom pom. Reece wanted to use two different colors so anything goes here!

antennae attached to back of butterfly

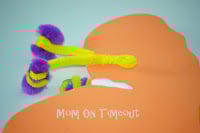
Glue the antennae onto the back of the butterfly, again using something heavy if needed. At one point Reece was in a BIG hurry to play with the butterfly and so we just used a large foam sticker to secure the antennae. We’re not picky around here (nor sticklers for rules!).

Here is what Reece came up with when left to his own devices:

butterfly craft made by child

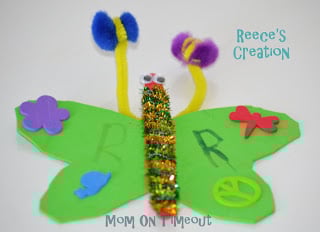
He did everything, the cutting, gluing, pipe cleaners – he did it all! He was obviously proud of his masterpiece because he marked it quite clearly with an “R” – twice!

  • 23

By Trish - Mom On Timeout August 23, 2011 Crafts, Kids

Previous article:
« General Tso’s Chicken Sliders With Crunchy Slaw
Next article:
Eggs Benedict with Hollandaise Sauce »

Comments

  1. Rose @ Walnut Acre says

    September 12, 2011 at 4:01 AM

    Butterflies are one of my favorite crafts and I love the take on it.

    Reply
  2. Tonia @ The Gunny Sack says

    September 9, 2011 at 3:24 PM

    What a fun craft! I am going to show this to my daughter so she can make some this weekend! Thanks for sharing!

    Reply
  3. Janelle says

    September 7, 2011 at 8:44 PM

    The bright and pretty colors caught my eye over at Seven Thirty Three. This is a great kid craft and I would love to try this with my daughter.

    If you have time, I would love for you to join my first giveaway:

    http://ofpinksandfairytales.blogspot.com/2011/09/giveaway-my-memories-suite.html

    Hope to see you there!

    Janelle
    Of Pinks and Fairy Tales

    Reply
  4. Grandma Bonnie says

    August 31, 2011 at 7:44 PM

    This looks like a fun and easy craft for my grand daughter to try. Thanks for sharing.
    New follower from the Homemade Monday hop. Hope you stop for a visit.
    Have a nice week.

    Reply
  5. MomOnTimeout says

    August 31, 2011 at 8:27 AM

    I will Natasha – thanks for visiting Mom On Timeout.

    Reply
  6. Natasha says

    August 31, 2011 at 8:05 AM

    thanks great idea

    would love it if you could share this post on my new link party, Serenity Saturday, over at http://www.serenityyou.blogspot.com

    xxx

    Reply
  7. MomOnTimeout says

    August 30, 2011 at 7:08 AM

    Thanks for stopping by!

    Reply
  8. Classifiedmom1 says

    August 30, 2011 at 4:58 AM

    Those are beautiful! And what fun 😉 Thank your for linking up to The Sunday Showcase!

    Reply
  9. Vicky says

    August 29, 2011 at 2:20 PM

    Very cute! I will have to try this with my girls! Came by from the Sunday Showcase

    Reply
  10. MomOnTimeout says

    August 25, 2011 at 9:58 AM

    Thanks! I would love to share!

    Reply
  11. Amanda Formaro says

    August 25, 2011 at 9:55 AM

    This is SO cute!

    I’d love it if you shared this with the Fun Family Crafts audience. FFC is similar to Craftgawker but it only features kid friendly tutorials. Looking forward to seeing what fun crafts you submit!
    http://funfamilycrafts.com

    Reply
  12. MomOnTimeout says

    August 24, 2011 at 10:14 PM

    Thanks!

    Reply
  13. Chris Rosenquist says

    August 24, 2011 at 10:13 PM

    Great work!

    Reply
  14. MomOnTimeout says

    August 23, 2011 at 3:21 PM

    They are so cute Jen! Glad to see you stopping by 🙂

    Reply
  15. Jennifer Goldbronn says

    August 23, 2011 at 2:16 PM

    oh my goodness! I am going to make these on our Mama-Lily day this Friday!! Love crafts.

    Reply
Newer Comments »

Leave a Reply Cancel reply

Your email address will not be published. Required fields are marked *

Recipe Rating


This site uses Akismet to reduce spam. Learn how your comment data is processed.

Hi, I’m Trish!

Welcome to Mom On Timeout where I’m serving up real food for real families! Dinners, desserts, and everything in between!
Read More…

categories

archives

Popular Posts

white bowl with handles filled with zuppa toscana soup and topped with cheese. Kale, sausage and bacon can be seen in the soup.
crockpot chili in a ladle held above the crockpot and the rest of the chili.
chicken-stir-fry
best-tater-tot-casserole-recipe-hamburger-green-beans

Some of my favorites…

Orange pound cake with end cut off sitting on wood board topped with a glaze.
Overhead shot of sour cream cake donut on wire rack topped with glaze.
Berry cobbler served on white round plate and topped with vanilla ice cream. Baking dish with the rest of the berry cobbler recipe can be seen in the background.
Strawberry Cake Roll with one slice cut off at the end sitting on wood board topped with powdered sugar and fresh strawberries.
Slice of hummingbird cake recipe on a white round plate sitting in front of cake stand with rest of cake on it.

Copyright ©2025, Mom On Timeout. All Rights Reserved.
Design by Pixel Me Designs
  • Facebook
  • Twitter
  • Pinterest