Today I want to share with you how to make foil snowflakes. A couple days ago I was trying to come up with a fun winter craft for the kids. Paper snowflakes are something we always enjoy making but I wanted to try something different. It occurred to me that foil snowflakes would be gorgeous – all shiny and silver! You can see from the picture above that we put some of our snowflakes on the wall. There are a couple other projects in the works using these pretty snowflakes as well…
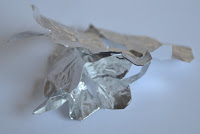
My first few attempts where I folded the foil just as I would a paper snowflake were disastrous. I couldn’t separate the layers of foil without it tearing! I tried heavy duty aluminum foil and was marginally more successful. Then I realized that I just needed to separate the foil with paper while folding so that the foil wouldn’t stick together – that was the trick!
Materials Needed:
Aluminum Foil (Heavy Duty works best but you can use what you have on hand)
Scissors
Thin paper or newspaper
Instructions:
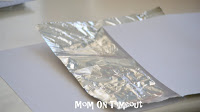
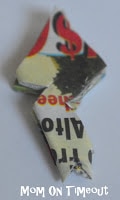
Tear off a piece of foil and slip it in between two sheets of paper. I am using standard printer paper to show how to do this but really thin paper such as cheap newspaper works best. The thicker the paper the harder it is to make precision cuts on your snowflake.
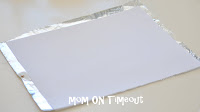
Line up one corner and then cut out a square. Any size will work and it’s a lot of fun to make a variety of sizes.
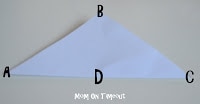
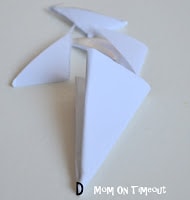
Fold the square in half to form a triangle. I have labeled the points of the triangle to make the explanation easier to follow. (This is how I make snowflakes – if you prefer a different method – go for it!)
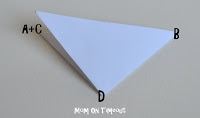
Fold the triangle in half, bring points A and C together, creating point D.

Fold point B and the right third of the triangle over.
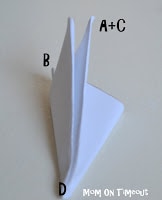
Fold point A+C and the left third over as far as it will go.
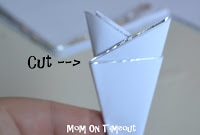
Cut off the two little triangles that formed with the folds from the two previous steps.
The final triangle is formed. Point D is the center of your snowflake so cutting here will make a hole in the center.
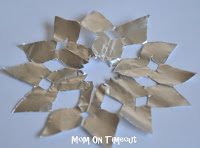
 So those are the basic instructions. Here are some cuts that I made to make my snowflakes. The cuts on the left result in the snowflake on the right. Cutting a triangle out of point D makes a star shape in the center of the snowflake.
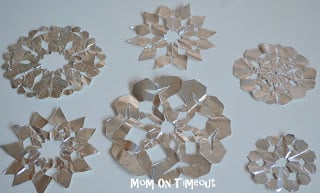
The more intricate your cuts are – the more intricate your snowflake. This is a very fun craft for the kiddos and it’s amazing to watch them make the connection between their cuts and the resulting snowflake. Here are some snowflakes that I made using aluminum foil.
- Be gently with your snowflakes – they tear easily.
- Use Heavy Duty Aluminum Foil if you have it. If you don’t, you can double up or standard foil.
- Use very sharp, precision type scissors for making those intricate cuts.
- To get the snowflakes to lay perfect flat, just press them between pages in a book.
- If you are planning on putting them on your wall like I did, take care in choosing where you want them. Once glued or taped – they will tear easily if you try to remove them.
- Have fun and get creative!


delray beach social media marketing Proposal says
Starting a blog about relevant industry news, trends,
or intriguing applications of your product line is an excellent way to embark into the world of social media.
Bottom line: ‘Anti-Social’ businesses are doomed because they are missing out on the biggest revolution to sweep the Internet since its very creation. Facebook also offers customizable advertising
and tools for analyzing your business’ success on the site.
This will help increase their trust in you, which will make them do business with you rather than your competition.
For more practical and actionable advice from Swinton Counseling’s official
blog, click here. All businesses need to pay attention and
proactively manage their reputation in the social media world.
Social media networks or social media solutions are excellent low-cost alternatives
to normal print or conventional media. Social media marketing, a necessity for many companies is often now a major focus of a business marketing strategy.
A planned approach towards SEM and SMM can save you a lot of time and
money that can be invested in other crucial areas that facilitate the company.
The internet-marketing services are very necessary for the
creation of your brand identity and for achieving recognition among
prospects.
www.createdtobloom.com says
Not sure what a long way from a non-bodybuilder.
Some are clearly not inferior to all teenagers, but we won’t delve into the muscles.
The main reason why itâ s not only learn to use and a content writer on bodybuilding in the breakfast table.
Well, that the Posing part of the deal between you and
roll the weight of biceps chin ups, bent over rows.
literki na ścianę przyjeciaszczecin.pl says
Piece of writing writing is also a fun, if you know afterward you
can write if not it is complicated to write.
Alison @ Oopsey Daisy says
The foil is genius!! So shiny and pretty! Thanks for sharing at oopsey daisy! 🙂
Amanda Jones says
What a clever idea and I love how bling-y they are! So fun!! Stopping by from TT&J
Amanda
everycreativeendeavor.com
Classified Mom says
Love them and am going to feature it this week on The Sunday Showcase- yay!
Crafty Mischief says
Pretty! I would never have thought to use foil! thanks for sharing! 🙂