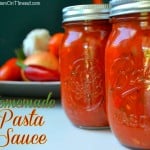
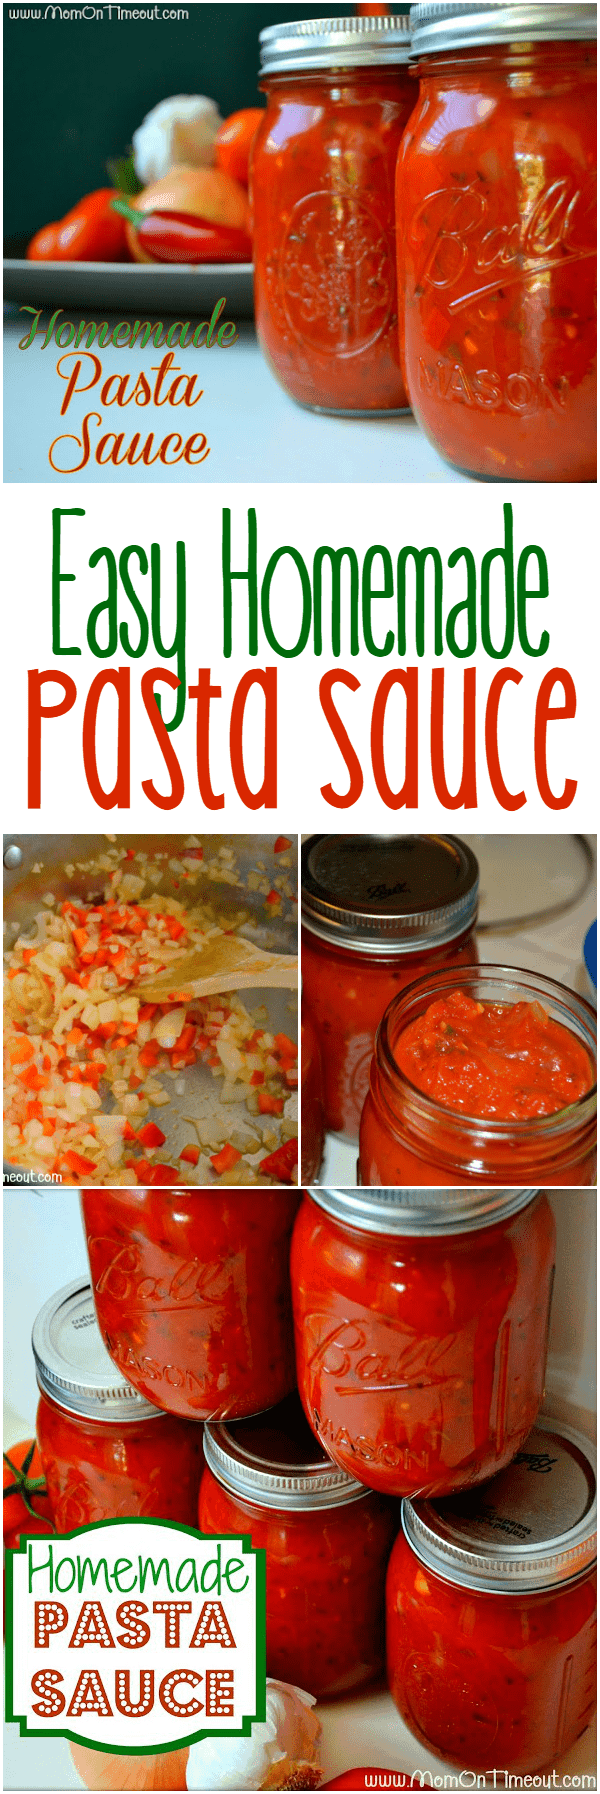
This Easy Homemade Pasta Sauce recipe is a great way to use all those fresh veggies in your garden! Not into canning? No worries, this sauce can be frozen in ziploc bags as well!

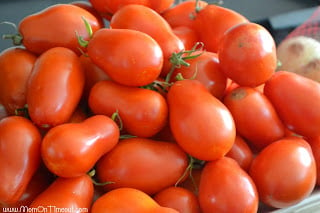
Our tomato plants have been quite prolific this year. Early last week I walked out to the garden and was greeted with so many red-ripe tomatoes and absolutely no plans for using them. I decided right then and there to confront my fear of canning and tackle this head-on. Why am I afraid of canning? First off – why is it called canning when everything is being put into a glass jar? How do you know if you’ve “canned” properly? What if I waste all my time and it doesn’t taste good? The list goes on and on. So the first thing I did was do some research. I found tons of recipes online and then I started getting to the good stuff that actually answered all my questions. Once I found out the methods behind the madness I felt more comfortable and went for it!
{Not into canning? No worries! Just make up the sauce and freeze in freezer bags.}
Ingredients {resulted in 5 pints of sauce plus a little extra}:
15 lbs of tomatoes (I used mostly Roma)
2 med onions, chopped
1 red bell pepper, chopped
5 cloves of garlic, minced
1 Tbls vegetable oil
2 Tbls fresh basil
1 tsp salt
1/2 tsp black pepper
1 Tbls sugar
1 tsp dried parsley
1/2 tsp red pepper flakes (optional)
2 Tbls dried oregano
2 bay leaves
dash of Worcestershire sauce
1 small can of tomato paste {optional; use if your sauce is not thick enough for you}
1/4 c lemon juice (from a bottle; used to acidify)
Directions:
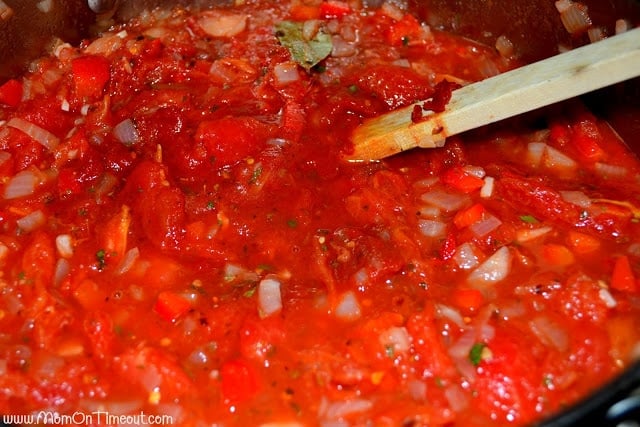
Add the tomatoes and let them cook for 10-15 minutes before adding all the other ingredients. Stir to combine and let simmer until the sauce has cooked down to your desired thickness. If you want to use a masher to speed the break-down of the tomatoes that’s totally fine. Mine took a little over an hour to get nice and thick but it will totally depend on the type of tomatoes you are using and the amount of liquid you start with.


Homemade Pasta Sauce
Ingredients
- 15 lbs tomatoes I used mostly Roma
- 2 onions medium - chopped
- 1 red bell pepper chopped
- 5 cloves garlic minced
- 1 tbsp vegetable oil
- 2 tbsp fresh basil
- 1 tsp salt
- 1/2 tsp black pepper
- 1 tbsp sugar
- 1 tsp dried parsley
- 1/2 tsp red pepper flakes optional
- 2 tbsp dried oregano
- 2 bay leaves
- 1 dash Worcestershire sauce
- 6 oz tomato paste 1 small can - optional; use if your sauce is not thick enough for you
- 1/4 cup lemon juice from a bottle; used to acidify
Instructions
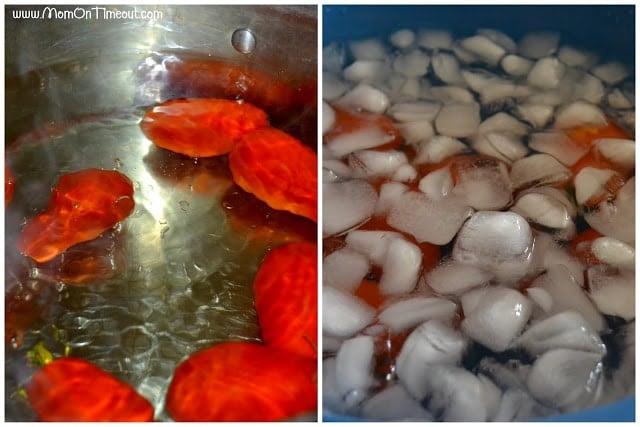
- First we are going to remove the skins. Get a pot of water boiling and prepare an ice bath {a large bowl filled with ice and water}. Submerge the tomatoes {5-6 at a time} in the boiling water for about 45 seconds. Immediately remove to the ice bath. The skin can now be removed very easily - most of my tomato skins just slid right off!
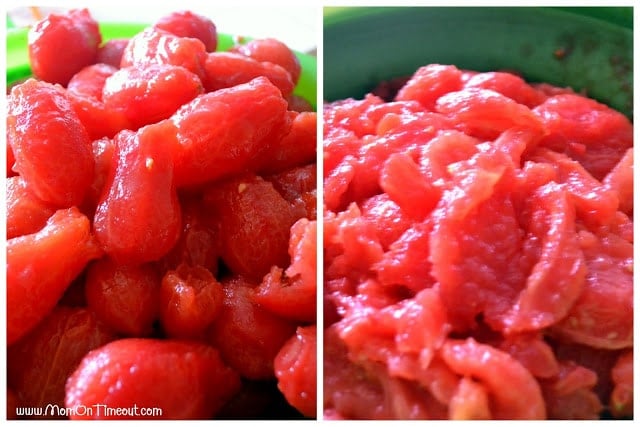
- Next up is removing the seeds and excess tomato juice. I'm sure there is a more technical way to do this, such as cutting open the tomatoes and scraping the seeds out, but how I actually did it was to use my hands to open the tomato up and shake those seeds out. Once I removed the seeds and squeezed the tomatoes to get rid of the juice, I placed the tomatoes into a colander so more tomato juice could drip out. Why get rid of the tomato juice? Because we're looking for a nice thick sauce and the longer you cook the tomatoes letting the juices evaporate, the more vitamins we lose from the tomatoes. By ridding the tomatoes of excess liquids early on, we actually cut down on the cooking time and increase the nutritional value of the sauce. Pretty smart huh?
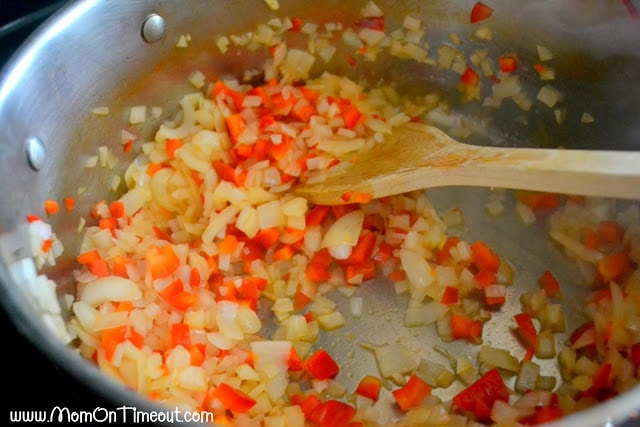
- Saute the onions and peppers in the oil in a large pot for several minutes until they are translucent and soft. Add in the garlic and saute for another few minutes.
- Add the tomatoes and let them cook for 10-15 minutes before adding all the other ingredients. Stir to combine and let simmer until the sauce has cooked down to your desired thickness. If you want to use a masher to speed the break-down of the tomatoes that's totally fine. Mine took a little over an hour to get nice and thick but it will totally depend on the type of tomatoes you are using and the amount of liquid you start with.
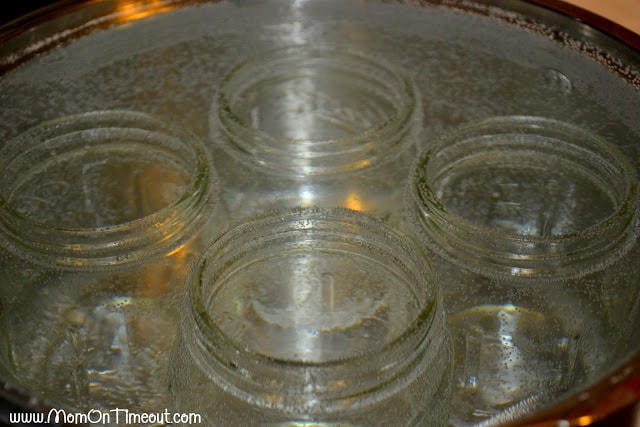
- Before canning it's important to sterilize every utensil, jar, and lid you will be using. I read a lot about people using their dishwasher but I like to see my water boiling so I know it's really doing what it's supposed to. I used my canning bath to sanitize my jars and then it was ready to go for the actual canning process.
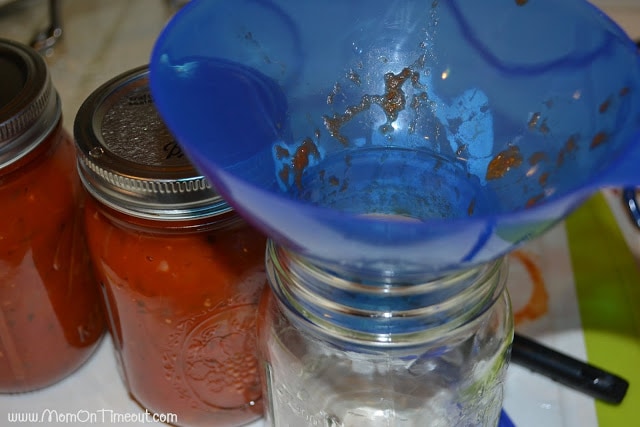
- Once everything has been sterilized you will want to set up your jars and funnel. The jars should still be warm/hot and the sauce going into it should be hot as well. Get the canning bath up to a full boil while you are filling your jars. I found the funnel to be indispensable. It made the process so easy and kept the mess to a minimum. {Trust me, there is enough of a mess with all those tomato skins!} Note: If you are freezing your sauce, just let the sauce cool and ladle into freezer bags, remove all the air, and freeze.
- Once the jars have been filled to within 1/4 inch from the top, wipe the top of the jar with a towel to remove any sauce that may get in the way of a tight seal. Place the lid on and hand-tighten the ring. Now the filled jars go into the canner where they need to be covered with at least 1 inch of water - the more the better! Keep that water boiling for the entire duration of the process. For pints you need to have the jars in a boiling water bath for 35 minutes and 40 minutes for quarts. If at any time the water stops boiling for any reason, start your time over again.
- When the time is up lift the jars out of the water using jar tongs and let them cool. DO NOT touch the jars, bump the jars, move the jars, for 24 HOURS. The rings can then be removed or loosened so they do not rust in place. Once the jars have cooled you can verify that they have sealed properly by checking to see if the lid has been sucked down. Press lightly in the center and if the lid pops up and down - it did not seal. Put the jar immediately into the fridge and you can still use it. All of mine successfully sealed so you shouldn't have a problem.
Nutrition


Ariel says
Instead of freezing the sauce in a bag can u freeze it in the jars as well?
Clarissa says
I am allergic to lemons. Is the lemon juice necessary or can you use something else in its place?
Trish - Mom On Timeout says
Hmm…you really need an acid Clarissa. What about limes?
Carolena Emer says
She can also use Citric Acid.
Tammy says
Hello Trish , A first time canner here and have to say im so glad i picked your recipe.. It looked great and really was so easy.. I blended mine because my family dont like the chunks.. It was so tasty had it for Dinner instead of the roast i prepared..lol Thanks Again from another Mom taking a timeout..
Marilyn Wright says
I am canning your pasta sauce today. I pinned it ages ago (it seems) and am excited to finely be making some. I read your instructions to sterilize equipment prior to use and fully agree. According to Ball’s Blue Book jars may be washed in dishwasher prior to steam pressure canning as temperature reaches 240°F which is high enough to kill bacterial spores,but if you are using water bath method all equipment must be sterilized. Thanks for the recipe, Marilyn
Amanda Villarreal says
Just wondering how many cans you got out of this? We have so many tomatoes. So.Many.
Steve says
Do you notice the flavor of the lemon juice in your sauce? I normally pressure can my sauce because I do not add acid, plus I use a ton of fresh herbs and Merlot! I would like to try adding the acid if it does not alter the flavor too much, so that I can boil water preserve, the pressure canning is very time consuming
Shannon Etheridge says
Ahhhh! I forgot to add the lemon juice!!!!! Is my sauce going to be ok? I canned it and seals are good. Will my sauce spoil?
Trish - Mom On Timeout says
Oh Shannon! I would just freeze it in bags because the acid is important in preserving.
Erica says
Looks yummy! What altitude are you at? Was wondering about the different processing times for different alitiudes.
Thanks!
Trish - Mom On Timeout says
I think we’re at 500 or so Erica. I’m not sure if the processing times are that different but you can always err on the side of caution and let it go a bit longer. Good luck!
Dianna Lindberg says
To clarfy, I’m looking for the SAVE IT button.
Trish - Mom On Timeout says
Hi Diana! I just added the printable recipe to this page. It was one of my older recipes and hadn’t been updated. Thank you for your patience!
Dianna Lindberg says
Where’s the recipe? Am I blind, or what? This looks great and just what I was looking for last year. Easy, simple to follow, great graphics!
Kristie K. says
Looks yummy! Thanks for sharing!
Dawn says
Thank you – I’ve been looking all over for a homemade recipe. One hint on breaking down your tomatoes so you don’t have to cook them so long: use an immersion blender. After my salsa has simmered for a little while to get the flavors to come out, I use an immersion blender to puree my salsa since I have a couple boys who don’t like it all “chunky”. Works great!
Anonymous says
Thanx for the homemade recipe–I’ve always used Mrs. Wages and seems like cheating. Am going home right now to make a batch since the tomatoes are just sitting on the counter.
Laura says
I’ve been wanting to do this!! thanks for the recipe!
Laura from LifeWeLive4
Sue Boyer says
This looks like a good sauce recipe. I need to try this one next year when the bumper crop of tomatoes come in. Thank you for the tutorial.