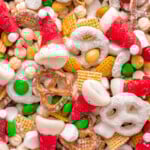
Santa's Christmas Snack Mix
This colorful Santa’s Christmas Snack Mix comes together quickly and adds instant holiday magic to any celebration. Each festive handful is packed with “snowball” cereal, crunchy, sweet, and festive flavors and the cutest homemade Santa Hats tucked in for a whimsical surprise. It’s perfect for gifting, holiday parties, or leaving out for Santa on Christmas Eve!
Servings 16
Calories 589kcal
Ingredients
- 5 cups Kix cereal
- 1 cup powdered sugar
- 3 cups Chex cereal
- 3 cups mini pretzels twists or sticks
- 2 cups roasted peanuts lightly salted
- 2 cups white pretzels
- 2 cups mini marshmallows
- 2 cups M&M’s red and green
- 2 cups Santa hats see below
Santa Hats
- 1 cup bugle corn snacks
- 1 cup red candy melts
- 1 cup white candy melts or white chocolate
- 2 tablespoons red sanding sugar
- tiny marshmallows optional
Instructions
- In a large mixing bowl, combine Kix cereal and powdered sugar. Toss gently, coating the cereal with the powdered sugar, creating “snowballs”.5 cups Kix cereal, 1 cup powdered sugar
- Add in Chex cereal, mini pretzels, peanuts, white pretzels and marshmallows.3 cups Chex cereal, 3 cups mini pretzels, 2 cups roasted peanuts, 2 cups white pretzels, 2 cups mini marshmallows
- Stir in the Christmas M&M’s and Santa Hats.2 cups M&M’s, 2 cups Santa hats
- Transfer to an airtight container or portion into holiday bags/containers for gifting.
To Make Santa Hats:
- Use Bugles corn snacks as the hat base.1 cup bugle corn snacks
- Dip the pointed end into melted red candy melts (or white chocolate dyed red with gel food coloring). Dip the hollow end into melted white candy melts or white chocolate.1 cup red candy melts, 1 cup white candy melts
- Sprinkle top with red sanding sugar.2 tablespoons red sanding sugar
- Place on parchment paper until set.
- Add a dab of white candy melt on the tip for the “pom-pom” or use tiny marshmallows.tiny marshmallows
- Let dry completely before mixing into the snack mix.
Notes
Storage Information
Tools and Equipment (affiliate links): Glass Mixing Bowls | Bugles | Cellophane Bags
Please see post above for more information, step-by-step process photos, recipe tips and frequently asked questions.
- Room Temperature: Keep the mix in an airtight container at room temperature for up to 1 week. For longer storage, skip the marshmallows and add them just before serving so they stay soft.
- Make Ahead: This mix is great to make ahead and is good for up to 1 week. I recommend adding the marshmallows just before serving for maximum freshness. The Santa hats can be made a day or two in advance and stored in an airtight container until you’re ready to mix everything together.
Tools and Equipment (affiliate links): Glass Mixing Bowls | Bugles | Cellophane Bags
Please see post above for more information, step-by-step process photos, recipe tips and frequently asked questions.
Nutrition
Calories: 589kcal | Carbohydrates: 86g | Protein: 11g | Fat: 24g | Saturated Fat: 11g | Polyunsaturated Fat: 5g | Monounsaturated Fat: 5g | Trans Fat: 0.1g | Cholesterol: 4mg | Sodium: 446mg | Potassium: 311mg | Fiber: 6g | Sugar: 43g | Vitamin A: 398IU | Vitamin C: 3mg | Calcium: 111mg | Iron: 7mg
